This article was co-authored by Christine George. Christine George is a Master Hairstylist, Colorist, and Owner of Luxe Parlour, a premier boutique salon based in the Los Angeles, California area. Christine has over 23 years of hair styling and coloring experience. She specializes in customized haircuts, premium color services, balayage expertise, classic highlights, and color correction. She received her cosmetology degree from the Newberry School of Beauty.
This article has been viewed 20,098 times.
Coloring your hair is an easy and exciting way to change up your style. But if you're not sure you want to commit to a new color, there are tons of temporary dyes you can use at home without damaging your hair as much or making drastic, permanent changes. Whether you use a dip-dye, hair chalk, or sprays, pastels and bright hues will add a dose of playfulness to your look.
Steps
Using Temporary Hair Dye
-
1Brush or comb your hair until it's free of tangles. Brushing your hair will ensure even coverage and make it easier to color only certain sections of your hair. If brushing or combing means your bouncy curls turn into waves, then you can just run your fingers through it so you can easily separate certain sections.
- If you want to make washing it out easier, spray your hair with regular hairspray first—the color will stick to the hairspray instead of your actual hair.
-
2Separate the sections you want to color and protect the parts you don't. Use clips, bands, and pins to pull back the strands you don't want colored. For extra protection, wrap those parts in tin foil or plastic wrap to make sure none of the spray hits those strands.
- Choose strands from underneath your hair for subtle pops of color.
Advertisement -
3Wear an old shirt or drape a towel over your shoulders. Most sprays will wash out of your clothes, but not all of them (especially depending on the chemicals and fabrics that come in contact with them). So protect your clothes and line any carpets or rugs with old towels just in case.
- If you're coloring all of your hair, it may be easier to go outside to avoid spraying any walls, rugs, or furniture.
- Make sure to use the spray in a well-ventilated room.
-
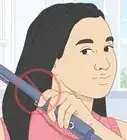
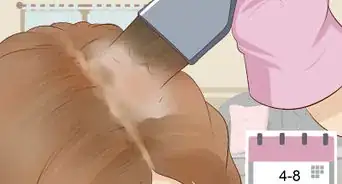
4Hold the canister about 10 inches (25 cm) away from your hair. Holding it too far away will cause the spray to go everywhere and holding it too close might create clumps and uneven color. Spray at a downward angle to have better control over the intensity and design.[1]
- Spray nozzles can be different depending on the manufacturer, so be sure to read the instructions on the can!
-
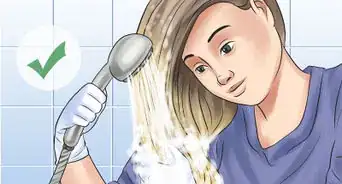
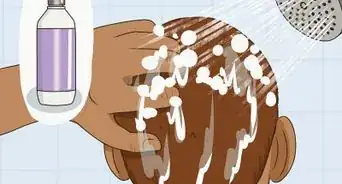
5Wash your hair later that same day with shampoo and conditioner. Avoiding sleeping with the spray in your hair because it will rub off on your bedding and make your hair dry and brittle overnight. You may need to do 2 or 3 rounds of shampooing to remove all the color (and more if you have light or blonde hair).[2]
- Coloring sprays dehydrate your hair, so leave the conditioner on for 3 to 5 minutes in the shower and use a leave-in conditioner for extra moisture.


Streaking with Hair Chalk
-
1Wear an old t-shirt and protect the floor area with a towel. Hair chalks won't stain anything, but the dust that comes off can make a mess. Putting towels down will save you the hassle of mopping or vacuuming afterward.
- No gloves needed, as the chalk will easily wash off your hands.
-
2Brush away any tangles and pull back the sections you're not coloring. If you would like strands of highlights for a streaking effect, use small hair rubber bands or clips to separate those strands from other parts. Choose strands from underneath for a playful, elegant look.
-
3Wet the sections of hair that are going to be colored. Water will make the color much more vibrant. You can skip this step if you're blonde. Twist the strands after wetting so you don't end up with stark blocks of color.[3]
- You can even try braiding your hair before applying the chalk for an interesting geometric pattern.
-
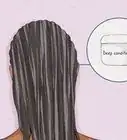
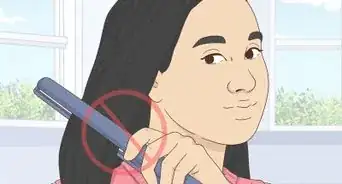
4Rub the chalk down the strands of hair you want to color. Rub the chalk onto the hair and massage it into each strand in a downward motion to ensure you're getting good coverage. Avoid massaging upwards as it may cause frizz and split ends.[4]
- The chalk will flake off into dust as you're rubbing it in, so be prepared for a mess!
-
5Air-dry your hair before applying heat from a straightener or curler. Let the wet (and now chalked) strands dry on their own before using a straightener or curler. Heat will help the chalk settle into each strand and bring out the bold, vibrant hue. Note that the chalk will rub off onto the straightener or curler, but you can wash it off after the heat plates have cooled completely.[5]
- Make sure the chalked strands are completely dry—using heat tools on wet hair can instantly fry it!
- If you don't have a straightener or curler, you can also use a hair dryer on the lowest power and highest heat setting.
-
6Spray the colored sections with hair spray to lock in the chalk. Give the chalked sections a good spritz—the hairspray will act like a layer of glue to keep the chalk on each hair. You may need to shake out excess chalk beforehand to keep it from dusting off throughout the day.[6]
- Put a towel down onto your pillow to keep the dye from rubbing off onto your bedding.
-
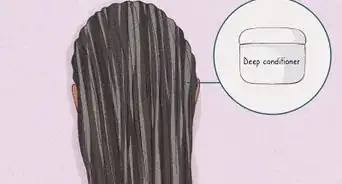
7Wash your hair with shampoo and conditioner to remove it. Hair chalk typically lasts for about 1 or 2 shampoos (and more if your hair is light or blonde). So if you're ready to wash it out, do 2 to 3 rounds of shampooing in the shower. The chalk will dry your hair out a little, so be sure to use a deep conditioner to rehydrate your hair.


Dip Dyeing the Ends with Food Coloring
-
1Wear a black or old shirt and apply oil to protect your skin from staining. A dark colored shirt won't be stained by the dye and the oil will keep the dye from soaking into your skin. Rub the oil onto your hairline, neck, ears, and anywhere else your hair might touch. You can also use petroleum jelly instead of baby of olive oil.[7]
- Keep in mind that whatever you wear will be stained by the dye upon contact.
-
2Put on gloves and pour the full bottle of dye into a shallow mixing bowl. If your hair is thin and or if you're only dyeing a few small strands, you might not need to use the full bottle. If your hair is thick or if you're coloring all of the ends or longer sections, use the full bottle. Wear gloves to protect your hands from the coloring.[8]
- Note that food coloring works best on light or blonde hair. If you have dark hair, you may need to bleach the tips before applying the food coloring.
-
3Separate your hair into sections depending on your goal. To dye all of your ends, separate each side of your head into 2 smaller parts (i.e., create 2 small ponytails on the right side, the left side, and the back for a total of 6 medium-sized chunks). Pull back and secure any parts that will not be dyed using hair bands or clips.
-
4Dip the ends of your hair into the dye for 3 to 5 seconds. Keep your hair in the dye for about 3-5 seconds to ensure each strand is coated. If you want solid color at your ends (for a bold ombre look), dip each section of your hair into the dye up to the same line. If you only want to dip sections, separate them beforehand into thin chunks about the diameter of a dime.
- After dipping your hair, run through the dyed portions with your gloved fingers at the top of the dye so you won't have a stark line. You can even dip your fingers into the dye to add some variation above the dip-dyed line.
-
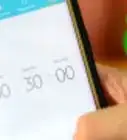
5Wait 5 to 10 minutes for the dye to soak in. While you're waiting, apply medium to high heat using a hair dryer to make sure the dye soaks into each strand. You don't have to constantly blow dry it for the whole 5 to 10 minutes, just make sure you apply heat to each portion for about the same amount of time.[9]
- If you've divided hair into 6 chunks, blow dry each part for 30 seconds at a time.
-
6Rinse the dyed sections under cold water and apply conditioner. Rinse your hair until the color of the water coming out is less intense. For instance, if you've used pink dye, rinse until the water you squeeze from your hair is extremely light and almost peachy-colored. Apply conditioner to the dyed sections keep your hair moisturized and shiny once it's dry.[10]
- Keep in mind that the more you rinse, the less intense the color will be.
- It may be easier to rinse your hair in a large sink (particularly a kitchen sink with a detachable hose fixture).
-
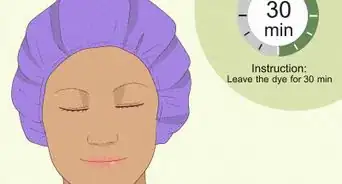
7Wrap your hair into a turban with a dark-colored towel before drying it. Use a dark-colored towel or one that is darker than the color of the dye (e.g., if the dye is light blue, use a navy towel). Keep the towel on for about 5 minutes before drying your hair either with a hair dryer or by air.[11]
- It's better to use a hair dryer to help set the color, but either way, it will still show up!
-
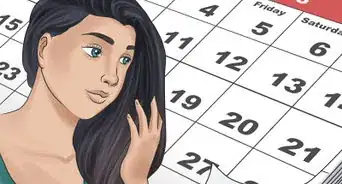
8Avoid washing your hair for at least 24 hours after dip-dyeing. Washing your hair within 24 hours of dyeing will make the color fade faster. The color will last anywhere from 1 week to 2 months depending on how light your hair is and your hair care routine.
- The color will fade with each wash, so shampoo and condition your hair more often to get back to your original color faster.


Expert Q&A
-
QuestionHow can I remove hair dye from my hair at home?
 Christine GeorgeChristine George is a Master Hairstylist, Colorist, and Owner of Luxe Parlour, a premier boutique salon based in the Los Angeles, California area. Christine has over 23 years of hair styling and coloring experience. She specializes in customized haircuts, premium color services, balayage expertise, classic highlights, and color correction. She received her cosmetology degree from the Newberry School of Beauty.
Master Hair Stylist & ColoristIf it's permanent, there's not much you can do to remove it at home. If it's a semi permanent or demi, you can get clarifiers to help loosen up the amount of pigment that was deposited. These can dry out and damage your hair, so they should not be used every day.
Warnings
- Blonde hair is highly porous and will take up coloring products like a sponge. So be mindful about the amount you apply and how intensely you “set” the color (particularly if you want to wash it out the next time you shower).⧼thumbs_response⧽
Things You'll Need
Dip Dyeing the Ends with Food Coloring
- Disposable gloves
- Dark colored (or old) shirt
- Baby (or olive) oil
- Food coloring (any color of your choice)
- Shallow mixing bowl
- Comb
- Old (or dark colored) towel
- Conditioner
- Hair dryer
- Hair bands and/or clips (optional)
Streaking with Hair Chalk
- Hair chalk
- Dark colored (or old) shirt
- Brush or comb
- Hair bands and/or clips
- Water
- Hair straightener, curler, or blow dryer
- Hairspray
Spraying on Temporary Color
- Coloring spray
- Brush or comb
- Hairspray (optional)
- Clips, bands, and/or bobby pins
- Tin foil and/or plastic wrap (optional)
- Dark colored (or old) shirt

References
- ↑ https://www.seventeen.com/beauty/hair/advice/a20617/creative-streak-color-spray/
- ↑ https://www.seventeen.com/beauty/hair/advice/a20617/creative-streak-color-spray/
- ↑ https://www.thefashionspot.com/beauty/300719-diy-how-to-hair-chalk/
- ↑ https://www.hairromance.com/2013/08/how-to-use-hair-chalk.html
- ↑ https://www.thefashionspot.com/beauty/300719-diy-how-to-hair-chalk/
- ↑ https://www.thefashionspot.com/beauty/300719-diy-how-to-hair-chalk/
- ↑ https://www.lipstiq.com/2013/43932/how-i-dyed-my-hair-with-food-coloring/
- ↑ https://www.lipstiq.com/2013/43932/how-i-dyed-my-hair-with-food-coloring/
- ↑ https://www.lipstiq.com/2013/43932/how-i-dyed-my-hair-with-food-coloring/
About This Article