This article was co-authored by Aaron Beth and by wikiHow staff writer, Hunter Rising. Aaron Beth is the founder of Aaron’s Refrigeration Company in New York City and a factory certified installer (FCI) for Sub-Zero products. He specializes in the service and maintenance of built-in refrigerators, wine coolers and ice machines. With over 54 years of experience, Aaron is the recipient of numerous Super-Service awards from Angie’s Lists and 2019 Best-of-the City.
There are 15 references cited in this article, which can be found at the bottom of the page.
wikiHow marks an article as reader-approved once it receives enough positive feedback. In this case, several readers have written to tell us that this article was helpful to them, earning it our reader-approved status.
This article has been viewed 270,976 times.
If your refrigerator stops producing cold air, there may be something wrong with the PTC (positive temperature coefficient) relay, also known as the start relay. The PTC relay starts the compressor inside the fridge to make cold air so your food stays cool. Luckily, the PTC relay is something you can easily check and replace yourself if you need to. After you access the relay and compressor on your fridge, use a multimeter to test the ports to make sure it has a low resistance. If the relay still works, you may also need to check the compressor to make sure it’s still functioning.
Steps
Accessing the Relay
-
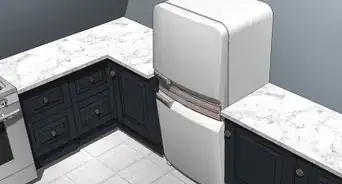
1Unplug your fridge. Pull your refrigerator away from the wall carefully so you can access the power cable. If you can’t move the fridge on your own, ask someone to help you pull it out. Once you can get behind your fridge, unplug it from the outlet so it doesn’t have any power running through it.[1]
- Your food will stay safe in your fridge for up to 4 hours and in your freezer for 24-48 hours while it’s disconnected from power. Avoid opening the doors to prevent it from heating up faster.[2]
- If you expect your repairs to take longer than 4 hours, move your food to a different fridge or into an insulated cooler.
- If your fridge hasn’t been working and you don’t know how long it’s been, throw away perishable foods since they may be at an unsafe temperature.
-
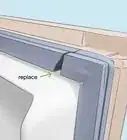
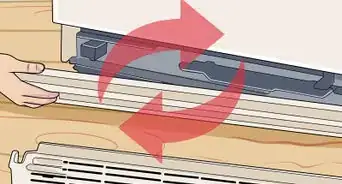
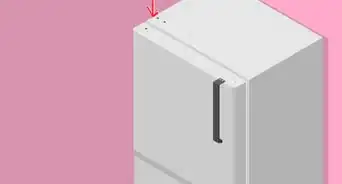
2Remove the lower back panel from your fridge to access the relay. Look for the small access panel on the back of your fridge near the bottom. Use a screwdriver to take off the screws holding the panel in place and set them in a bowl so you don’t lose them. Set the back panel aside while you’re working so it’s out of the way.[3]
- You do not have to remove the entire back of your fridge.
Advertisement -
3Take the plastic cover off of the relay if it has one. Look for the compressor inside your fridge, which will be a large black cylinder on either side of the machine. Locate the area on the side of the compressor that has a black plastic box on the side with wires coming out from it. Grab the top of the plastic cover and carefully pull it off of the compressor to expose the relay inside.[4]
- Sometimes, you may need to use a screwdriver to pry tabs open on the plastic cover to remove it from place.
- Your fridge may not have a plastic cover over the relay.
-
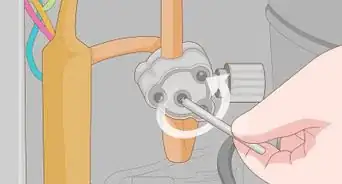
4Disconnect the wires from the relay. The PTC relay will look like a small black box attached to the side of your compressor with 2-3 wires running to it. Grip the ends of the wires with a pair of needle-nose pliers and carefully pull them off the prongs of the relay. Disconnect each wire from place so you’re able to remove the relay.[5]
- There may be a wire that’s attached to a screw on the relay. If so, loosen the screw with a screwdriver before pulling the wire out of place.
Tip: Take a picture of the relay before you detach the wires so you remember how to put them back on later.
-
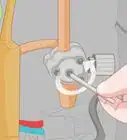
5Remove the relay by pulling it off of the prongs. Grab the relay on the side you just took the wires off of and carefully pull it out from the prongs on the compressor. The relay should easily slide off of the prongs and disconnect from the compressor so you can test it. If you aren’t able to pull the relay easily, place a screwdriver between it and the compressor and push it off of the prongs.[6]
- Be careful not to pull the relay so it bends or breaks the prongs on the compressor.


Checking the Relay with a Multimeter
-
1Look for burnt marks around the ports on the relay to see if it’s shorted. Inspect the relay to see if it has any charred markings around the ports where it plugged into the compressor. If you see any burnt parts on the relay, then it most likely shorted and needs to be replaced. If the relay is still intact, then continue testing it as normal.[7]
- You may also be able to smell char on the relay if it’s burnt or shorted.
-
2Set up your multimeter to read resistance. Set your multimeter to read resistance in ohms (Ω) so you can easily test the PTC relay. Plug the end of the red probe into the positive (+) terminal and the black probe into the negative (-) terminal on the bottom of the multimeter so you can use them.[8]
- You can buy a multimeter from a hardware store or online.
-
3Put the probes in the M and S slots on the relay to check for open resistance. Locate the ports on the side of your PTC relay that have the letters M and S above them, which are usually the ports that connect to the compressor. Put one of the probes into each slot on the relay at the same time and check the reading on your multimeter. It does not matter which probe you put into which port. The reading should read “OL,” which stands for “open line,” meaning there is an infinite level of resistance between the 2 ports.[9]
- If the reading doesn’t say “OL”, it will most read 0-1 ohms, which just means the relay is upside-down.
-
4Flip the relay upside-down to see if the resistance changes to 0-1 ohms. Keep the probes inside of the same ports while you turn the relay over to the opposite side. Check the multimeter to see if the reading changes from “OL.” If the meter has a reading between 0-1 Ω, then the relay is still working. If the reading doesn’t change or it’s above 1 Ω, then it may be time to get a replacement.[10]
- The PTC relay has a small metal piece inside that moves when there’s an electrical current running through it. When the metal piece comes into contact with the ports, it closes the line and creates 0 Ω of resistance.
- If the relay has correct readings, then you should check the compressor next to see if it’s causing the problem.
Tip: Use a toothbrush to clean any dust from around the ports if the reading didn’t change, and then take another reading. It’s possible that the PTC relay got dirty and it’s affecting the resistance measurement.
-
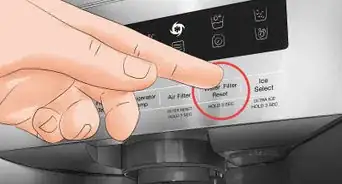
5Order a replacement relay if the resistance doesn't read OL or 0-1 ohms. If your reading was over 1 Ω, then the relay may not be working properly and you’ll have to replace it. Look for the model number listed on the side of the relay and buy an exact match for your refrigerator. Once you get the new relay, plug it into the prongs on the compressor. Reattach the wires onto the matching ports of the relay so it can turn on your compressor again. Plug the refrigerator back in to make sure the new relay works before screwing on the back panel.[11]
- You can buy replacement PTC relays from appliance specialty stores or online. They usually cost anywhere between $20-80 USD.
- If you can’t find the model number on the PTC relay, then search for the refrigerator model you have so you can buy a piece that fits inside.
- Try testing the compressor before getting a new PTC relay to make sure it’s not the cause of the problem.


Testing the Compressor
-
1Put the probes of a multimeter on the left and right prongs of the compressor. Locate the 3 prongs that the PTC relay plugs into on the side of your compressor. Put one probe on the prong that’s furthest to the left and the other probe on the prong on the right to take a resistance reading. Write down the measurement so you don’t forget it.[12]
- The prongs will be shaped like a triangle that’s right-side up or upside-down. Use the prongs that are horizontally across from one another for the first measurement.
- The resistance between the 2 prongs will vary depending on the fridge model and compressor.
-
2Measure the resistance between the leftmost and the third prong. Continue holding one of the probes against the leftmost prong on the compressor. Move the other probe to the third pin, which will either be on the top or bottom depending on how the prongs are laid out. Write down the resistance measurement you take between the 2 prongs.[13]
- If the prongs are configured in an upside-down triangle, then the third prong will be on the bottom. If they form a right-side up triangle, then the third prong will be on the top.
- Hold the probes on the prongs for at least 5-10 seconds or until the resistance settles on a single reading.
-
3Find the measurement from the rightmost and third prongs. Keep the probe on the third prong and move the other probe so it’s on the rightmost one. Keep the probes on the multimeter for at least 5 seconds so you can get an accurate reading. Check the multimeter to find the resistance measurement and write it down so you don’t forget it.[14]
-
4Add the lowest 2 readings to see if they’re within 0.5 Ω of the largest reading. Take the smallest 2 resistance readings from the compressor and add them together to find the total. Compare the sum of the 2 readings to the highest resistance measurement you took to see how close they are. If the sum of the 2 readings is within 0.5 Ω of the highest reading you took, then the compressor is okay. If the readings are higher or lower than the threshold, then you need to call someone to repair or replace the compressor for you.[15]
- Compressors can be expensive to fix, so you may want to buy a new refrigerator instead.
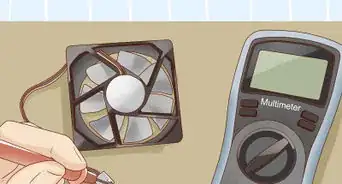
- If the compressor still works, then there may be a problem with the internal fan. Contact a repair person to take a look at your fridge to further diagnose the problem.
- You may like to find out if it is worth fixing a refrigerator. It depends on the make and model and how much it costs to replace it.
- Newer refrigerators have computer controls and sensors. So they tend to break down more and are costly to repair. The old machines are better because they break down less and are easier to fix.
- When you buy a new refrigerator, be weary about listening to the salesperson. Call the technician or mechanic and ask them whether they can fix it or if you should buy a new one. Mechanics know more than the salespeople.


Community Q&A
-
QuestionMy new PTC relay is not not running the compressor. What could be wrong?
 Community AnswerCheck supply voltage. If supply voltage is in between 160- 170 Volts, then there should be the problem of low voltage. Please connect starting capacitor of 5mfd, 400volt parallel to ptc relay.
 -
QuestionHow do I start a refrigerator without a relay?Community AnswerYou cannot. The relay is there to let the compressor windings start on one winding and then almost immediately switch to the second winding. Most high load or heavy load applications have this start then run mode.
-
QuestionIf relay goes faulty, will the compressor will be hot or not?Community AnswerIt can be. If the windings don't burn up, there will be current causing heat to be in the wiring. Since there is a lot of wire in windings, the compressor can be extremely hot. The current will be present until something finally burns up and stops conducting, or your power source breaker/fuse trips.
Warnings
- Don’t test your refrigerator while it’s still plugged in since you could shock or electrocute yourself.⧼thumbs_response⧽
Things You’ll Need
- Screwdriver
- Needle-nose pliers
- Multimeter


References
- ↑ https://youtu.be/sWCVeKaNPKY?t=15
- ↑ https://www.foodsafety.gov/food-safety-charts/food-safety-during-power-outage
- ↑ https://youtu.be/LgPXwtxsgyo?t=78
- ↑ https://youtu.be/sWCVeKaNPKY?t=44
- ↑ https://youtu.be/LgPXwtxsgyo?t=151
- ↑ https://youtu.be/LgPXwtxsgyo?t=170
- ↑ https://youtu.be/PRq1WPH1sRg?t=390
- ↑ https://www.sciencebuddies.org/science-fair-projects/references/how-to-use-a-multimeter
- ↑ https://youtu.be/PRq1WPH1sRg?t=265
About This Article

To test the PTC relay in your refrigerator, unplug the fridge and remove the lower back panel so you can access the relay, which will look like a small black box with 2 or 3 wires running into it. Carefully disconnect the wires with a pair of pliers, and then remove the relay by pulling it off of the prongs on the compressor. Then, use a multimeter to check the relay for open resistance. If the reading on the meter is above 1 ohm or remains unchanged, it may be time for a replacement. To find out how to replace your PTC relay, keep reading!