This article was co-authored by Chiara Corsaro and by wikiHow staff writer, Jack Lloyd. Chiara Corsaro is the General Manager and Apple Certified Mac & iOS Technician for macVolks, Inc., an Apple Authorized Service Provider located in the San Francisco Bay Area. macVolks, Inc. was founded in 1990, is accredited by the Better Business Bureau (BBB) with an A+ rating, and is part of the Apple Consultants Network (ACN).
This article has been viewed 289,690 times.
This wikiHow teaches you how to move files from one Mac computer onto another Mac computer.
Steps
Using AirDrop
-
1Turn on Wi-Fi and Bluetooth for both Macs. In order to use AirDrop, both Wi-Fi and Bluetooth must be enabled on both of your Macs:
- Wi-Fi — Click the "Wi-Fi" icon in your Mac's menu bar, then click Turn Wi-Fi On in the drop-down menu. You'll also need to select and sign into a Wi-Fi network if your Mac doesn't automatically connect to one.
- Bluetooth — Open the Apple menu , click System Preferences..., click Bluetooth, and click Turn Bluetooth On on the left side of the window.
-
2Make sure your Macs are on and within 30 feet (9 meters) of each other. Since AirDrop won't work reliably past around 30 feet, you'll need to make sure that your Macs are near each other (preferably in the same room).[1]
- Appliances, walls, and floors can all prevent AirDrop from working within the 30-foot range.
- Both Macs need to be turned on in order to complete the file transfer.
Advertisement -
3
-
4Turn on AirDrop if necessary. If AirDrop is disabled on either of your Macs, you can enable it by clicking Go at the top of the screen, clicking AirDrop in the resulting drop-down menu, clicking the AirDrop: Off link at the bottom of the window that appears, and clicking Everyone in the drop-down menu. You can then close the AirDrop window.
-
5Select files to send. Go to the location of the files you want to transfer, then hold down ⌘ Command while clicking each file you want to transfer.
-
6Hold down Control while clicking a selected file. Doing so will prompt a drop-down menu.
-
7Select Share. It's in the drop-down menu. Selecting it prompts a pop-out menu to appear.
-
8Click AirDrop. This option is in the pop-out menu. Doing so opens the AirDrop window.
-
9Select your other Mac's username. Click the name of the account you use for your other Mac. This will send a file transfer request to the other Mac.
-
10Accept the transfer on your other Mac. When prompted, click Accept in the AirDrop notification on the other Mac. The AirDrop files should begin downloading into your Mac's Downloads folder.
-
11Click Done on the first Mac. Doing this will close the AirDrop menu.


Using an External Hard Drive
-
1Plug a flash drive or external hard drive into a Mac. Using the drive's USB cable or connector, attach the drive to one of your Mac's USB ports.
- If you have a newer MacBook, you may not have a traditional rectangular USB port. If so, you'll need a USB to Thunderbolt 3 adapter.
- If this is your first time plugging in the hard drive, you may need to format it. If so, make sure you choose Mac OS Extended (Journaled) as the format.
EXPERT TIPChiara Corsaro is the General Manager and Apple Certified Mac & iOS Technician for macVolks, Inc., an Apple Authorized Service Provider located in the San Francisco Bay Area. macVolks, Inc. was founded in 1990, is accredited by the Better Business Bureau (BBB) with an A+ rating, and is part of the Apple Consultants Network (ACN).Computer Specialist Chiara Corsaro
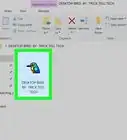
Computer SpecialistUsing a USB device is one of the easiest ways to backup and/or transfer files. To copy files to a USB device, connect your USB flash drive or external hard drive to your computer, locate the file you want to copy, then drag the file to the USB device. When you are ready to transfer that file to another system, connect your USB device to the other computer, click on the USB device icon, and drag the file to the other machine's desktop.
-
2
-
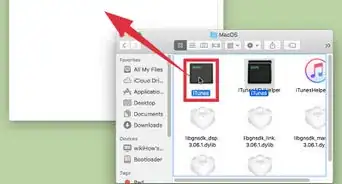
3Go to the files you want to transfer. Open the folder in which the files you want to transfer are located.
-
4Select the files. Hold down ⌘ Command while clicking each file you want to copy.
- If you want to copy the entire folder's contents, click one file, then press ⌘ Command+A.
-
5Copy the files. Press ⌘ Command+C to do so.
-
6Click your external drive's name. It's in the lower-left side of the Finder window. Doing so opens your external drive.
-
7Paste in the copied files. Press ⌘ Command+V to do so. Your files will appear in the external drive's window.
-
8Eject and remove the drive. Click the "Eject" icon to the right of the drive's name, then unplug the drive.
-
9Plug the drive into your other Mac. This should be the Mac onto which you want to transfer your files.
-
10
-
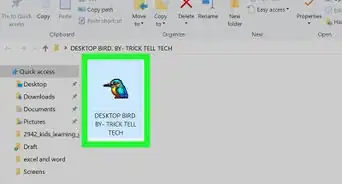
11Move the files onto your Mac. Click and drag the files from the drive onto your desktop (or into your preferred folder). This will place the files on your Mac.EXPERT TIPChiara Corsaro is the General Manager and Apple Certified Mac & iOS Technician for macVolks, Inc., an Apple Authorized Service Provider located in the San Francisco Bay Area. macVolks, Inc. was founded in 1990, is accredited by the Better Business Bureau (BBB) with an A+ rating, and is part of the Apple Consultants Network (ACN).Computer SpecialistChiara Corsaro
Computer SpecialistTry using Time Machine if you want to do a full system backup or restoration. Once configured, Time Machine will backup anything and everything that is on your computer automatically, each time you connect your external hard drive to your computer. If you use Time Machine, please make sure you get an external hard drive that is twice the size of your internal hard drive, as Time Machine backs up not just your data files (eg: photos, documents, desktop items, etc.), but also your programs, operating system, and settings.


Using a Thunderbolt 3 Bridge
-
1Make sure both of your Macs support Thunderbolt 3. Thunderbolt 3 (also known as USB-C) ports resemble oval slots; you'll find them on the sides of your MacBook housing or on the back of your iMac monitor.
- If your Macs don't both use Thunderbolt 3, you can't use this method.
-
2Buy a Thunderbolt 3 cable. Thunderbolt 3 cables have a USB-C connector at each end of the cable. You can find these cables online or in tech department stores.
-
3Connect the two Macs with the cable. Plug one end of the cable into one Mac's Thunderbolt 3 port, then plug the other end into your other Mac's Thunderbolt 3 port.
-
4
-
5Click System Preferences…. It's in the drop-down menu.
-
6Click Network. This option is a globe-shaped icon in the System Preferences window.
-
7Click +. It's at the bottom of the left-hand column of connections. A pop-up window will appear.
-
8Click the "Interface" drop-down box. You'll find this near the top of the pop-up window. Clicking it prompts a drop-down menu.
-
9Click Thunderbolt Bridge. It's in the drop-down menu.
-
10Click Create. This is at the bottom of the pop-up window.
-
11Click Apply. It's in the bottom-right corner of the screen.
-
12Add the Thunderbolt Bridge on the other Mac. You'll do this using the same process as above:
- Open System Preferences, then click Network.
- Click +, then select Thunderbolt Bridge in the "Interface" drop-down menu.
- Click Create, then click Apply.
-
13Wait for both Macs to recognize the Thunderbolt Bridge connection. Once the colored dot to the left of the "Thunderbolt Bridge" heading turns from red to yellow, you can proceed.
- If it takes more than a couple of minutes for your Mac's Thunderbolt Bridge connection to switch, close and re-open the Network window.
-
14Note the IP address on the target computer. The address to the right of the "IP Address" heading is the address you'll use to connect to the current computer.
-
15Enable file sharing for the first Mac. Make sure you're doing this on the Mac to which you want to transfer files:
- Click the ⋮⋮⋮⋮ icon in the top-left corner of System Preferences.
- Click Sharing.
- Check the "File Sharing" box on the left side of the window.
-
16
-
17Sign in. Enter the username and password you use to log into the Mac to which you're connecting, then click Connect.
-
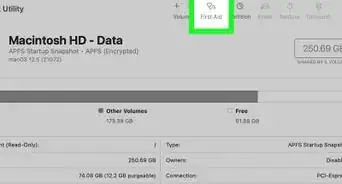
18Click Macintosh HD. You'll see this option in the pop-up window that appears. Doing so selects your other Mac's hard drive as the target location.
- If you have a solid state drive (SSD), you'll click the SSD option here instead.
-
19Click OK. It's at the bottom of the pop-up window.
-
20Transfer files to the other Mac. You can copy files from anywhere on your computer and then add them to your other Mac by doing the following:
- Click the IP address (or Mac name) in the left-hand column of Finder.
- Go to the folder in which you want to paste the files (e.g., Desktop) in the Finder window.
- Press ⌘ Command+V.
- Wait for the files to appear on the other Mac.


Using a Time Machine Backup
-
1Understand when to use this method. If you want to migrate your Mac's preferences, files, and other information onto a new Mac, you can use a Time Machine backup from your old Mac to do so.
- This method shouldn't be used for regular file transfers.
-
2Create a Time Machine backup. If you don't already have a Time Machine backup, create one using a blank hard drive before proceeding.
-
3Attach your Time Machine hard drive to a Mac. Plug your Time Machine drive into the Mac that you want to set up using the Time Machine backup.
- If you have a newer MacBook, you may not have a traditional rectangular USB port. If so, you'll need a USB to Thunderbolt 3 adapter.
-
4
-
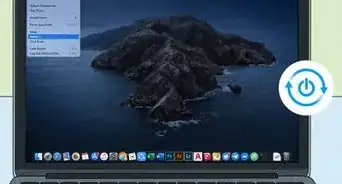
5Press and hold ⌘ Command and R. You'll need to do this as your Mac is restarting.
-
6Release the keys when you see the Utilities window appear. This window will have a few options (e.g., Restore from Time Machine Backup) in it.
-
7Click Restore from Time Machine Backup. It's in the middle of the window.
-
8Click Continue twice. It's in the bottom-right corner of the window.
-
9Click Time Machine Backup. This option is in the middle of the window.
-
10Click Continue. It's in the bottom-right corner.
-
11Select the backup you want to use. Click the name and date of the backup from which you want to restore this Mac.
-
12Click Continue. It's at the bottom of the window. Your Mac will begin restoring your Time Machine backup; once the restore finishes, you should be able to access your old Mac's files and settings on your new Mac.


Community Q&A
-
QuestionWhat if the USB is not appearing on my other Mac?
 Community AnswerYou can use Airdrop by turning on Bluetooth and WiFi, control-clicking on the file, going under Share, and clicking AirDrop. A pop-up will appear with names of some devices that have Airdrop on. This may take a minute, but wait until the name of the Mac you're sharing to pops up. Click on the name of the other Mac and wait for it to share! This is a workaround to the USB issue.
 -
QuestionWill this "restore from backup" option be safe if my Macs are on 2 different versions of MacOS?
 FancyghostCommunity AnswerThis will work. It may change the version of MacOS, depending on which backup you choose.
 -
QuestionWill an external hard drive power on a non-responding iMac?FancyghostCommunity AnswerNo. This is a separate issue. You should look up other troubleshooting steps to fix this.
Warnings
- Consider disabling AirDrop when you aren't using it, and only accept files from people or computers you trust.⧼thumbs_response⧽


References
About This Article