This article was co-authored by wikiHow staff writer, Jack Lloyd. Jack Lloyd is a Technology Writer and Editor for wikiHow. He has over two years of experience writing and editing technology-related articles. He is technology enthusiast and an English teacher.
The wikiHow Tech Team also followed the article's instructions and verified that they work.
This article has been viewed 371,662 times.
Learn more...
This wikiHow teaches you how to send emails, manage your inbox, and perform other basic tasks in Gmail. Keep in mind that, before you can use Gmail, you'll need to create a Gmail account if you don't already have one.
Steps
Sending an Email
-
1Open Gmail. Go to https://www.gmail.com/ in your computer's web browser. This will open your Gmail inbox if you're logged in.
- If you aren't logged in, you'll need to enter your email address and password when prompted.
-
2Make sure you're using the most current Gmail inbox. Do the following:
- Click the "Settings" gear .
- Click Try the new Gmail at the top of the drop-down menu.
- If you see Go back to classic Gmail in the drop-down menu, you're already using the new version of Gmail.
Advertisement -
3Click + Compose. It's in the top-left corner of the page. Doing so prompts a "New Message" window in the lower-right side of the page.
-
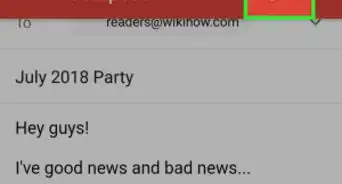
4Enter your recipient's email address. In the "To" text box, type in the email address of the person whom you want to contact.
- To add another person to the "To" text box, press the Tab ↹ key after you finish typing the first person's email address.
- If you want to CC (or BCC) someone, click the Cc (or Bcc link) on the right side of the "To" text box and then enter the person's email address in the "Cc" (or "Bcc") text field that appears.
-
5Add a subject. Click the "Subject" text box, then type in whatever you want to use for the email's subject.
- In general, it's best to keep your subjects limited to a few words.
-
6Enter your email's body text. In the large text box below the "Subject" field, type in whatever message you want to send to your recipient(s).
-
7Add formatting or attachments to your email. While optional, you can easily change the appearance of your message's text, attach a file, or upload a photo:
- Formatting — Select the text you want to format by clicking and dragging across it, then click one of the formatting options at the bottom of the email.
- Files — Click the paperclip-shaped "Attachments" icon at the bottom of the email, then select files to upload.
- Photos — Click the "Photos" icon at the bottom of the email, then select a location and select photos to upload.
-
8Click Send. It's at the bottom of the "New Message" window. Doing so will send your email to the specified recipient(s).


Managing Your Emails
-
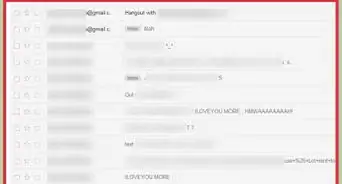
1Open an email. Click an email's subject to open the email in the inbox.
- To exit an open email, click the left-facing arrow above the upper-left corner of the email.
-
2Search through your emails. You can scroll through your inbox to view emails there, or you can click the search bar at the top of the page and then type in whatever you're searching for (e.g., a subject or a sender).
-
3Select emails as needed. If you want to select a group of emails, click the checkbox to the left of each email you want to select.
- This is useful when moving or deleting large groups of emails all at once.
- To select an entire page of emails, click the checkbox above the top-left side of the top email.
-
4Mark emails as read. Select the emails you want to mark as read, then click the open envelope icon at the top of the inbox.
- Opening an email will also mark it as read.
-
5Archive emails. Archiving an email allows you to save the emails without having them in your inbox folder. To archive emails, select the emails in question, then click the downward-facing arrow icon at the top of the page.
- You can find archived emails by clicking the All Mail folder on the left side of the page, though you may have to scroll down (and/or click More) on the left-hand menu to find this option.
-
6Delete emails. To delete emails from your inbox, select the emails you want to delete, then click the "Trash" icon at the top of the window.
- Deleting emails from your inbox doesn't permanently delete them immediately—they'll move to the Trash folder where they'll remain for 30 days before being deleted automatically.
-
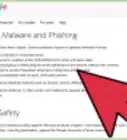
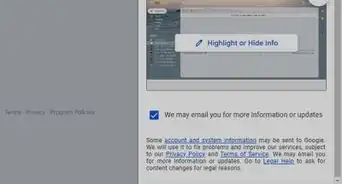
7Mark emails as spam. Sometimes undesirable emails will find their way into your inbox. You can mark these emails as "spam" by selecting them and clicking the ! icon at the top of the inbox; doing so will both add the emails to the Spam folder and tell Gmail to add similar emails to the Spam folder in the future.
- You may have to mark emails from the same sender as "spam" a few times before the emails stop appearing in your inbox.
-
8Add a draft. If you want to start working on an email but don't have time to finish it, you can save it as a draft by waiting for the word "Saved" to appear in the lower-right side of the "New Message" window and then closing the email. You can then open it from the Drafts folder on the left side of the page.
- As with All Mail, you may have to scroll down and/or click More to find the Drafts folder.


Creating and Using Labels
-
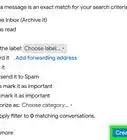
1Know what labels do. "Labels" are Gmail's versions of folders; when you assign a label to an email, the email is added to the label's folder in the left-hand menu.
-
2
-
3Click Labels. It's a tab at the top of the window.
-
4Scroll down to the "Labels" section. This section is toward the bottom of the page. Doing so displays a list of your custom labels.
- If you haven't created any labels yet, this section will be empty.
-
5Click Create new label. It's at the top of the "Labels" section. A pop-up window will appear.
-
6Enter a label name. Type whatever you want to name your label into the text box at the top of the pop-up window.
- If you want to add the label to an existing label (similar to placing a new folder inside of an existing folder), you should also check the "Nest label under" box and then select a label from the drop-down menu.
-
7Click Create. It's at the bottom of the window.
-
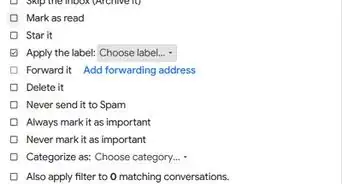
8Remove any existing labels if necessary. If you have existing labels which you want to delete, do the following:
- Scroll down to the label you want to remove in the "Labels" section.
- Click remove to the right of the label.
- Click Delete when prompted.
-
9
-
10View your label's contents. Once you've created the label and added emails to it, you can view the emails by clicking the label's name on the left side of the inbox.
- To view all of your labels, you may have to click More and then scroll down on the left side of the inbox.
- If you want to remove the label's emails from the inbox without deleting them, you can archive the emails.


Managing Contacts
-
1
-
2Click More. This option is at the bottom of the drop-down menu. Doing so opens a second page of icons.
-
3Click Contacts. It's a blue-and-white person-shaped icon. This will open your Gmail Contacts page.
-
4Review your contacts. Depending on whether or not you've used Gmail before, you may see a few contacts here.
- Contacts may range from only names to full profiles including names, addresses, phone numbers, and email addresses.
-
5
-
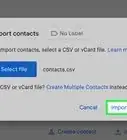
6Enter the contact's first and last name. In the "First name" and "Last name" text boxes at the top of the pop-up window, enter your contact's first and last names, respectively.
-
7Enter the contact's email address. Type the contact's email address into the "Email" text box.
- You can add additional information, such as the contact's phone number or a contact picture, but doing so is optional.
-
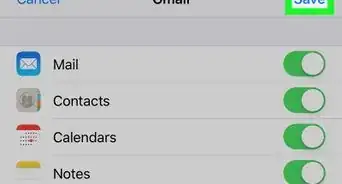
8Click SAVE. It's in the bottom-right corner of the window. Doing so saves your contact and adds them to your account's contact list.
-
9Delete a contact. If you want to remove a contact, do the following:
- Hover over the contact's name, then click the checkbox that appears on the left side of their name.
- Click ⋮ in the upper-right side of the page.
- Click Delete in the drop-down menu.
- Click DELETE when prompted.


Using Gmail on Mobile
-
1Install the Gmail app if necessary. If you don't have the Gmail app installed on your smartphone or tablet, open the App Store (iPhone) or the Google Play Store (Android), search for Gmail, and download it.
- Gmail is always free to download and use, so don't pay for any app claiming to be Gmail.
- Gmail is almost always pre-installed on Android smartphones and tablets.
-
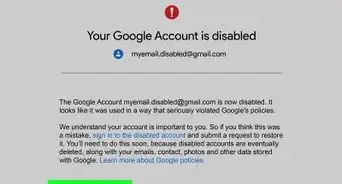
2Open Gmail. Tap the Gmail app icon, which resembles a red "M" on a white background. This will open your Gmail inbox if you're already logged in.
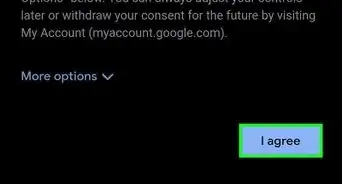
- If you aren't logged in, enter your email address and password when prompted. You may instead just need to select your Gmail account.
-
3Send an email. While some account management options on mobile are limited, you can still use Gmail for its primary purpose: sending emails. To send an email, tap the "Compose" icon, then fill out the resulting form and tap the "Send" icon.
-
4Open an email. Tap an email to do so.
-
5Select multiple emails as necessary. If you want to select multiple emails in order to archive or delete them all at once, tap and hold one email until a checkmark appears on the left side of the email, then tap any other emails you want to select.
- Once the first email is checked, you don't have to tap and hold subsequent emails.
- To cancel your selection, tap the "Back" icon in the upper-left side of the screen.
-
6
-
7Add emails to labels. Just like on desktop, you can add emails to labels on your mobile platform.
- Unlike on desktop, you cannot create labels if you're using an Android phone or tablet.
-
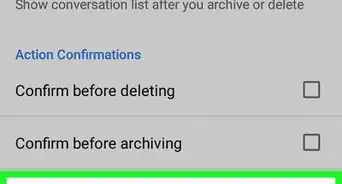
8Manage your emails. There are a few different ways in which you can manage your mobile Gmail inbox:
- Archive — Select emails to archive, then tap the downward-facing arrow at the top of the screen.
- Delete — Select emails to delete, then tap the "Trash" icon at the top of the screen.
- Mark as read — Select unopened emails, then tap the open envelope icon at the top of the screen.
- Mark as spam — Select a spam email, tap ⋯ (iPhone) or ⋮ (Android), tap Report spam in the drop-down menu, and tap Report spam & unsubscribe if available (if not, just tap Report spam when prompted).
-
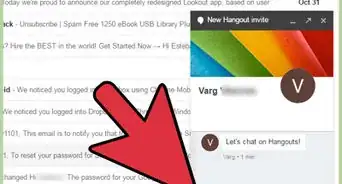
9Enable Gmail notifications for your smartphone. If you want to receive notifications from the Gmail app whenever you receive an email, do the following:
- iPhone — Open your iPhone's Settings, tap Notifications, scroll down and tap Gmail, and tap the white "Allow Notifications" switch (if the switch is green, notifications are enabled).
- Android — Open your Android's Settings, tap Apps, scroll down and tap Gmail, tap the "Notifications" heading, and tap the white "ON" switch (if this switch is blue, notifications are enabled).


Community Q&A
-
QuestionWhat is Gmail used for?
 Community AnswerIt is Google's email service. You have to sign up and create a Google account to use this service.
 -
QuestionWhat is difference between Gmail and regular email?
 Community AnswerGmail is just one of many email account options. It allows you to connect a bit further with options like Google+ where you can share pictures and other media with your contracts.
 -
QuestionCan I lock my Gmail account when I am away from my desk so my coworkers cannot look at my emails?Community AnswerYou can always just sign out of your account and sign back in when you come back. But most people would simply minimize or close the window when they're away from their desk.
Warnings
- You cannot delete the Gmail app from an Android smartphone or tablet if it came pre-installed.⧼thumbs_response⧽
About This Article
1. Go to https://gmail.com.
2. Sign in with your Google account.
3. Click Compose.
4. Enter the email address of the recipient.
5. Enter a subject.
6. Type the message.
7. Add attachments if desired.
8. Click Send.