Explore this Article
IN THIS ARTICLE
Other Sections
X
wikiHow is a “wiki,” similar to Wikipedia, which means that many of our articles are co-written by multiple authors. To create this article, volunteer authors worked to edit and improve it over time.
This article has been viewed 28,492 times.
Learn more...
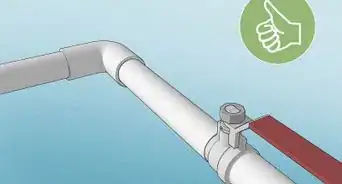
Need to bend some steel pipes? A pipe bender might be able to help. The machine can generally accommodate 3-quarter inch to 2 inches (5.1 cm) round tube steel, with a wall thickness of 8 inches (20.3 cm). Read on for a full tutorial on how to use a manual pipe bender all on your own.
Steps
1
Install the die.

2
Install the follower block.

3
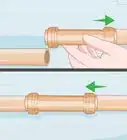
Prepare the pipe.

4
Insert the pipe.
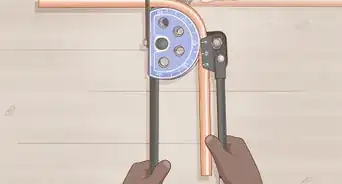
-
The follower block is kept loose so as to adjust the height when inserting the tube. Hold the pipe in between the follower block and the die. Vertically align the block to the pipe, and then insert the pipe into the machine. The die will rotate outwards as you insert the pipe. Once the pipe is in place, rotate the die back into the correct position.

5
Install the U-strap.

6
Fix up the drive pin.

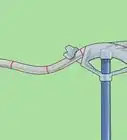
7
Align the pipe.

8
Create tension in the pivot arms.

9
Install the degree pointer.
-
Take the pointer and place it on the end of the lug. The pointer consists of a thumbscrew. Use it to anchor the pointer to the lug. Ensure that the pointer is resting on the degree ring and is aligned to zero degrees. At this point, you need to tighten the tensioner bolt, which is located next to the die.

Advertisement
10
Engage the drive rack.

11
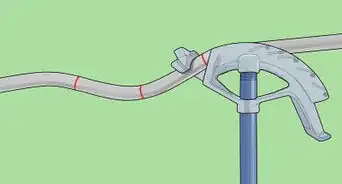
Start the bending process.
-
Pull on the handle and the pivot arms will begin to open. The die will rotate and bend the pipe. At the same time, the pointer will begin to indicate the curvature measurement. As you bend the pipe, engage the subsequent teeth of the drive rack and work your way down to the last notch.

Advertisement
12
Reset the bender.
-
Once you have reached the last notch in the drive rack, you need to reset the bender. Complete the last half-turn of the handle and hold it in the closed position. Keep a little pressure on the handle and detach the release lever of the anti-spring back kit. Then release the drive pin, allowing the pivot arm to become loose. Put a little pressure on the release lever and reset the pivot arms. Place the drive pin in the next drive hole while keeping the arms in their reset position. Then you can continue the bending process.

13
Remove the pipe.
-
Once you have got the bends you need, it is time to remove the pipe. Keep a little tension on the handle and detach the spring back kit. Swing the drive rack and the handle out of your way. Remove the drive pin and close the pivot arms. Loosen the tensioner bolt, remove the U-strap pin, and take out the pipe from the machine.

Advertisement
Warnings
- The die is marked with the size number. Make sure that the number is facing upwards with the lug facing outwards away from the pivot arms.⧼thumbs_response⧽
- Always ensure that the die is kept clean and without grease.⧼thumbs_response⧽
- The follower block has a tiny height positioning pin attached to it. This pin needs to be facing downwards when installing the block⧼thumbs_response⧽
Advertisement
You Might Also Like
How to
Bend a 3‐Point Saddle
How to
Measure Pipe Size

How to
Fix a Leaky Sink Drain Pipe
How to
Fix Leaking Pipes

How to
Thread Pipe
 How to Easily Patch and Repair PVC Pipe
How to
Fix a Broken Pipe
How to
Clear a Clogged Waste Pipe
How to
Hide Pipes
How to
Join PPR Pipe
How to
Clean a P‐Trap or U‐Bend
How to
Bend Copper Tubing
How to
Cut Galvanized Pipe
How to
Connect Pex to Copper
Advertisement
About This Article
wikiHow is a “wiki,” similar to Wikipedia, which means that many of our articles are co-written by multiple authors. To create this article, volunteer authors worked to edit and improve it over time. This article has been viewed 28,492 times.
16 votes - 75%
Co-authors: 6
Updated: June 15, 2022
Views: 28,492
Categories: Piping
Advertisement