Easily set up iCloud on your Windows PC to see iCloud Photos
This article was co-authored by Josef Storzi and by wikiHow staff writer, Kyle Smith. Josef Storzi is an Apple and Mobile Phone Repair Specialist and the Owner of Imobile LA, a mobile phone repair company based in Los Angeles, California. Josef specializes in repairing screens, charging ports, batteries, water damage, speakers, and microphones on all mobile phone brands including Apple, Samsung, LG, Nokia, and Sony. He also specializes in tablet, laptop, and computer repairs as well as the pros and cons of recent mobile software updates.
This article has been viewed 458,016 times.
This wikiHow guide will show you how to access iCloud photos from your PC. Your iCloud account allows you to keep all of your Apple devices synced and connected, but you can also use it to access your iCloud content from your Windows PC. By using the iCloud website or the iCloud for Windows utility, you can access your iCloud Photos and other iCloud data from any computer.
Things You Should Know
- Log into the iCloud website. Click the "Photos" option to see your iCloud photos.
- Download photos by clicking the "download" button. They will typically save to your computer's download folder.
- Download and install the iCloud for Windows desktop app from the Microsoft Store to sync photos to your Windows computer.
Steps
Using the iCloud Website
-
1Log into https://www.icloud.com/ using your Apple ID. You can access your iCloud Photo Library from any computer by using the iCloud website. Make sure to log in with the same Apple ID that you use for your iCloud Photo Library.
- You can reset your iCloud password or change your iCloud email if needed.
-
2Click the Photos option. This will load your iCloud Photo Library. It may take a while to load the first time.Advertisement
-
3Browse the photos in your iCloud Photo Library. You'll be able to find photos from all of your iCloud-enabled devices once the Photos section loads. Photos that you have just taken with a device may not appear until that device uploads the photos, which usually happens within a few minutes.
- The Albums section allows you to see your various iCloud photo albums.
-
4Double-click a photo to view it full-size. This will open it and allow you to view it in its actual size.
- Use the photo gallery list at the bottom of the screen to move between different photos.
-
5Delete a photo by clicking the Trash button. You'll see this in the upper-right corner when you have a photo open. Deleting the photo will delete it from all of your synced devices.
-
6Hold the Ctrl key and click photos to select multiple. This will allow you to download or delete multiple photos at once.
-
7Click "Download" to download your selected images. This is the cloud icon with a downward-facing arrow. They will be downloaded to your browser's default download folder, usually "Downloads."
-
8Click the "Delete" button to delete the selected photos. This is the trashcan icon in the top right of the screen. All of the photos you've selected will be deleted from all of your synced devices.
-
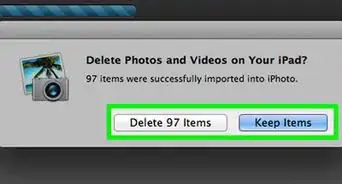
9Click the "Add To" button to add selected photos to an album. This is the multiple-rectangles icon with a plus button in the top right of the screen. You can select from any of your existing albums or create a new one in the pop-up menu that appears.


Using iCloud for Windows
-
1Download the iCloud for Windows installer. This method allows you to access iCloud on your device by installing iCloud for Windows. Your iCloud photos will be synced with a special folder on your computer. This will allow you to easily access your photos like you would any file on your computer.[1]
- You can find the installer in this Apple Support page: https://support.apple.com/en-us/HT204283. The link in the support article will take you to the iCloud installer in the Microsoft Store.
- Downloading iCloud for Windows also allows you to use iCloud storage on your PC!
-
2Click Get to install iCloud from the Microsoft Store.
-
3Click Open. This will replace the Get button when iCloud is done installing.
-
4Sign in with your Apple ID. This should be the Apple ID you use for iCloud Photos.
-
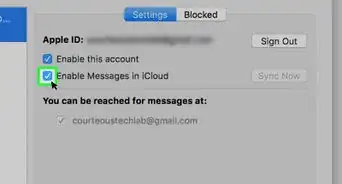
5Check the "Photos" box. This will tell iCloud to sync your iCloud Photo Library with your Windows computer. iCloud will create a special folder for your iCloud Photos that you'll be able to easily access in Windows Explorer.[2]
- You can check the boxes for other iCloud content that you want to sync with your Windows computer as well.
-
6Click Apply to save your changes. iCloud will create the iCloud Photos folder on your computer and begin downloading your iCloud Photo Library to it. This may take a while for larger libraries.[3]
-
7Find your "iCloud Photos" folder. The location varies depending on your version of Windows:
- Windows 11: Open the Microsoft Photos app and click iCloud Photos in the left menu.
- Windows 10: Open File explorer with ⊞ Win+E and click iCloud Photo in the left menu.
- Windows 8: Open the Start menu and click iCloud Photos.
-
8Add photos to your iCloud Photo Library to view on other devices. Any photos that you add to your iCloud Photos folder on your Windows PC will be uploaded to your iCloud Photo Library and will be accessible from any of your iCloud-connected devices. To add photos:
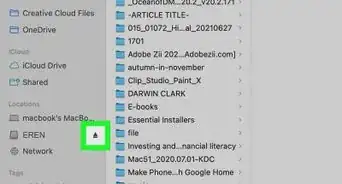
- Open File Explorer and click iCloud Photos in the left navigation menu.
- Open another FIle Explorer window and go to the photos you want to add to iCloud.
- Select the photos and drag them to the iCloud Photos folder.
- You're done! It may take a few minutes for new photos to appear on other devices.
-
9Delete photos from your iCloud Photos folder to remove them on all devices. Any photos deleted from the "iCloud Photos" folder will be permanently removed from your iCloud Photo Library on all of your devices. To delete photos:
- Open File Explorer and click iCloud Photos in the left navigation menu.
- Locate the photos you want to delete.
- Select the photos and right-click one of the selected photos.
- Click Delete in the right-click menu to delete the selected photos.
-
10Download photos from iCloud onto your PC. You can download a local copy of a photo to edit it. To download a photo:
- Open File Explorer and click iCloud Photos in the left navigation menu.
- Locate the photo you want to download.
- Double-click the photo's thumbnail to download it to your computer.
- Now you can open the photo in a photo editing software like Microsoft Paint or Photoshop to edit the image. When you save the edited image in the iCloud Photos folder, it will update the image on all of your iCloud devices.


Expert Q&A
-
QuestionPhotos from an iphone I had in 2012 were backed up to itunes account or icloud, not certain, i no longer have the iphone handset and the AppleId has changed since then. Is there a way to retrieve phot
 Kyle SmithKyle Smith is a wikiHow Technology Writer, learning and sharing information about the latest technology. He has presented his research at multiple engineering conferences and is the writer and editor of hundreds of online electronics repair guides. Kyle received a BS in Industrial Engineering from Cal Poly, San Luis Obispo.
wikiHow Technology WriterYou may be able to recover the photos by recovering your Apple ID account. Go to Apple's official website and click "Support." Click "Forgot Apple ID or password" on the support page. There will be an option called "If you forgot your Apple ID, you can look it up." Follow the prompts to recover your Apple ID. -
QuestionIcloud photos on my PC are not in date order but are in date order on ipad and iphone. How can I sort PC photos into date order?Kyle SmithKyle Smith is a wikiHow Technology Writer, learning and sharing information about the latest technology. He has presented his research at multiple engineering conferences and is the writer and editor of hundreds of online electronics repair guides. Kyle received a BS in Industrial Engineering from Cal Poly, San Luis Obispo.
wikiHow Technology WriterIn the Photos section of the iCloud website, click "Library" in the left menu to see your photos in order of date. If you're using the iCloud desktop app for Windows, click the "Date" header in the iCloud Photos folder to sort by date. -
QuestionHow do I copy a photo on iCloud to an external drive?Kyle SmithKyle Smith is a wikiHow Technology Writer, learning and sharing information about the latest technology. He has presented his research at multiple engineering conferences and is the writer and editor of hundreds of online electronics repair guides. Kyle received a BS in Industrial Engineering from Cal Poly, San Luis Obispo.
wikiHow Technology WriterIf you're using the iCloud website, select the photos you want to download, then click the download button (a cloud with a down arrow). Drag and drop the downloaded photos from the download location to the external drive. If you're using the iCloud desktop app for Windows, select the photos you want to copy. Then, right-click a selected photo and click "Copy." Right-click an empty area in the external drive and select "Paste."


References
About This Article