This article was co-authored by wikiHow staff writer, Nicole Levine, MFA. Nicole Levine is a Technology Writer and Editor for wikiHow. She has more than 20 years of experience creating technical documentation and leading support teams at major web hosting and software companies. Nicole also holds an MFA in Creative Writing from Portland State University and teaches composition, fiction-writing, and zine-making at various institutions.
wikiHow marks an article as reader-approved once it receives enough positive feedback. In this case, several readers have written to tell us that this article was helpful to them, earning it our reader-approved status.
This article has been viewed 466,695 times.
Learn more...
Adding numbers automatically to a column in Excel can be done in two ways, using the ROW function or the Fill feature. The first method ensures that the cells display the correct row numbers even when rows are added or deleted. The second, and easier method, works just as well but you'll need to redo it whenever you add or delete a row in order to keep the numbers accurate. The method you choose is based on your comfort with using Excel and what you're using the application for, but each one is straightforward and will have your sheet organized in no time.
Steps
Numbering Rows Dynamically
-
1Click the first cell where the series of numbers will begin. This method explains how to make each cell in a column display its corresponding row number.[1] This is a good method to use if rows are frequently added and removed in your worksheet.
- To create a basic row of consecutive numbers (or other data, such as days of the week or months of the year), see Filling a Column with Continous Numbers.
-
2Type =ROW(A1) into the cell (if it is cell A1). If the cell is not A1, use the correct cell number.
- For example, if you are typing in cell B5, type =ROW(B5) instead.
Advertisement -
3Press ↵ Enter. The cell will now display its row number. If you typed =ROW(A1), the cell will say 1. If you typed =ROW(B5), the cell will read 5.[2]
- To start with 1 no matter which row you want to begin your series of numbers, count the number of rows above your current cell, then subtract that number from your formula.
- For example, if you entered =ROW(B5) and want the cell to display a 1, edit the formula to say =ROW(B5)-4, as B1 is back 4 rows from B5.[3]
-
4Select the cell containing the first number in the series.
-
5Hover the cursor over the box at the bottom right corner of the selected cell. This box is called the Fill Handle. When the mouse cursor is directly above the Fill Handle, the cursor will change to a crosshair symbol.
- If you don’t see the Fill Handle, navigate to File > Options > Advanced and place a check next to “Enable fill handle and cell drag-and-drop.”
-
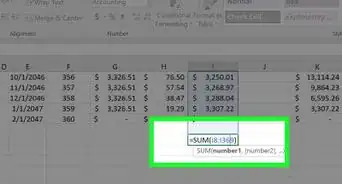
6Drag the Fill Handle down to the final cell in your series. The cells in the column will now display their corresponding row numbers.
- If you delete a row included in this series, the cells numbers will automatically correct themselves based on their new row numbers.


Filling a Column with Continuous Numbers
-
1Click the cell where your series of numbers will begin. This method will show you how to add a series of continuous numbers to the cells in a column.
- If you use this method and later have to delete a row, you will need to repeat the steps to renumber the entire column. If you think you will be manipulating rows of data often, see Numbering Rows instead.
-
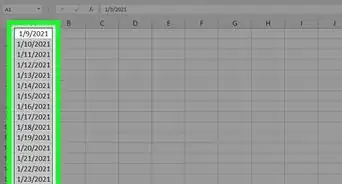
2Type the first number of your series into the cell. For instance, if you will be numbering entries down a column, type 1 into this cell.
- You don’t have to start with 1. Your series can start at any number, and can even follow other patterns (such as even numbers, in multiples of 5, and more).
- Excel also supports other types “numbering,” including dates, seasons, and days of the week. To fill a column with the days of the week, for example, the first cell should say “Monday.”
-
3Click the next cell in the pattern. This should be the cell directly beneath the currently active cell.
-
4Type the second number of the series to create the pattern. To number consecutively (1, 2, 3, etc), type a 2 here.[4]
- If you wanted your continuous numbers to be something like 10, 20, 30, 40, etc, the first two cells in the series should be 10 and 20.
- If you are using days of the week, type the next day of the week into the cell.
-
5Click and drag to select both cells. When you release the mouse button, the both cells will be highlighted.
-
6Hover the cursor over the tiny box at the bottom right corner of the highlighted area. This box is called the Fill Handle. When the mouse pointer is directly on top of the Fill Handle, the cursor will become a crosshair symbol.
- If you don’t see the Fill Handle, navigate to File > Options > Advanced and place a check next to “Enable fill handle and cell drag-and-drop.”
-
7Click and drag the Fill Handle down to the final cell in your desired series. Once you release the mouse button, the cells in the column will be numbered according to the pattern you established in the first two cells.


Community Q&A
-
QuestionWhy does Autonumber repeat the sequence rather than fill down when I drag down?
 Community AnswerAfter dragging down, there is an icon next to the last cell that gives you options of whether you want to copy cells or fill series. Click the intended option.
Warnings
- Always make sure the "Alert before overwriting cells" option is checked in the Advanced tab of Excel Options. This will help prevent data entry errors and the need to recreate formulas or other data.⧼thumbs_response⧽


References
- ↑ https://support.office.com/en-us/article/Automatically-number-rows-in-Excel-2016-for-Windows-598f6fb5-a5dc-4474-af7a-6cce5559ad92
- ↑ https://www.youtube.com/watch?v=wnC7t8S4zlU
- ↑ https://www.youtube.com/watch?v=wnC7t8S4zlU
- ↑ https://support.office.com/en-us/article/Automatically-number-rows-76ce49e3-d8d2-459b-bd85-ee1d3973e6e6
About This Article

1. Type " =ROW(A1)" into the first cell (if the cell is A1).
2. Press Enter.
3. Select the cell.
4. Drag the fill handle to the final cell in the series.