This article was co-authored by wikiHow staff writer, Darlene Antonelli, MA. Darlene Antonelli is a Technology Writer and Editor for wikiHow. Darlene has experience teaching college courses, writing technology-related articles, and working hands-on in the technology field. She earned an MA in Writing from Rowan University in 2012 and wrote her thesis on online communities and the personalities curated in such communities.
This article has been viewed 21,192 times.
Learn more...
You can set your document's settings to create a margin of extra color, called the bleed. This wikiHow will teach you how to use bleed in Illustrator in a new document or add bleed to an existing one.
Steps
Creating a New Document with Bleed
-
1Open Adobe Illustrator. You'll find this program in your Start Menu or Applications folder.
-
2Hover your cursor over File. You'll find this along the top of your document space or horizontally across the top of your screen. When you mouse over the File tab, a menu will drop-down.Advertisement
-
3Click New. This creates a new document and opens a dialog window.
-
4Click More Settings. You'll see this in the panel on the right side of the window under "Preset Details."
-
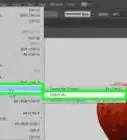
5Name the project and make sure the "Width" and "Height" fields are set to "5." The defaults are usually set to 5 as well, so you might not have to make any changes.
- This example comes from a printing company, so you can set your document to different sizes if you'd like.[1]
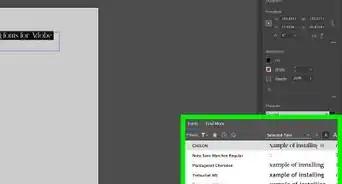
- You can change the units of measurement by clicking through the drop-down menu next to "Units." It normally defaults to inches.
-
6Enter a value for "Bleed." This will allow the printer to print past the border so the color completely covers the project area.
-
7Click the link icon to the right of the bleed values. After you enter a bleed value in the first text field, you can click the link icon to make all the values the same.
-
8Click Create Document. You'll see this in the bottom right corner of the window.
- You'll see the blank document appear on your screen. The red outline around the blank canvas represents your bleed.
-
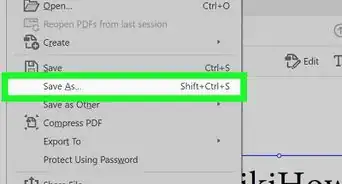
9Save your file with trim marks (if you want to). To save a PDF of your document with marks that indicate where the bleed begins so it is cut in the right way, navigate to File > Save As and select "Adobe PDF" as the file type, then click Save. Under "Adobe PDF Preset," select "High Quality Print" and click Marks and Bleeds" from the panel on the left side of the window. Click to select Trim Marks and click Use Document Bleed Settings and Save PDF.


Adding a Bleed to an Existing Document
-
1Open the project you want to add bleed to in Illustrator. You can either do this within Illustrator by clicking File > Open or you can right-click the file in your file browser and select Open with > Illustrator.
-
2Hover your cursor over File. You'll find this along the top of your document space or horizontally across the top of your screen. When you mouse over the File tab, a menu will drop-down.
-
3Click Document Set Up. You'll find this towards the bottom of the drop-down menu.
-
4Enter a value for "Bleed." Currently, the values for these should be 0, if your document doesn't have a bleed set. If they have values, you can change them to edit your bleed area.
-
5Click the link icon that you'll find to the right of the bleed values. After you enter a bleed value in the first text field, you can click the link icon to make all the values the same all around your project area.
-
6Click OK. The window will close and your document will display the red border to indicate the bleed margin.[2]


References
About This Article

1. Open Adobe Illustrator.
2. Hover your cursor over File and click New.
3. Click More Settings.
4. Name the project and make sure the "Width" and "Height" fields are set to 5.
5. Enter a value for "Bleed."
6. Click the link icon to the right of the bleed values.
7. Click Create Document.