This article was co-authored by wikiHow staff writer, Darlene Antonelli, MA. Darlene Antonelli is a Technology Writer and Editor for wikiHow. Darlene has experience teaching college courses, writing technology-related articles, and working hands-on in the technology field. She earned an MA in Writing from Rowan University in 2012 and wrote her thesis on online communities and the personalities curated in such communities.
The wikiHow Tech Team also followed the article's instructions and verified that they work.
This article has been viewed 248,699 times.
Learn more...
Google Analytics can provide you with useful information about who is visiting your Blogger blog and how they find it. To start tracking visitors to your blog, you can set up a Google Analytics account and add your tracking ID to your blog. The steps are a little different depending on when you created your blog on Blogger. This wikiHow article teaches you how to add Google Analytics to your Blogger account so you can start tracking visits.
Steps
Setting Up Google Analytics Account
-
1Go to http://www.google.com/analytics in a web browser. It's the Google Analytics website and will work in any popular web browser like Chrome or Firefox.
-
2Click Sign in to Google Analytics. If you're not logged in to Google, click Sign In, and then enter your Google username and password.
- If you don't have a Google account, go to google.com, click Sign In, and then click Create an Account.
Advertisement -
3Click Start measuring. It's a button in the center of the page that will allow you to use Google Analytics.
- If you already have an Analytics account, scroll to the bottom of the page and click the gear icon. Under the Admin tab, click Create Property and you'll be able to continue following these steps to create an Analytics link after skipping the next step step.[1]
-
4Create an account name (if you are creating an account). In the Account Name/Property Name field, type a name for the Google Analytics account.
- The account name can be the name of your Blogger weblog, your Google username, or any descriptive word or words you'd like to use.
- If you are creating a new property, you can skip this step.
-
5Click Next. It's at the bottom of the page and will let you continue to "Property Setup."
- If you are creating a new property instead of a new account, you can skip this step.
-
6Add the name of your Blogger blog. In the "Property name" field, type the name of your Blogger blog.
- It doesn't have to match exactly, but if you have several Blogger blogs, it helps if you write the correct Blogger name for each Google Analytics account.
-
7Choose your time zone and currency. For Google Analytics to work, choose your region and time zone so your visits can be logged correctly. For example, it's Monday for you, but Tuesday for a visitor, but Google Analytics will report the visitor on Monday.
- Choose the correct currency so Google Analytics charges you appropriately for any paid visits or paid advertising.
-
8Click Next. It's at the bottom of the page and will let you continue to "About your business."
-
9Add information about your business. You'll want to select the appropriate drop-down under "Industry Category" as well as provide other accurate business information so Google Analytics can categorize your blog correctly.
-
10Click Create. A window will pop-up that you will need to read and agree to before you can continue.
- The first time you sign in to Google Analytics, you'll be prompted to change save your communication preferences. If you don't want Google Analytics to send you emails, uncheck all the boxes, and then click Save.


Adding the Tracking ID to a Blog
-
1Click Web to get the Google Analytics tracking ID. Go to your Google Analytics dashboard and navigate to your newly created property.[2]
- This method will work if you Blogger after 2006. If you created your blog before that, you'll need to use this method instead.
-
2Enter your website's URL. In the "Website URL" field, enter your website without the "https://" since that's already provided in the drop-down to the left.
-
3Enter your Stream name. This is usually your website's name.
-
4Click Create stream. This button is at the bottom of the page and will become clickable once you fill out both the "website URL" and "stream name" fields.
-
5Copy your measurement ID. Find the alphanumeric code under "Measurement ID", select it with your mouse, and then copy it.
- You can also write it down on a piece of paper.
-
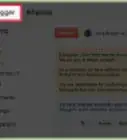
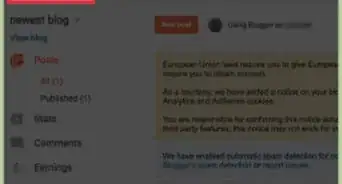
6Go to Blogger and log in to your account. If you're automatically logged in, you won't need to log in again.
-
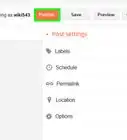
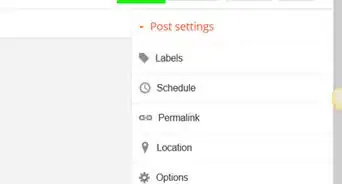
7Click . This gear icon next to "Settings" will be in the bar on the left side of the browser page. If you don't see a sidebar with Settings, then you're using the Classic template.
-
8Click Google Analytics Property ID. It's in the first grouping of the menu between Favicon and Adult Content.
-
9Paste or type your Google Analytics Property/Measurement ID. When pasting your ID, make sure it's in the format UA-XXXXX-XX.
-
10Click Save. Now that you've saved your tracking ID, Google Analytics will begin tracking visits to your blog. After about 24 hours, you'll start seeing visitors on your Google Analytics dashboard.


Adding the Tracking ID to the Classic Blogger Template
-
1Click Web to get the Google Analytics tracking ID. Go to your Google Analytics dashboard and navigate to your newly created property.
- Use this method if you created your Blogger before 2006. Alternatively, you can convert your blog to a newer template and then use the latest instructions.
-
2Enter your website's URL. In the "Website URL" field, enter your website without the "https://" since that's already provided in the drop-down to the left.
-
3Enter your Stream name. This is usually your website's name.
-
4Click Create stream. This button is at the bottom of the page and will become clickable once you fill out both the "website URL" and "stream name" fields.
- If you'd like to convert your blog to the new Blogger template instead of continuing with the Classic template, click here.
-
5Click Global site tag. This will expand the menu to show a piece of code that you'll need to copy.
-
6Go to your Blogger dashboard and click Theme. Log in if prompted. You'll see the icon for Theme in the menu on the left side of the screen.
-
7Click Edit HTML. It's at the top of your page and will display your Blogger's code.
-
8Add the Google Analytics code to the template HTML code. In the template code box, scroll down until you find the </body> tag. Put the cursor on the line above the </body> tag, and then paste the Google Analytics code.
-
9Save your changes. Click the floppy disk icon to save.[3] Now that you've saved your tracking ID, Google Analytics will begin tracking visits to your blog. After about 24 hours, you'll start seeing visitors on your Google Analytics dashboard.


Converting to the Newer Blogger Template
-
1Go to your Blogger dashboard. If you created your blog before 2006 and are still using the classic template, you can use this method to convert your blog to the latest version.
-
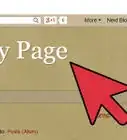
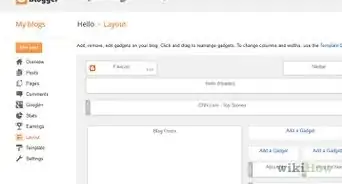
2Click Template. It's in the menu on the left side of the window next to a paint roller icon.
-
3Click the arrow next to Edit HTML. If you click Edit HTML instead, the site's code will open and you'll need to navigate back.
-
4Click Switch to second generation Layouts theme. This will update your website dashboard to appear like the newer dashboards, but you won't have access to site code anymore.
- Instead of changing the code to change the appearance of your website, you can click to apply different themes to change the look of your blog.
-
5Choose a new template to use and then click Apply. Your website will update to reflect the theme changes.
- If you want to go back to the Classic template, go to the Theme tab again. Click the arrow next to Customize and select Switch to first generation Classic theme.
-
6Add your Google Analytics tracking ID. Now that you've converted your Classic template to the latest version, you can add your tracking ID to start tracking visits to your blog.


References
About This Article