This article was co-authored by wikiHow Staff. Our trained team of editors and researchers validate articles for accuracy and comprehensiveness. wikiHow's Content Management Team carefully monitors the work from our editorial staff to ensure that each article is backed by trusted research and meets our high quality standards.
The wikiHow Tech Team also followed the article's instructions and verified that they work.
This article has been viewed 1,092,380 times.
Learn more...
This wikiHow teaches you how to alter the background color in new and existing Adobe Photoshop files.
Steps
In a New File
-
1Open Adobe Photoshop. It's a blue app icon that contains the letters "Ps."
-
2Click on File. It's on the left side of the menu bar at the top of the screen.Advertisement
-
3Click on New…. It's near the top of the drop-down menu.
-
4Click on the "Background Contents:" drop-down menu. It's near the center of the dialog box.
-
5Choose a background color. Click on one of the following:
- Transparent for no background color.
- White if you'd like the background to be white.
- Background Color if you'd like to use the preset background color.
-
6Name your file. Do so in the "Name:" field at the top of the dialog box.
-
7Click on OK. It's in the upper-right corner of the dialog box.


In the Background Layer
-
1Open Adobe Photoshop. It's a blue app icon that contains the letters "Ps."
-
2Open the image you want to edit. Do so by pressing CTRL+O (Windows) or ⌘ +O (Mac), selecting the image file you wish to open, and then clicking Open in the lower-right corner of the dialog box.
-
3Click on Windows. It's in the menu bar at the top of the screen.
-
4Click on Layers. The "Layers" menu window will appear in the lower-right corner of the photoshop window.
-
5Click on Layer. It's near the left side of the menu bar at the top of the screen.
-
6Click on New Fill Layer. It's near the top of the menu.
-
7Click on Solid Color….
-
8Click on the "Color:" drop-down menu.
-
9Click on a color. Select the color you want the background to be.
-
10Click on OK.
-
11Refine your color choice. Use the color picker tool to adjust the color to the shade you like.
-
12Click on OK.
-
13Click and hold on the new layer. Do so in the "Layers" window in the bottom-right of the window.
-
14Drag the new layer until it's immediately above the layer labeled "Background" then release the click.
- If the new layer is not still highlighted, click on it.
-
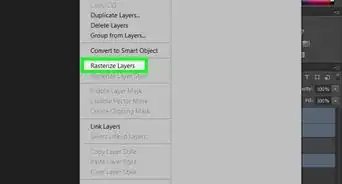
15Click on Layer. It's near the left side of the menu bar at the top of the screen.
-
16Scroll down and click on Merge Down. It's near the bottom of the "Layer" menu.
- The background layer should be the color you chose.


In the Photoshop Workspace
-
1Open Adobe Photoshop. It's a blue app icon that contains the letters "Ps."
-
2Open the image you want to edit. Do so by pressing CTRL+O (Windows) or ⌘ +O (Mac), selecting the image file you wish to open, and then clicking Open in the lower-right corner of the dialog box.
-
3Right click (Windows) or control-click (Mac) on the workspace. It's the dark border around your image in the Photoshop window.
- You may need to zoom out to see the workspace. To do so CTRL+ - (Windows) or ⌘ + - (Mac).
-
4Select a color. If the available options don't appeal to you, click on Select Custom Color, then choose your color and click on OK.


In an Image
-
1Open Adobe Photoshop. It's a blue app icon that contains the letters "Ps."
-
2Open the image you want to edit. Do so by pressing CTRL+O (Windows) or ⌘ +O (Mac), selecting the image file you wish to open, and then clicking Open in the lower-right corner of the dialog box.
-
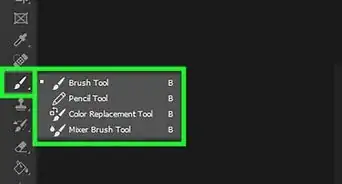
3Click on the Quick Selection Tool. It looks like a paintbrush with a dotted circle around its tip near the top of your tool menu.
- If you see a tool that looks like a magic wand, click and briefly hold on it. When you release the click, a drop-down of available tools should appear. Click on the Quick Selection Tool.
-
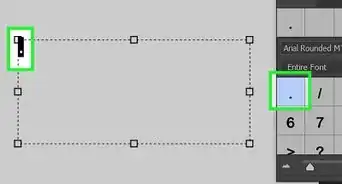
4Place your cursor at the top of the foreground image. Click and drag across the body of the image.[1]
- If the image is very detailed, click and drag small sections, rather than trying to move over the entire image.
- Once you have selected a portion of the image, you can click at the bottom of the selection and drag further to increase the selection.
- Continue until there is a dotted line around the perimeter of your foreground image.
- If the Quick Selection Tool highlights an area outside of the image, click on the “Subtract from Selection” brush at the top-left corner of the window. It looks like the quick selection tool, but has a "minus" (-) next to it.
-
5Click on Refine Edge. It's at the top of the window.
-
6Check "Smart Radius." It's in the "Edge Detection" section of the dialog box.
-
7Adjust the radius slider left or right. Pay attention to how it looks on your image.
- When you have the edge refined, click on OK.
-
8Right-click or control-click on the background of the image. A menu will pop-up.
-
9Click on Select Inverse. It's near the top of the menu.
-
10Click on Layer. It's near the left side of the menu bar at the top of the screen.
-
11Click on New Fill Layer. It's near the top of the menu.
-
12Click on Solid Color….
-
13Click on the "Color:" drop-down menu.
-
14Click on a color. Select the color you want the background to be.
-
15Click on OK.
-
16Refine your color choice. Use the color picker tool to adjust the color to the shade you like.
-
17Click on OK. The background of the image should be the color you chose.
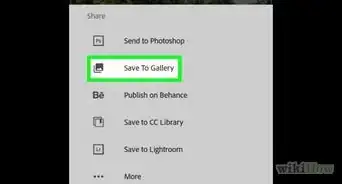
- Click on File in the menu bar and Save or Save As... in the drop-down menu to save your changes.


Community Q&A
-
QuestionHow do I copy characters into a new document in Photoshop?
 Community AnswerHave both files open. Use the magnetic lasso tool to select the part you want to place in the other photo. Use the move tool to drag the image into the other tab.


About This Article

To change the background color of a picture in Photoshop, first, click on the “Quick Selection Tool”, which should look like a paintbrush with a dotted circle around its tip near the top of your tool menu. Then, place your cursor at the top of the foreground image, and click and drag across the body of the image. If your image is really detailed, click and drag small sections and continue until there is a dotted line around the perimeter of the foreground image. Once you have the foreground selected, right-click or control-click on the background and click on “Select Inverse” on the menu that pops up. From there, click on “Layer” on the menu bar at the top of the screen, then hit “New Fill Layer” and “Solid Color”. On the “New Layer” window, use the drop-down menu to choose a new background color for your image. To learn more, like how to refine the edges on your foreground image, read on.