This article was co-authored by Natasha Dikareva, MFA. Natasha Dikareva is a San Francisco, California based sculptor, and installation artist. With over 25 years of ceramics, sculpting, and installation experience, Natasha also teaches a ceramic sculpture workshop titled "Adventures in Clay" covering concept development, hand-building techniques, texture, and glazing techniques. Her work has been featured in solo and group exhibitions at the Beatrice Wood Center for the Arts, Abrams Claghorn Gallery, Bloomington Center for the Arts, Maria Kravetz Gallery, and the American Museum of Ceramic Art. She has taught at the University of Minnesota and the American Indian OIC School. She has been awarded the Excellence Award at the 1st World Teapot Competition, Best in Show at the 4th Clay & Glass Biennial Competition, and a Grand Prize at the American Museum of Ceramic Art. Natasha holds an MFA from the University of Minnesota and a BFA from Kiev Fine Arts College.
This article has been viewed 46,965 times.
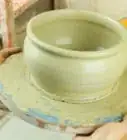
Clay pots are great for use in indoor and outdoor gardening, but they can become dirty over time, especially when exposed to the elements. Removing any loose dirt, soaking the pots and removing any stubborn stains, and then disinfecting them can give you clean pots you can use over and over again.
Steps
Removing Loose Dirt
-
1Empty your pots of all dirt and plants. Before you can clean the pot, it obviously needs to be empty. Dump out old plants and dirt. If you want to keep the plants in the pots, remove them gently and set them in an empty pot until the original pot is clean and dry.[1]
-
2Brush away dirt. Once the pots are empty, brush away as much of the dirt as possible with your hands. Most of it should come away easily, but some of it may not.[2]Advertisement
-
3


Soaking the Pot
-
1Mix a water and vinegar solution. Mix together a 1:3 ratio of white vinegar to water in a large tub or sink. For example, you’ll want to use 1 cup (8 ounces) of vinegar with 3 cups (24 ounces) of water. If you’re cleaning a lot of pots, simply double or triple these amounts.[5]
- You can also use a bleach and water mixture. Mix together ¼ cup (2 ounces) of bleach and five gallons of water.[6]
-
2Let the pots soak for 20 to 30 minutes. Place your pots in the water and vinegar solution and let them soak for twenty to thirty minutes. The liquid should completely cover your tallest pot.[7]
- You might see or hear bubbles in the solution. That’s okay – it just means that the pots are coming clean.
-
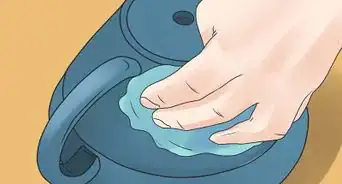
3Check the pots. After 20 to 30 minutes, take the pots out of the liquid to check them. If they’re ready to come out, you should be able to easily remove any remaining residue with your hands or a brush.[8]
- If you can’t easily remove the remaining residue, let the pots soak for 5 to 10 minutes longer.
-
4Soak really dirty rims in pure vinegar. The rims of clay pots tend to become very dirty. If you have extra dirty rims, flip them upside down and place them on plates or in a bowl with a layer of pure vinegar in them. Let them sit for about 10 minutes.[9]


Removing Salt Marks
-
1Make a baking soda paste. The amount of baking soda paste you need will vary depending on how many pots you’re cleaning and how extensive the salt stains are. But you should add just enough water to baking soda to give it the consistency of hand lotion.[10]
-
2Spread over the salt build up. You should spread enough paste to cover the salt stains completely. It should be just thick enough to cover the stain.[11]
-
3Let the paste sit for five to ten minutes. The paste will dry slightly as it sits – that’s okay.[12]
-
4Scrub away the paste. After five to ten minutes, use your hands or a brush to scrub away the now-dry paste. You might need to rinse the pots to completely remove the paste, but once you do, the salt stain should be gone.[13]


Disinfecting Your Pots
-
1Set the dishwasher to quick-wash. Once you’ve soaked your pots, you’ll want to disinfect them. Set your dishwasher to its quickest wash setting, and add the amount of soap you would add for a small to medium load of dishes.[14]
-
2Run your pot through. Let your pots run through a full cycle in your dishwasher. The heat and the soap will disinfect your pots.[15]
-
3Let them dry. Once your pots are done in the dishwasher, leave them in the rack to dry completely. This can take up to a couple of hours. You can also speed the drying process by placing them outside on a sunny day.[16]


Expert Q&A
-
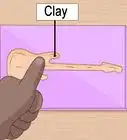
QuestionHow can I clean pottery?
 Natasha Dikareva, MFANatasha Dikareva is a San Francisco, California based sculptor, and installation artist. With over 25 years of ceramics, sculpting, and installation experience, Natasha also teaches a ceramic sculpture workshop titled "Adventures in Clay" covering concept development, hand-building techniques, texture, and glazing techniques. Her work has been featured in solo and group exhibitions at the Beatrice Wood Center for the Arts, Abrams Claghorn Gallery, Bloomington Center for the Arts, Maria Kravetz Gallery, and the American Museum of Ceramic Art. She has taught at the University of Minnesota and the American Indian OIC School. She has been awarded the Excellence Award at the 1st World Teapot Competition, Best in Show at the 4th Clay & Glass Biennial Competition, and a Grand Prize at the American Museum of Ceramic Art. Natasha holds an MFA from the University of Minnesota and a BFA from Kiev Fine Arts College.
Ceramics & Sculpting InstructorYou can use water and a brush to clean the pottery. If you like, you can even use a sponge. These do not damage pottery. -
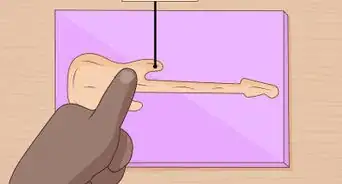
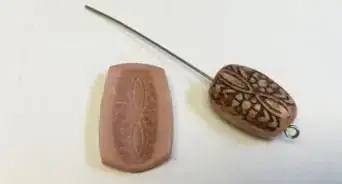
QuestionHow can I distinguish between clays?Natasha Dikareva, MFANatasha Dikareva is a San Francisco, California based sculptor, and installation artist. With over 25 years of ceramics, sculpting, and installation experience, Natasha also teaches a ceramic sculpture workshop titled "Adventures in Clay" covering concept development, hand-building techniques, texture, and glazing techniques. Her work has been featured in solo and group exhibitions at the Beatrice Wood Center for the Arts, Abrams Claghorn Gallery, Bloomington Center for the Arts, Maria Kravetz Gallery, and the American Museum of Ceramic Art. She has taught at the University of Minnesota and the American Indian OIC School. She has been awarded the Excellence Award at the 1st World Teapot Competition, Best in Show at the 4th Clay & Glass Biennial Competition, and a Grand Prize at the American Museum of Ceramic Art. Natasha holds an MFA from the University of Minnesota and a BFA from Kiev Fine Arts College.
Ceramics & Sculpting InstructorThere are high-temperature and low-temperature clays. They are classified based on their firing temperature. For example, porcelain is a high-temperature clay, stoneware is mid-range clay, and earthenware is a low-temperature clay. -
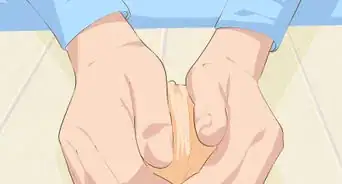
QuestionCan I use the same clay for making pots and sculptures?Natasha Dikareva, MFANatasha Dikareva is a San Francisco, California based sculptor, and installation artist. With over 25 years of ceramics, sculpting, and installation experience, Natasha also teaches a ceramic sculpture workshop titled "Adventures in Clay" covering concept development, hand-building techniques, texture, and glazing techniques. Her work has been featured in solo and group exhibitions at the Beatrice Wood Center for the Arts, Abrams Claghorn Gallery, Bloomington Center for the Arts, Maria Kravetz Gallery, and the American Museum of Ceramic Art. She has taught at the University of Minnesota and the American Indian OIC School. She has been awarded the Excellence Award at the 1st World Teapot Competition, Best in Show at the 4th Clay & Glass Biennial Competition, and a Grand Prize at the American Museum of Ceramic Art. Natasha holds an MFA from the University of Minnesota and a BFA from Kiev Fine Arts College.
Ceramics & Sculpting InstructorYou cannot use the same clay for making pots and sculptures because the clay that is good for throwing on the wheel may not be suitable for making sculptures.
Warnings
- Don’t wash your pots in the dishwasher before you’ve removed all of the dirt from them. If you do, the dirt can get baked on.⧼thumbs_response⧽
- Don’t wash your pots in the dishwasher with other dishes.⧼thumbs_response⧽


-Oven-Step-15.webp)
References
- ↑ http://thegardeningcook.com/tips-cleaning-clay-pots/
- ↑ http://www.rodalesorganiclife.com/garden/how-clean-terra-cotta-pots
- ↑ http://www.rodalesorganiclife.com/garden/how-clean-terra-cotta-pots
- ↑ Natasha Dikareva, MFA. Ceramics & Sculpting Instructor. Expert Interview. 5 May 2020.
- ↑ http://www.rodalesorganiclife.com/garden/how-clean-terra-cotta-pots
- ↑ http://thegardeningcook.com/tips-cleaning-clay-pots/
- ↑ http://www.rodalesorganiclife.com/garden/how-clean-terra-cotta-pots
- ↑ http://www.rodalesorganiclife.com/garden/how-clean-terra-cotta-pots
- ↑ http://getbusygardening.com/how-to-clean-terracotta-pots/
- ↑ http://thegardeningcook.com/tips-cleaning-clay-pots/
- ↑ http://thegardeningcook.com/tips-cleaning-clay-pots/
- ↑ http://thegardeningcook.com/tips-cleaning-clay-pots/
- ↑ http://thegardeningcook.com/tips-cleaning-clay-pots/
- ↑ http://www.rodalesorganiclife.com/garden/how-clean-terra-cotta-pots
- ↑ http://www.rodalesorganiclife.com/garden/how-clean-terra-cotta-pots
- ↑ http://www.rodalesorganiclife.com/garden/how-clean-terra-cotta-pots
About This Article

To clean a clay pot, start by emptying it and brushing away any loose dirt. Then, mix 1 part vinegar and 3 parts water in a large tub, and let the pot soak in it for 30 minutes. Finally, remove the pot from the solution, and wipe off any remaining residue with your hands or a brush. If there are stubborn salt stains on your clay pot, cover them with a baking soda paste for 10 minutes, and then scrub the stains away with a brush. To learn how to disinfect clay pots, scroll down!