This article was co-authored by Victor Belavus and by wikiHow staff writer, Janice Tieperman. Victor Belavus is an Air Conditioning Specialist and the Owner of 212 HVAC, an air condition repair and installation company based in Brooklyn, New York. In addition to HVAC and air conditioning units, Victor also specializes in furnace repair and air duct cleaning. He has over 10 years of experience working with HVAC systems.
There are 9 references cited in this article, which can be found at the bottom of the page.
wikiHow marks an article as reader-approved once it receives enough positive feedback. In this case, 97% of readers who voted found the article helpful, earning it our reader-approved status.
This article has been viewed 548,176 times.
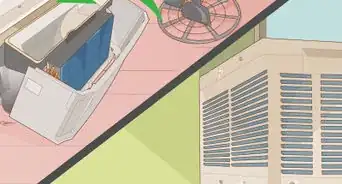
Air conditioners are essential to keeping your home and business cool during hot weather. Split air conditioners are a common type of cooling system well-known for their compact, ductless format. The inner unit looks like a long rectangle that’s built into a wall of your home, while the outdoor unit, known as a condenser or compressor, looks like a large metal box. Any air conditioner is only as good as its inner workings, so it’s important to examine and clean your split A/C often. Start by accessing and cleaning your indoor A/C unit before you work your way outside to clean the condenser.
Steps
Washing the Indoor Unit
-
1Put a cleaning bag around the entire split A/C system. Surround your entire appliance with a new cleaning bag to prevent any dust or dirt from reaching the floor. They can be purchased online for under $20.[1]
- Try to purchase a bag that comes with a cinch, so you can loosen and tighten its circumference.
- You can use an empty trash bag in lieu of a specialty cleaning bag.
-
2Turn off the power source and lift up the front panel. Go to the appropriate circuit breaker or power source in your home and turn off the power to your split A/C before opening the front panel.[2] Undo the latches on the front part of the A/C to lift it up so you can access the inside of the unit.[3]
- Most machines have indoor and outdoor components, so make sure that you’re turning off the power to the entire cooling system.[4]
Advertisement -
3Remove the air filters from your split A/C. The long, rectangular pieces that rest at the front of the appliance are the air filters, and they have to be removed and washed to remain in top condition. Press a tab along the side of each air filter to loosen and remove them. Make sure to first shake the filters outside to remove any obvious dust and dirt before you start the cleaning process.[5]
- If there are no obvious tabs that open the front of your split A/C, check the manufacturer’s guide for help.
-
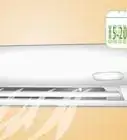
4Rinse the removed air filters under running water. Take the air filters to a sink or large basin and pour cool tap water over them. If your filters aren’t that dirty, rinsing them might be enough to remove the dust. If running water doesn’t seem to do the trick, use a sponge or cleaning pad to gently rub in a mild cleaning detergent. Then, rinse them off and let them air dry.[6]
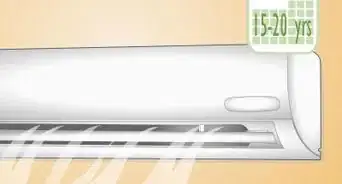
- Wash out your filters at least once every other month.[7]
-
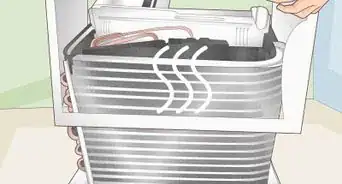
5Blow the dust off of the cooling fins. Add a thin, canister attachment to your air blower and use it to free the dust from the back of your split A/C. The cooling fins look like a series of metallic lines that are snug against the back of the A/C. Make sure that you blow over the entire surface area of the cooling fins.[8]
- A brush or canister vacuum attachment can also help with this part of the process.[9]
-
6Clean the coils with no-rinse evaporator spray and let them dry. Take a specialty can of no-rinse evaporator cleaner and apply it to the coils. Then, let the product sit for at least 20 minutes.[10] The coils look like connected, rounded pieces of metal, and they can be found running across the center of the indoor unit.
- You can purchase evaporating cleaners online.
-
7Spray antifungal cleaner onto the coils to prevent mold. Use a can of antifungal cleaning spray to sanitize the back of your air conditioner, where toxins would most likely form. This cleaner helps prevent toxic particles and spores from growing in your appliance. Allow at least 5 minutes for the spray to set before you put the air filters back in.[11]
- If you’re having trouble finding this spray at a hardware store, check online.
-
8Replace the air filters. Secure the air filters back in their original position once you have confirmed that they are clean and dry. They should glide into place easily, but double-check your owner’s manual if you’re having any difficulties with the assembly process. These freshened air filters will ensure that only clean, cool air makes it through your A/C.[12]
-
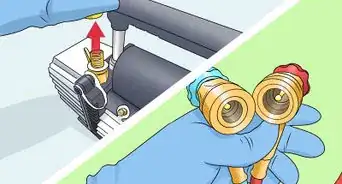
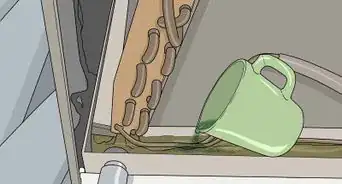
9Clear out any clogs in the A/C by flushing out the drain lines. Avoid a drain line clog by disconnecting the hose or pipe that separates the indoor and outdoor units. Use a pressurized flush kit to force water or cleaner down the drainpipe. Let the drain line air-dry for at least 1 hour to make sure all of the water or cleaning fluid has evaporated. Reconnect the hose before turning on the A/C.
- If needed, feel free to flush water or a cleaning agent through the drain line both ways.
- You can purchase flush kits online that contain a pressurized nozzle.
-
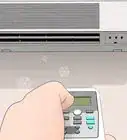
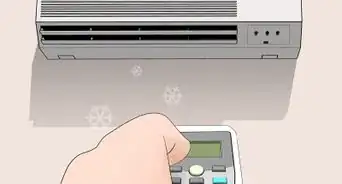
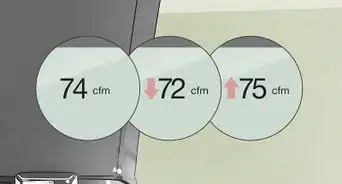
10Turn your split A/C back on to make sure everything is working. Go to the circuit breaker or power source for your A/C and switch the electricity back on. Once the power is up and running, check your split A/C to see if cold air is coming out of it. Enjoy breathing in refreshing and clean air![13]
- You can also stick a wire or long piece of metal through the pipe to remove any clogs.[14]
- If your split A/C is still having issues, consider contacting a professional technician for help.
- Keep the cleaning bag in place after you turn the A/C on—there’s a good chance that the machine will be spitting out some dirty water. Wait until all of the waste has left the AC before removing and tossing out the bag.


Cleaning the Outdoor Unit
-
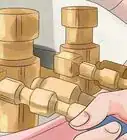
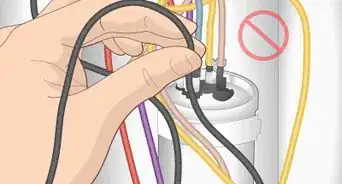
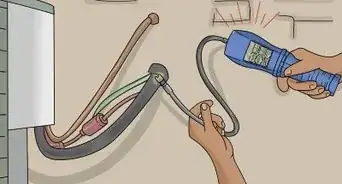
1Switch off the power to your outdoor condenser. Unplug or switch off your outdoor split A/C unit so that no electricity is flowing into it. Since you’ll be rinsing off the fins of the AC with cold water, you definitely don’t want it to be hooked up. Your power system might be hooked up to a breaker, or it could have its own power source—regardless, flip or unplug this source so that the power is completely off.[15]
- Check your home’s schematics if you don’t know where the power source is. Generally, it can be found a few feet away from the unit outside.
-
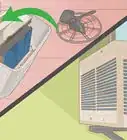
2Use a brush attachment to vacuum the condenser fins. Hook up a vacuum outside and add the brush attachment to the vacuum’s nozzle. The condenser fins are thin, vertical metal pieces that line the inside of the metal unit. Turn on the vacuum and suck out any visible dust and debris from the outdoor unit using long movements. Go horizontally and vertically in straight lines until no dirt or leaves are visible in your condenser.[16]
- Rake around your outdoor unit frequently and brush off any stray leaves or pieces of debris that you see.[17]
-
3Straighten the metal fins with a long knife, if necessary. Take a long dinner knife and slide it through the indentations between any metal fins that seem bent. If you want your condenser to be working at top quality, you want to be sure that all of the fins are straight and functioning properly.[18]
- You can also purchase specific tools from a home improvement store that are designed to straighten out the A/C condenser fins.
-
4Unscrew the lid of the outdoor unit so you can take out the fan. Use a screwdriver or another pointed tool to detach the grille from the top of the condenser. Before you can clean out the fins, you need to remove any electrical units—specifically, the fan. Use a wrench or screwdriver to remove any bolts or screws securing the fan in place before you lift it out of the metal unit. The fan is wired to the condenser, so you won’t be able to remove it completely.[19]
- Double check the manufacturer's guide to confirm the safest way to take out your outdoor condenser fan.
-
5Rinse the fins with a hose and let the unit dry completely. Turn on a garden hose and rinse out the A/C condenser fins from the inside of the metal unit. The rinsing process allows the fins to be as clear and clean as possible, so your condenser can run efficiently. Let the inside of the outdoor unit dry completely before you do anything else.[20]
- Use a sprayer attachment if you want to get a finer or stronger mist from the hose. Try not to apply too much water pressure to the fins.
-
6Reattach the displaced parts before turning the power back on. Use the proper tools to secure your fan back into the condenser unit, and use a screwdriver to reconnect the top grille to the outdoor unit. Once all of these pieces are secure, go to the circuit breaker or power source and flip the electricity on again (or plug in the unit).[21]
- If your outdoor unit seems to be having issues, don’t be afraid to contact a professional for assistance.


Expert Q&A
Did you know you can get premium answers for this article?
Unlock premium answers by supporting wikiHow
-
QuestionHow do I disinfect my split AC?
 Victor BelavusVictor Belavus is an Air Conditioning Specialist and the Owner of 212 HVAC, an air condition repair and installation company based in Brooklyn, New York. In addition to HVAC and air conditioning units, Victor also specializes in furnace repair and air duct cleaning. He has over 10 years of experience working with HVAC systems.
Air Conditioning SpecialistFor disinfection, I recommend using a fogger and an organic sanitizer, like one made out of tea tree oil. The best practice is to power your air handler off, open the evaporator coil compartment, and spray the evaporator coil and condensate drain with the sanitizer. Just be careful not to wet the electrical compartment.
Support wikiHow by unlocking this expert answer.
Warnings
- Double-check to ensure that no power is flowing into the split AC when you clean it. When you spray the evaporated cleaner, try to avoid hitting any electronic components.⧼thumbs_response⧽
Things You'll Need
Washing the Internal Split A/C Unit Safely
- Cleaning bag
- Trash bag (optional)
- Gentle detergent
- Air blower
- No-rinse evaporator spray
- Anti-fungal and anti-bacterial spray
- Flush kit
Washing out the Split AC
- Vacuum
- Brush attachment
- Knife
- Screwdriver
- Fin comb kit (optional)
- Hose

References
- ↑ https://removeandreplace.com/2018/04/19/how-to-clean-wall-mounted-split-system-air-conditioner-air-filters-coils/
- ↑ https://www.choice.com.au/home-and-living/cooling/air-conditioners/articles/how-to-clean-your-air-conditioner
- ↑ https://m.youtube.com/watch?v=s6NHxfKUkUo&t=0m42s
- ↑ https://www.energy.gov/energysaver/ductless-mini-split-air-conditioners
- ↑ https://removeandreplace.com/2018/04/19/how-to-clean-wall-mounted-split-system-air-conditioner-air-filters-coils/
- ↑ https://m.youtube.com/watch?v=s6NHxfKUkUo&t=156s
- ↑ https://www.energy.gov/energysaver/maintaining-your-air-conditioner
- ↑ https://m.youtube.com/watch?v=s6NHxfKUkUo&t=1m40s
- ↑ https://removeandreplace.com/2018/04/19/how-to-clean-wall-mounted-split-system-air-conditioner-air-filters-coils/
- ↑ https://removeandreplace.com/2018/04/19/how-to-clean-wall-mounted-split-system-air-conditioner-air-filters-coils/
- ↑ https://removeandreplace.com/2018/04/19/how-to-clean-wall-mounted-split-system-air-conditioner-air-filters-coils/
- ↑ https://www.choice.com.au/home-and-living/cooling/air-conditioners/articles/how-to-clean-your-air-conditioner
- ↑ https://removeandreplace.com/2018/04/19/how-to-clean-wall-mounted-split-system-air-conditioner-air-filters-coils/
- ↑ https://www.energy.gov/energysaver/maintaining-your-air-conditioner
- ↑ https://www.familyhandyman.com/heating-cooling/air-conditioner-repair/clean-your-air-conditioner-condenser-unit/
- ↑ https://www.familyhandyman.com/heating-cooling/air-conditioner-repair/clean-your-air-conditioner-condenser-unit/
- ↑ https://www.familyhandyman.com/heating-cooling/air-conditioner-repair/clean-your-air-conditioner-condenser-unit/
- ↑ https://www.familyhandyman.com/heating-cooling/air-conditioner-repair/clean-your-air-conditioner-condenser-unit/
About This Article

To clean a split air conditioner, place an aircon bag, which can be purchased online, around the bottom part of the AC to catch runoff. Once in position, you can spray coil cleaning spray onto the cooling fins’ surface, rotary blades, and coils. For the best clean, leave the spray on for 10-20 minutes. Finally, use a water spray to flush the unit and allow dirt to spill into the aircon bag. For help choosing a good coil cleaning spray, read on!