This article was co-authored by wikiHow staff writer, Janice Tieperman. Janice is a professional and creative writer who has worked at wikiHow since 2019. With both a B.A. and M.A. in English from East Stroudsburg University, she has a passion for writing a wide variety of content for anyone and everyone. In her free time, you can find her working on a new crochet pattern, listening to true crime podcasts, or tackling a new creative writing project.
There are 9 references cited in this article, which can be found at the bottom of the page.
This article has been viewed 20,864 times.
Learn more...
A leaky home air conditioner can make your life very inconvenient and uncomfortable. While the U.S. Department of Energy recommends that a professional technician perform repairs to your A/C unit, you can speed along the process by finding the source of the refrigerant leak ahead of time. Refrigerant is the substance in your air conditioning system that turns from liquid to gas and absorbs heat in order to cool down your home.[1] Start by locating the refrigerant lines, then use a soapy water mixture or an electronic device to figure out where the leak is. You can use a similar procedure to test your vehicle's A/C system for leaks.
Steps
Locating the Refrigerant Lines
-
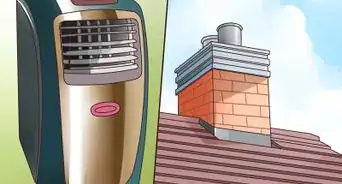
1Look behind your home to see if you have an outdoor condenser. Check outside your home and see if you can spot a large, metallic box. If you don’t see this device outside of your home, then your condenser unit is likely attached to your furnace.
- While you may be feeling the effects of a refrigerant leak on the inside of your home, the source of the leak is likely outside.
-
2Check if your unit is on top of your furnace. Find the furnace in your home and see if there is a small metal box attached to the top of it. Look to the left of the furnace and see if a large, curved section of ducting is attached to the side. If you see both of these elements attached to your furnace, then you’ve successfully located your stacked unit.
- Check your home’s schematics to double-check where your furnace is.
Advertisement -
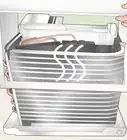
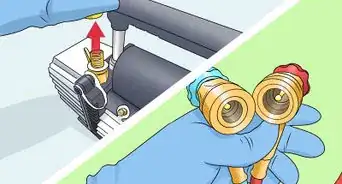
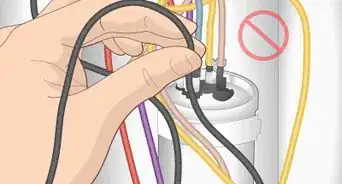
3Find the refrigerant lines in your unit. If you have a solo unit, identify the refrigerant line (or filter/dryer line) by finding a thin tube attached to a cylindrical adapter.[2] For those with a stacked condenser unit, examine the condenser box attached to the top of the furnace. Next, check the bottom right corner of this box to locate the refrigerant lines, which are a pair of thick and thin tubes.
- When you’re trying to find a leak in an outdoor unit, the filter/dryer tube is the most likely suspect.[3]
Tip: All A/C condenser units will have 2 refrigerant lines: a suction line and a liquid line. The suction line is a thicker, wider tube that holds gas. The liquid line is a narrow, thinner tube that transports liquid.


Testing with Soapy Water
-
1Fill a spray bottle with a soapy water solution. Take about 0.5 teaspoons (2.5 mL) of dish soap and add it into a water-filled spray bottle. Shake the container thoroughly or stir it with a long utensil to create a soapy water solution. Aim to use lukewarm water when preparing the mixture.[4]
- Lukewarm water is generally around 90 to 95 °F (32 to 35 °C).[5]
-
2Spray the joints of the refrigerant lines with the water. Find the places where the lines are attached to the condenser. Once you’ve located these joints, spritz over them with a few squirts of soapy water. Wait a few seconds to see if any large bubbles start foaming along these joints.[6]
- Although it’s mixed with soap, the water itself won’t be that foamy when you spray it onto the refrigerant lines. The bubbles that form around a leak are large and distinctive, like a bubble-blowing toy.
-
3Identify leaks by looking for large bubbles that form on the joints. Don’t be discouraged if you can’t find a leak at first. Keep spraying along the attachments until you spot some bubbles. A lack of bubbles might not mean a lack of refrigerant leakage—it might just mean that your leak is too small to be detected with soapy water.[7]
- Soapy water is best for finding big leaks. If you suspect that your leak is smaller, try using an electronic detector instead.
- If you think there might be a leak in the longer stretch of your refrigerant tubes, spray along the entire line.


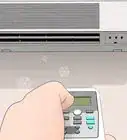
Using an Electronic Leak Detector
-
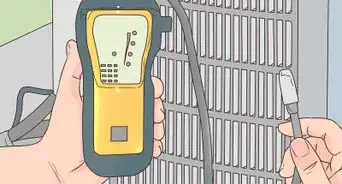
1Power on your electronic leak detector. Use the power button to turn on your device and ensure that it’s working properly. Depending on your specific detector, there might be a screen or a series of curved LED lights on the device. To test out the device, press and drag the extended probe across a flat surface, so you can see if it’s beeping and lighting up properly.[8]
- If you don’t have an electronic leak detector on hand, feel free to buy one online or find one at a hardware/home improvement store.
- These devices have a long nozzle with a sensitive tip that detects leaks and reports them to the main electronic component.
-
2Place the probe of the device at the top of the refrigerant line. Start at the end of the line, where the tube is connected to the metal cylinder or small metallic box (depending on your A/C setup). To make the process more efficient, be sure to work your way from left to right or top to bottom with the probe of the electronic detector.[9]
- Some parts of the refrigerant line may be out of reach. If the leak is in those areas, then the device won’t be able to detect it.
-
3Drag the probe slowly along the line until the device emits a long beep. Hold onto the electronic base of the device and shift the detector slowly. Keep the probe straight, and make sure that it’s always touching the refrigerant line. If the probe shifts too much, you won’t be able to get an accurate reading.[10]
- Try imitating a turtle’s pace as you pull the probe along the line.
- The device will emit a steady, short beep as it moves along, similar to a metal detector.
-
4Wait for the probe to indicate a leak by beeping and lighting up. Keep your eyes and ears open for any distinctive sounds from the device. Listen for a long, loud beep when you hit a break in the line. Additionally, see if your LED screen lights up at all.[11] Check all of the refrigerant lines until you’ve determined where the leak is.[12]


Things You’ll Need
Testing with Soapy Water
- Spray bottle
- Water
- Dish soap
Using an Electronic Leak Detector
- Electronic leak detector


References
- ↑ https://www.energy.gov/energysaver/common-air-conditioner-problems
- ↑ https://www.theacoutlet.com/documents/Installation-Guide-Rheem-RA14.pdf
- ↑ https://www.theacoutlet.com/documents/Installation-Guide-Rheem-RA14.pdf
- ↑ https://patinstitute.ca/2695-2/
- ↑ https://www.uofmhealth.org/health-library/not59770
- ↑ https://m.youtube.com/watch?v=ag-VL3Tq0Lc&t=0m46s
- ↑ https://m.youtube.com/watch?v=ag-VL3Tq0Lc&t=0m56s
- ↑ https://www.realalternatives.eu/app/images/documents/RSE_GN1_v2_110623.pdf
- ↑ https://patinstitute.ca/2695-2/