wikiHow is a “wiki,” similar to Wikipedia, which means that many of our articles are co-written by multiple authors. To create this article, volunteer authors worked to edit and improve it over time.
This article has been viewed 52,698 times.
Learn more...
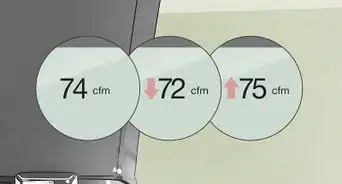
The run capacitor's job is to jump start the compressor and the fan of your air conditioning system when needed. A faulty capacitor does not do this properly. A possible sign your run capacitor has failed is that the compressor unit outside your home does not start up. It may make a humming noise in an attempt to start without ever turning on. The result is an air conditioning system that stops working. If you have the right tools and a do-it-yourself attitude, it is a relatively simple repair.
Steps
Turning Off Power to AC
-
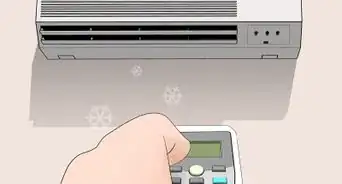
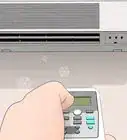
1Set the thermostat control to the off position.
-
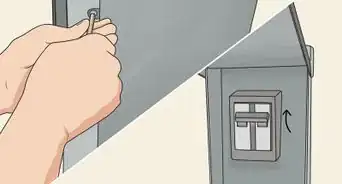
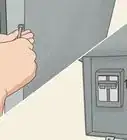
2Locate the 220v breaker box. It should be located close to your AC compressor. This feeds the unit the voltage necessary for it to run. Often you will see a cable running from this breaker box directly to the AC compressor.Advertisement
-
3Open the breaker box panel. There is a latch on the box (either on the side or bottom) that unlocks it. Once the door is in the open position, push it in slightly and it should lock in place.
-
4Remove the breaker by pulling it straight back by the handle. Set the breaker aside in a safe place.


Locating and Inspecting the Run Capacitor
-
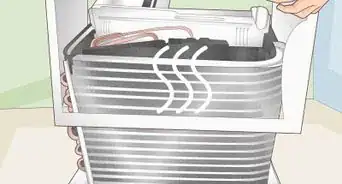
1Locate the side panel of your AC unit.
-
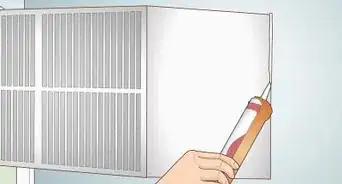
2Unscrew the bolts and remove the side panel. Use the appropriate bit with a bit driver to remove the screws. Typically there are four 5/16" hex screws that attach the side panel to the rest of the unit. Place the screws in a secure location so as not to lose any.
-
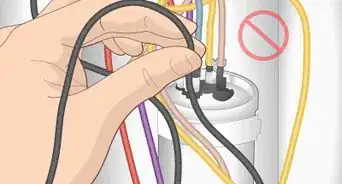
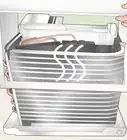
3Locate the current run capacitor but do not touch it (the capacitor must be discharged before it is safe to handle). It will have a cylindrical, canister-like shape. It will have three terminals on top. There will be colored wires coming from the AC Unit to some if not all of the terminals on the capacitor.
-
4Inspect run capacitor to see if it needs to be replaced. The top of the run capacitor should be perfectly flat. If you see that the top side is bulging upwards in any way, it needs to be replaced. If this is not the case, a faulty capacitor may not be the source of the issue. You may need to contact your local HVAC professional.
-
5Take note of what color wires are attached to each terminal on the capacitor. The three terminals on the capacitor are labeled HERM, FAN, and C. Take a picture with your smart phone to record how everything is installed to make sure the new capacitor is connected in the same way. Jotting down these details on a piece of paper will also work.


Discharging and Removing the Old Capacitor
-
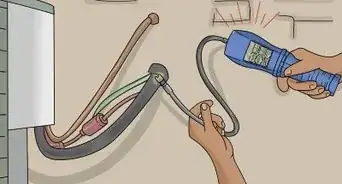
1Put on proper work gloves and eye protection. Inspect your insulated flat-head screwdriver. A properly insulated screw driver should have an entirely rubber handle. Ensure the handle has no exposed metal parts or cracks.
-
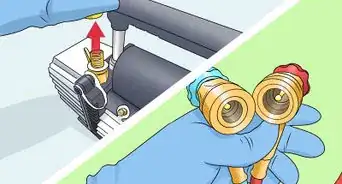
2Discharge the capacitor. To do this you are going to create a bridge between the C terminal and the HERM/FAN terminals, one at a time, using the metal part of the screwdriver. Ensure you are not touching anything metal. With the metal part of the screwdriver, touch a metal prong on the C terminal AND another from the HERM terminal at the same time, creating a bridge between the two. This may produce a shock. Do this two more times to ensure the terminals were completely discharged. Do the same to the C and FAN terminals.
-
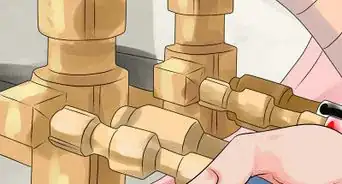
3Remove the curved metal bracket holding the capacitor in place. Use the appropriate bit and the bit driver to remove the screws. These are typically two 1/4" hex screws but this may vary. Set the screws and the bracket in a secure location.
-
4Disconnect the wires from the capacitor. To be safe, always treat the capacitor terminals as live terminals. Remove the old capacitor.


Installing the New Capacitor
-
1Purchase the appropriate capacitor for your AC unit. They can be purchased at your local HVAC Supply Store or they can also be purchased online through Amazon, eBay, etc... The simplest way to make sure you buy the correct one is to order the same model number from the same manufacturer. There are occasions where another brand might be more affordable. In this case you want to make sure to match the specifications on the old capacitor.
-
2Connect the new capacitor in the same location where the old capacitor was. Attach the appropriately colored wires according to how they were placed on the old capacitor.
-
3Reattach the curved metal bracket to secure the capacitor.
-
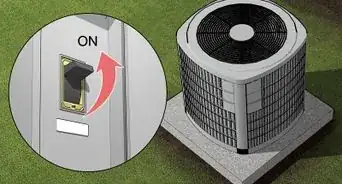
4Test the new capacitor. Plug the 220v breaker back in the ON position. Turn on the thermostat to cool. The AC unit should turn on within the next two to three minutes. Verify the unit is working properly. Do not attempt to reattached the AC unit's side panel while there is power running through it.
-
5Turn off power to the AC unit by turning off the thermostat and removing the 220v breaker again. Put the AC panel cover back on and secure it with the appropriate screws. Plug the 220v breaker back in and set the thermostat to cool. The repair is complete!

Community Q&A
-
QuestionIt's not clear whether you discharge the capacitor with the wires attached or after you disconnect them?
 Community AnswerDischarge it after the wires are off. This will ensure that no wires nor other components get damaged.
Warnings
- Capacitors may still hold a charge even after power has been turned off to the unit. Be sure to follow the steps to discharge the capacitor before handling.⧼thumbs_response⧽
- AC units and capacitors can contain high voltage. Observe all safety precautions. If you do not feel comfortable working with electrical devices, call your local HVAC professional.⧼thumbs_response⧽
- Do not begin any work until you have turned off the power to the AC unit.⧼thumbs_response⧽
- Always wear gloves and eye protection.⧼thumbs_response⧽
Things You'll Need
- Eye protection
- Gloves
- Bit driver
- Insulated flat-head screwdriver
- Replacement capacitor