X
This article was co-authored by wikiHow staff writer, Jack Lloyd. Jack Lloyd is a Technology Writer and Editor for wikiHow. He has over two years of experience writing and editing technology-related articles. He is technology enthusiast and an English teacher.
The wikiHow Tech Team also followed the article's instructions and verified that they work.
This article has been viewed 270,917 times.
Learn more...
This wikiHow teaches you how to delete cached files from your Mac's Calendar app. This will solve problems such as a slow or unresponsive calendar, but it may also wipe your calendar's data; as such, you'll begin the process of clearing your calendar's cache by backing up your existing calendars.
Steps
Part 1
Part 1 of 3:
Preparing to Clear the Cache
-
1Open the Calendar app. Double-click the calendar icon in your Mac's Dock.
-
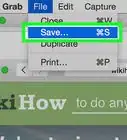
2Back up your calendar's data. If you have multiple calendars synced to different accounts, you'll need to back those up, too. To do so:[1]
- Click File
- Select Export
- Click Calendar Archive
- Select a save location.
Advertisement -
3Try removing and re-adding the account. You may be able to solve your calendar problem by removing the calendar account from your computer and then adding it back. To do so:
- Click the Apple Menu
- Click System Preferences
- Click Internet Accounts
- Select the calendar's account.
- Click -
- Restart your Mac
- Go back to the Internet Accounts page.
- Select an account provider (e.g., Outlook).
- Enter your account's email address and password.
-
4Close and re-open your Calendar. If the problem was fixed, your account simply needed a refresh. If not, continue to the next step.
-
5Double-check your backups before clearing your cache. There is a decent chance that your calendars' contents will be completely deleted if you clear your cache, so make absolutely sure that you have a backup file for each of your calendars. Only proceed after you are certain that you won't lose anything important.
-
6Close your Calendar app. You are now ready to proceed with clearing your calendar's cache.


Advertisement
Part 2
Part 2 of 3:
Clearing the Cache
-
1Open Finder. Click the blue, face-shaped app in the Dock.
-
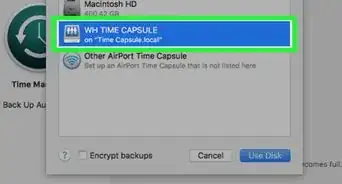
2Select your Mac's hard drive. It's on the left side of the Finder window, just below the "Devices" heading.
-
3Double-click the Macintosh HD folder. You should see this option near the top of the Finder window.
-
4Double-click the Users folder. This will open the Users folder.
-
5Double-click the folder with your name on it. This is the personal user folder.
-
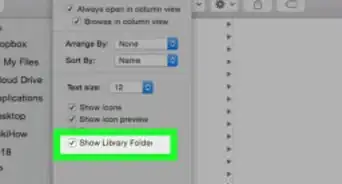
6Press ⌘ Command+⇧ Shift+.. Doing so prompts the hidden folders that are in your personal user folder to display. One such folder is the Library folder.
-
7Double-click the Library folder. It's in the middle of the personal user folder.
-
8Double-click the Calendars folder. This folder is in the middle of the Library folder.
-
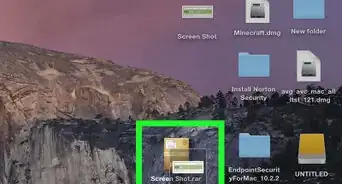
9Delete any cache files in this folder. There may be several files with "Cache" in their title; select each cache file by holding ⌘ Command and clicking them, then click File and click Move to Trash.
- These cache files are often named things like com.apple.cal.
-
10Click the Trash icon. It's a waste basket-shaped icon in the Dock. A pop-up menu will appear.
-
11Click Empty Trash…. This option is in the pop-up menu.
-
12Click Empty Trash when prompted. Doing so will most likely trigger an error message that says "The operation can't be completed because the item '[cache file name]' is in use", meaning you'll need to force-quit the Calendar background process and then empty Trash again.
- If you don't see any error messages pop up, your Calendar app's cache has successfully been cleared.


Advertisement
Part 3
Part 3 of 3:
Force-Quitting Calendar
-
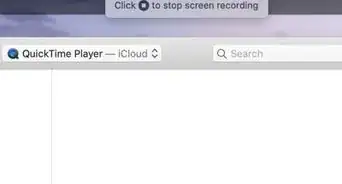
1Click Continue on the error window. You may have to do this for several errors depending on how many files you tried to delete.
-
2
-
3Type activity monitor into Spotlight. Doing so searches your Mac for the Activity Monitor app, which is a program that allows you to monitor and halt background processes.
-
4Click Activity Monitor. It's a black box with green lines on it. You should see it near the top of the Spotlight drop-down menu.
-
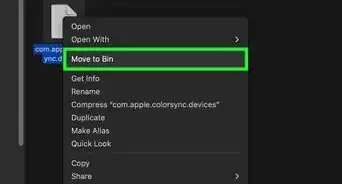
5Double-click the "CalendarAgent" entry. This is the Calendar background process. It will open.
-
6Click Quit. It's in the bottom-right side of the Calendar window.
-
7Click Force Quit when prompted. Doing so will prevent the Calendar background process from running, meaning that you can delete the cache files without interference.
- You may not see the "CalendarAgent" entry disappear from the Activity Manager when you click Force Quit.
-
8Empty the Trash. Click the Trash Can icon, click Empty Trash..., and click Empty Trash when prompted. You shouldn't experience any errors this time, meaning that your calendar's cached files will be deleted. You have successfully cleared your Mac's Calendar app's cache.


Advertisement


About This Article
Jack Lloyd
wikiHow Technology Writer
This article was co-authored by wikiHow staff writer, Jack Lloyd. Jack Lloyd is a Technology Writer and Editor for wikiHow. He has over two years of experience writing and editing technology-related articles. He is technology enthusiast and an English teacher. This article has been viewed 270,917 times.
How helpful is this?
Co-authors: 15
Updated: March 29, 2019
Views: 270,917
Categories: Featured Articles | Mac OS X
Advertisement