This article was co-authored by Stan Kats and by wikiHow staff writer, Rain Kengly. Stan Kats is a Professional Technologist and the COO and Chief Technologist for The STG IT Consulting Group in West Hollywood, California. Stan provides comprehensive technology solutions to businesses through managed IT services, and for individuals through his consumer service business, Stan's Tech Garage. Stan holds a BA in International Relations from The University of Southern California. He began his career working in the Fortune 500 IT world. Stan founded his companies to offer an enterprise-level of expertise for small businesses and individuals.
The wikiHow Tech Team also followed the article's instructions and verified that they work.
This article has been viewed 338,046 times.
Your router is the backbone of your home network. Configuring your router will let you access and change your Wi-Fi settings. Properly configuring your router will protect your information from prying eyes, securely connect all of the devices in your home to the internet, and even keep your children from looking at things they’re not supposed to. This wikiHow will show you how to connect to your router and configure its settings to better control your network using your Windows or Mac computer.
Things You Should Know
- When connecting to the router configuration page, you'll need to know your router's address, username, and password.
- Set up a static IP address using DHCP settings. Enable port forwarding to attach a direct link between your network and your device.
- Use the Block Sites menu to limit other users sharing the Wi-Fi network.
Steps
Connecting to the Router
-
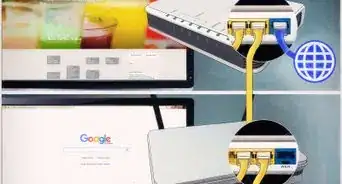
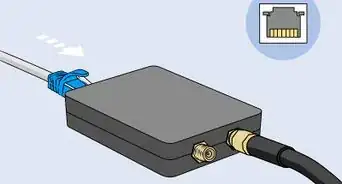
1Connect your router to your computer and your modem. Use Ethernet cables to connect your modem to the WAN/WLAN/Internet port on your router, and connect your computer to the “1”, “2”, “3”, or “4” port on the router.
- Shopping for a new router or modem? Check out our coupon site for Staples discounts or our coupon site for Office Depot.
-
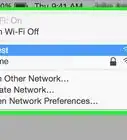
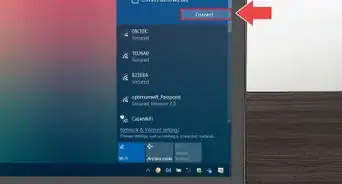
2Open a web browser. Your router’s configuration page can be accessed by any computer that is connected to the same network. When configuring your router, you will have the best results if you connect with a computer that is wired to the router with an Ethernet cable.
- You can use use Google Chrome, Safari, Mozilla Firefox, or another web browser.
Advertisement -
3Enter in your router’s address. Routers are accessed through your web browser by entering the IP address into the address bar. The IP address varies a bit by manufacturer, but most are the same or very close. These are some of the more popular manufacturers and the associated addresses:
- Linksys: http://192.168.1.1
- Xfinity: http://10.0.0.1/
- 3Com: http://192.168.1.1
- D-Link: http://192.168.0.1
- Belkin - http://192.168.2.1
- Netgear - http://192.168.1.1
- Arris - http://10.0.0.1
- Most routers have their default address printed in the documentation or on a sticker on the router itself. You can also look it up online on the manufacturer’s website or if the given router's address doesn't work for you then you can simply reset your router to its default state. [1]
- If needed, you can find your router's IP address.
-
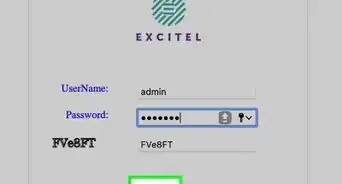
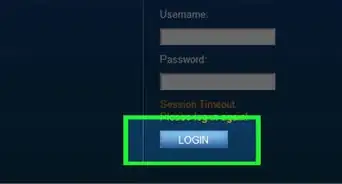
4Enter in your username and password. Before you access the configuration page, you’ll be asked for a username and password.[2] Most routers will come with a default username/password combo, while some allow you to proceed without entering anything.
- Your router’s documentation will tell you the default username and password required. They may also be printed on the router itself.
- “admin” is one of the most common default usernames.
- “admin” or “password” are two of the most common passwords.
-
5Reset your router if you can’t access it. If you’ve looked up your default address and username/password combo and you still can’t access your router, you can reset it to factory defaults to clear out any changes that may have been made. This is useful for secondhand routers or old changes that you can’t remember.
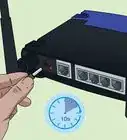
- You can reset your router by pressing the Reset button on it. This button is usually small and recessed, and can only be reached by a paper clip. Some routers have a button that can be pressed more easily.[3]
- You'll know the router is reset once you see the lights flashing.[4]
- After pressing the reset button, wait 30-60 seconds and then try entering the router’s address and username/password combination again.
-
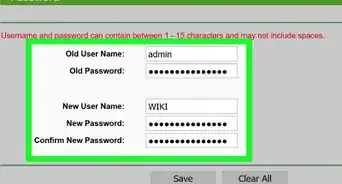
6Assign the router a new username and password. Leaving your router with the default username and password is very insecure, and you should change it immediately after setting it up. You can usually find this in the Administration section of the router configuration.
- Choose a username and password that can’t be easily guessed. Include numbers and symbols to create a secure password.
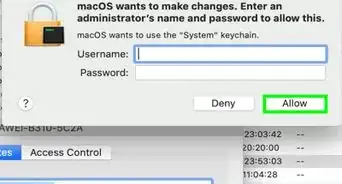
- Routers connected to services, such as Xfinity, may require you to log into a mobile app to manage more settings. If you don't see more options, head to your internet provider's main website to download their mobile app.[5]


Setting up a Wireless Network
-
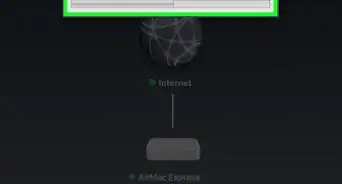
1Check your Internet settings. In the Internet, Setup, or Home menu of your router, check that your Internet IP address, DCHP, and DNS settings are all set. These should typically be set to automatic unless your service provider informs you otherwise.
- Many routers will provide a test button on the Internet menu page. Click it to check if your internet settings are configured correctly.
- With routers connected to services, such as Xfinity, you'll need to use their respective app to make changes to your account.
-
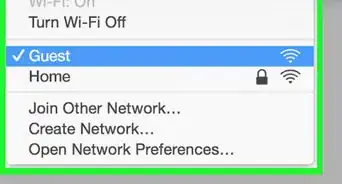
2Open the Wireless settings. This menu may be called Wireless, Wireless Settings, Basic Setup, or something similar. This page will display your wireless SSID, channel, encryption, and other settings.
-
3Name your network. Find the field labeled SSID. This is the name of your network, and it will appear in the list of available networks for your wireless devices. Be sure to not put any personal information in your network name, as the name will be public.
- Make sure that the “Enable SSID Broadcast” box is checked.
- The Channel should be set to Auto. If you have a lot of wireless networks in your area, your router will automatically move the network to a clean channel.
-
4Choose your wireless encryption. This can also be called the Security Options. Here you’ll be able to choose which method you want to use to encrypt your network traffic. The options for most routers are WEP, WPA-PSK, and WPA2-PSK.
- WPA2 is the most secure mode of encryption, and you should use it if all of your devices support it. Only older devices do not support WPA2.
-
5Choose a passphrase. The passphrase is what you enter when a device connects to your network. A strong passphrase will help protect your network from unwanted intruders. You should always have a passphrase for your network.[6]
-
6Apply your settings. Once you have chosen your SSID, encryption type, and passphrase, click the Apply or Save button to start your wireless network. Your router will process for a few seconds, and then your wireless network will be detectable by your wireless devices.[7]
- If you need to change your Wi-Fi passphrase, you can repeat the steps above to input a new one. You will need to know the current passphrase to change it. Otherwise, you'll need to reset your router.


Setting up a Static IP Address
-
1Access the router settings. Use the steps in Connecting to a Router to access your router's admin page.
-
2Locate the router's DHCP settings. This could look like Client List, DHCP Pool, DHCP Reservation, or something similar.
- This section will list the devices currently connected to your router, along with their IP addresses.
-
3Reserve an IP address. You'll need to assign an IP to the device for the router to use by default. Depending on the router, you'll be able to select from a list of IP addresses, or you can click a button that says Reserve or Add.
- If you want to revert back to DHCP, you'll need to select Automatic (DHCP) within the IP address setting.


Forwarding Ports
-
1Locate the Port Forwarding menu. This may also look like: Port Triggering, Applications & Gaming, Port Range Forwarding, or similar. This can usually be found in the Advanced section of the router’s configuration page.[8]
-
2Add a new service or rule. Click the button to add a custom service. This will open a form where you can enter the port forwarding information.
- Name/Service Name – This is the name of the program you are port forwarding for. The name is only for you to easily recognize it in a list.
- Protocol – Your options are TCP, UDP, and TCP/UDP. Refer to the program you are forwarding the port for to see what option you should choose.
- External Starting Port – This is the first port in the range of ports that you want to open.
- External Ending Port – This is the last port in the range of ports that you want to open. If you are only opening one port, enter the same port into this field.
- Check the box that uses the same port range for the Internal ports or fill out the same information for the Internal port fields.
- Internal IP address – This is the IP address for the computer that you want to open the port for. You can find the IP address for your PC or Mac computer.
-
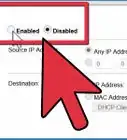
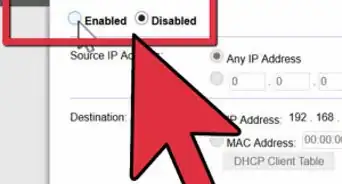
3Check the "Enable" box. Each line with port forwarding rules has its own Enabled box. Check the box for each line you want to enable.
-
4Save or Apply the rule. Your router will process for a few moments, and then the changes will be applied. Your program will now be able to access the open port for the computer you specified.


Blocking Apps and Websites
-
1Open the Block Sites menu. This can be found in the Security or Parental Controls section of the configuration menu. You can block sites from being accessed by any device on your network, though you can allow specific devices to access them. You can also set a schedule for the blocks, which is especially useful for homework time or when you need to focus on work.
- Blocking specific websites or keywords can benefit those who want to limit the user's activity.
-
2Add a site to the block list. Your options will change depending on the router you are using. Some routers allow you to block keywords as well as specific sites. Add what you want to block to the list.
-
3Allow trusted computers to view blocked sites. You can check a box to allow trusted IP addresses to view blocked sites. This can be useful for parents who still want access to the sites that they’ve blocked for their kids.
- Once you’ve checked the box, add it the IP addresses you want to bypass the blocks.
-
4Set your block schedule. This may be in a separate menu from the block list. You can select which days of the week you want the block to take effect, as well as the time of day that it is implemented. Once you are done, click the Apply button.


Expert Q&A
-
QuestionWhere do you go to configure your router?
 Stan KatsStan Kats is a Professional Technologist and the COO and Chief Technologist for The STG IT Consulting Group in West Hollywood, California. Stan provides comprehensive technology solutions to businesses through managed IT services, and for individuals through his consumer service business, Stan's Tech Garage. Stan holds a BA in International Relations from The University of Southern California. He began his career working in the Fortune 500 IT world. Stan founded his companies to offer an enterprise-level of expertise for small businesses and individuals.
Professional TechnologistGo to the online configuration interface by typing your device's IP address into an internet browser. -
QuestionWhat is the MAC IP address?
 Allan CramerCommunity AnswerThe MAC address is a device's unique personal ID code. With this you can track devices all the way back to when and where they were made. The IP address is generally a unique access code to access the internet; a "driveway" onto the "road" that is the internet, if you will. With this, it is a way for internet providers to communicate with servers to trace any data relevant to you, back to you.
 -
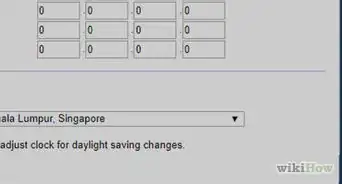
QuestionWhy do I need to change the region to my location when setting up my wireless router?
 Minh VuCommunity AnswerRegions determine channels that the router broadcast and sometimes your devices cannot pick up a channel broadcasted by other regions setting.


References
- ↑ https://routerify.com/router-default-username-password/
- ↑ Stan Kats. Cybersecurity Expert. Expert Interview. 24 June 2021.
- ↑ Stan Kats. Cybersecurity Expert. Expert Interview. 24 June 2021.
- ↑ Stan Kats. Cybersecurity Expert. Expert Interview. 24 June 2021.
- ↑ https://www.xfinity.com/support/articles/view-change-wifi-password
- ↑ Stan Kats. Cybersecurity Expert. Expert Interview. 24 June 2021.
- ↑ http://www.dummies.com/how-to/content/configure-a-router.html
- ↑ https://nordvpn.com/blog/open-ports-on-router/
About This Article

1. Connect the router to the modem.
2. Connect the computer to the router.
3. Go to the router’s default IP address in a browser.
4. Sign in with the default username and password.
5. Open the Wireless settings.
6. Name your network.
7. Set an encryption type and passphrase.
8. Save your changes.