This article was co-authored by wikiHow staff writer, Travis Boylls. Travis Boylls is a Technology Writer and Editor for wikiHow. Travis has experience writing technology-related articles, providing software customer service, and in graphic design. He specializes in Windows, macOS, Android, iOS, and Linux platforms. He studied graphic design at Pikes Peak Community College.
There are 8 references cited in this article, which can be found at the bottom of the page.
This article has been viewed 530,396 times.
Learn more...
Connecting two laptops through a LAN (Local Area Network) is a great way to quickly transfer data between two computers. You can transfer data between two laptops over a LAN using Mac or PC using an Ethernet cable or wireless connection. This wikiHow teaches you how to share and access files and folders over a Local Area Network on Mac and PC.
Steps
Sharing Files and Folders Through a LAN on Windows 10
-
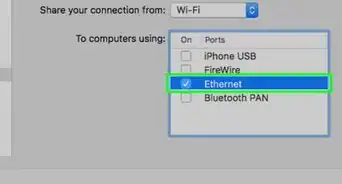
1Connect both laptops to your network. You can connect both laptops using a wireless connection, or you can connect both laptops to a LAN port on your modem or router using an Ethernet cable.
-
2Open the Control Panel. Use the laptop that has files or folders you want to share. Use the following steps to open the Control Panel:
- Click the Windows Start button in the lower-left corner.
- Type "Control Panel".
- Click Control Panel.
Advertisement -
3Type Network in the search bar. It's in the upper-right corner of the Control Panel window. This displays various network settings options.
-
4Click Network and Sharing Center. It's the green header at the top of your network settings.
-
5Click Change advanced sharing settings. It's in the sidebar to the left.
-
6Ensure Network Discovery and Printer and File Sharing is enabled. To turn on Network Discovery and Printer and File sharing is turned on, click the radio button next to "Turn on network discovery" and "Turn on printer and file sharing." These options are below "Private" and "Guest or Public (current profile)."
-
7Click Save Changes. It's at the bottom of the Control Panel window. This saves your settings changes.
-
8
-
9Navigate to a file or folder you want to share. You can share files and folders with other computers on your network. Use File Explorer to navigate to a file or folder you want to share. You can click the Quick Access folders in the menu to the left, or click a folder in the main window.
-
10Right-click a file or folder you want to share. This displays a menu to the right of the file or folder.
-
11Click Give access to. It's in the menu that pops up when you right-click a file or folder. This displays a sub-menu to the side.
-
12Click Specific people. It's at the bottom of the sub-menu next to "Give access to". This displays the Network Access menu.
-
13Click Share. It's at the bottom of the Network Access menu. This shares the file or folder across your network and displays the network address for the folder.


-
1Connect both laptops to your network. You can connect both laptops using a wireless connection, or you can connect both laptops to a LAN port on your modem or router using an Ethernet cable.
-
2
-
3Click Network. It's at the bottom of File Explorer in the menu bar to the left. This displays shared files and folders on the network.
-
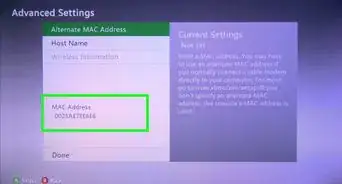
4Enter the network address for the computer you want to access. The computer's network address should be \\[computer name]. Replace "[computer name]" with the name of the computer you want to access. It can be a Mac or Windows computer.
- The computer you are trying to access must be powered on, logged in to and connected to the network.
-
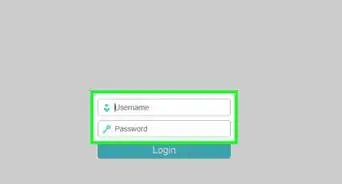
5Enter the username and password and press ↵ Enter. You'll need to enter the username and password for the computer you want to access. Then you should see all shared files and folders from the other computer.


Sharing Files and Folders Over a LAN on Mac
-
1Connect both laptops to your network. You can connect both laptops using a wireless connection, or you can connect both laptops to a LAN port on your modem or router using an Ethernet cable.
-
2
-
3Click System Preferences…. It's in the second option in the Apple Menu. This opens the System Preferences window.
-
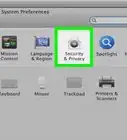
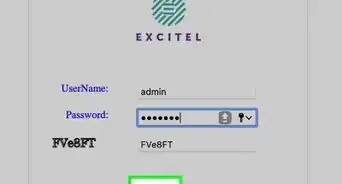
4Click Sharing. It has an icon that resembles a blue folder with a crosswalk sign on the front.
-
5
-
6Click File Sharing. It's the same option in the box on the left that you just checked. This displays the File Sharing options.
-
7Click + below the "Shared Folders" box. This box displays all folders you have shared over the network. Click the Plus sign (+) at the bottom to add new folders.
-
8Select a folder. You can click any of the "Favorites" folders in the sidebar to the left, or any folder in the Finder window.
-
9Click Add. It's in the lower-right corner of the window. This adds the folder to your list of shared folders, which can be accessed over the LAN.


-
1Connect both laptops to your network. You can connect both laptops using a wireless connection, or you can connect both laptops to a LAN port on your modem or router using an Ethernet cable.
-
2
-
3Click Go. It's in the menu bar at the top of the screen when you have the Finder open.
-
4Click Connect to Server…. It's at the bottom of the drop-down menu below "Go".
-
5Enter the network address for the computer you want to access. The network address for a shared computer is usually smb://[computer name]. Replace "[computer name]" with the actual name of the computer you want to access. This can be a Mac or Windows computer.
-
6Click Connect. It's in the lower-left corner of the "Connect to Server" window.
-
7Enter the username and password for the computer you want to access. After your Mac is able to establish a connection with the other computer, enter the username and password you use to log in to that computer. You can then access the Shared files and Folders in the Finder under "Shared" in the menu bar to the left.
- If you are trying to access a Windows computer, enter the email address and password for user's Microsoft account. [1]
- Make sure the other computer you are trying to access is powered on and logged into (not sleeping).


Sharing Files and Folders Over a LAN on Windows 8 and Below
-
1Connect both laptops to your network. You can connect both laptops using a wireless connection, or you can connect both laptops to a LAN port on your modem or router using an Ethernet cable.
-
2Open your Control Panel. Use the following steps to open the Control Panel.
- Click the Windows Start button in the lower-left corner.
- Type "Control Panel".
- Click Control Panel.
-
3Type Homegroup in the search bar. It's in the upper-right corner of the Control Panel.
-
4Click the HomeGroup header. It's the green header next to an icon that resembles a blue and green molecule.
- Homegroup is no longer available on Windows 10.
-
5Click Create a homegroup. It's the button in the bottom right of the window.
- Note that the button will only be enabled if you are not currently in a HomeGroup. If you are, leave your current HomeGroup.
-
6Click Next on the first screen of the window that pops up. The first screen will just tell you what a HomeGroup does.
-
7Choose what sorts of files you want to share with other computers. Use the drop-down menus to select "Shared" next to the file types you want to share. You will be able to choose from: Pictures, Documents, Music, Printers, and Videos. Depending on your needs, select or deselect the file types.
-
8Click Next. It's in the lower-right corner of the screen.
-
9Write down the password. It's at the top of the screen. This will be the password that other devices will need to enter in order to connect to the HomeGroup. Then, click finish.


-
1Connect both laptops to your network. You can connect both laptops using a wireless connection, or you can connect both laptops to a LAN port on your modem or router using an Ethernet cable.
-
2Open the Control Panel. Use the laptop that has files or folders you want to share with a second laptop. Use the following steps to open the Control Panel:
- Click the Windows Start button in the lower-left corner.
- Type "Control Panel".
- Click Control Panel.
-
3Type Homegroup in the search bar. It's in the upper-right corner of the Control Panel.
-
4Click HomeGroup header. It's the green header next to an icon that resembles a blue and green molecule.
- HomeGroup is no longer available on Windows 10.
-
5Click Join now. A new HomeGroup displayed on the HomeGroup window. Click the new HomeGroup and click Join Homegroup in the lower-right corner.
-
6Enter the password when prompted. Use the password that was displayed on the first computer.
- You can now use the drop-down menus to select which file types you want to share on the HomeGroup network.
-
7
-
8Click HomeGroup. It's in File Explorer. This displays user accounts that are part of the HomeGroup network.[2]
-
9Click a username. This is the Windows username for the person you want to access across the network. This displays the shared files and folders the user has shared across the network.
-
10Double-click the file or folder you want to access. This allows you to access the shared file across the local area network.


Connecting Two Connected Laptops to the Same Network
-
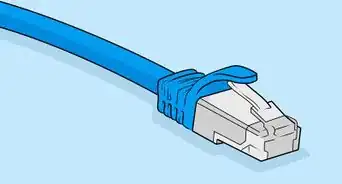
1Obtain a network crossover cable. This is a type of Ethernet cable used for connecting two computers to one another. If you have an older computer, you must use a crossover cable. A regular Ethernet cable will not work on older computers. There is no aesthetic difference between the two cables. Ask your store representative to find you a cross over cable just to be safe.
-
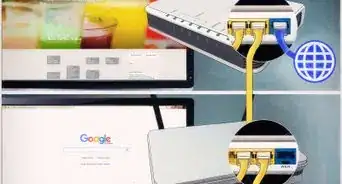
2Plug each end of the cable into a network port of each laptop. The network port is what you connect your Ethernet cable to usually. The cable will click when successfully connected to the network port.
- Note that some newer laptops do not have a network port. Some laptop manufacturers have decided not to include a network port so that the laptop is thinner or lighter. If this is the case, you will need to connect your laptops to a wireless network.
-
3Navigate to your Control Panel on both computers. Use the following steps to open the Control Panel:
- Click the Windows Start button in the lower-left corner.
- Type "Control Panel".
- Click Control Panel.
-
4Type System in the search bar on both computers. The search bar is in the upper-right corner of the Control Panel.
-
5Click the System header. It's the green header next to an icon that resembles a computer screen. You should see information about your computer such as Manufacturer, Model, etc.
-
6Scroll down and click Change Settings. It's on the right side of the screen below "Computer name, domain, and workgroup settings." A new window should pop up titled "System Properties."
-
7Click Change. It's at the bottom of the "System Properties" window. This displays the computer name and workgroup name.
-
8Enter in the same name for the workgroup on both PCs. It does not matter what the name is, as long as both computers use the same workgroup name.
-
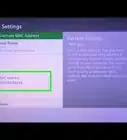
9Type Network in the Control Panel search bar on both laptops. It's in the upper-right corner of the Control Panel.
- For Windows 7, Vista, and XP Users: Open up "Network Settings" directly from your Control Panel. Search for it in the search box in the upper right corner of the window.
-
10Click View Network Connections. It's below the "Network and Sharing Center" header in the Control Panel.
-
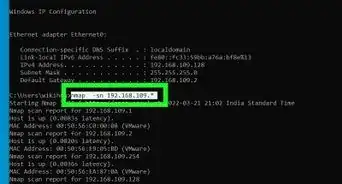
11Right-click Ethernet. It's in your "Network Connections" window. There may be multiple "Ethernet" options. Right-click the one that does not have a red "x" in the lower-left corner of the icon next to it.
-
12Click Properties. It's at the bottom of the menu that appears when you right-click "Ethernet".
-
13Select Internet Protocol Version 4 (TCP/IPv4) and click Properties. You can find "Internet Protocol Version 4 (TCP/IPv4)" in the list of items. Click it to select it, and then click Properties below the list of items.
-
14Click on the "Use the following IP address" option. This will allow you to manually enter an address.
-
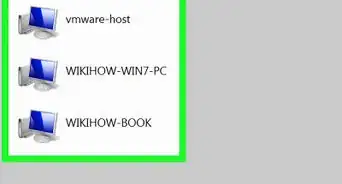
15Enter in these values for each PC: Use the fields below "Use the following IP address" to enter the following on both computers. It's is important that the last number for the IP address is different for both computers.
-
PC 1
- IP Address: 192.168.0.1
- Subnet Mask: 255.255.255.0
- Default Gateway: This field blank
-
PC 2
- IP Address: 192.168.0.2
- Subnet Mask: 255.255.255.0
- Default Gateway: Leave this field blank.
-
PC 1
-
16Click "OK" to apply the settings. You should now be able to share files across two computers over your connected LAN cable. You might need to restart each computer for the changes to take effect.[3]


Community Q&A
-
QuestionHow can I "screenshare"?This depends on the software you're using. If you're already using some communication software like Skype or Discord, you can find the option somewhere in the program. Otherwise, you can use online meeting software like Skype or join.me. Both these and many other communication software have a "screensharing" feature. To guide you in how to screenshare with a specific program, we would need to know which program you are using. They're all different.
-
QuestionWhy can I not turn on my laptop's bluetooth?
 Community AnswerTry to install drivers for your operating system for the bluetooth, or the button maybe stuck or broken.
 -
QuestionHow do I connect laptops wirelessly?
 Community AnswerWhile you could set up an ad-hoc peer-to-peer network between them, the easiest way is to connect them both through the same wireless access point/router and share resources over the network.
-Step-26-Version-2.webp)


References
- ↑ https://support.apple.com/en-us/HT204445#targetText=To%20enable%20File%20Sharing%20on,computer%20on%20the%20local%20network.
- ↑ https://support.microsoft.com/en-us/help/17145/windows-homegroup-from-start-to-finish
- ↑ https://www.maketecheasier.com/connect-two-windows-computer-on-lan/
- http://classroom.synonym.com/connect-two-laptops-using-wireless-lan-10391.html
- http://www.online-tech-tips.com/computer-tips/how-to-connect-two-computers-or-laptops-wirelessly/
- http://ccm.net/forum/affich-25120-how-to-connect-two-laptops-using-lan-cable
- http://ccm.net/faq/6340-connecting-two-pcs-using-a-crossover-ethernet-cable
- http://answers.microsoft.com/en-us/windows/forum/windows_8-networking/how-to-transfer-data-between-two-laptops-using-lan/7d95a049-07b8-47d3-8bb2-322c928d648e?auth=1
About This Article

1. Open the Control Panel in the Windows Start menu on the first computer.
2. Search "Network" and click Network Sharing Center.
3. Click Change advanced sharing options.
4. Ensure "Network Discovery" and "Printer and File Sharing" is enabled.
5. Open File Explorer and right-click a file or folder you want to share.
6. Click Give access to followed by Specific People.
7. Click Share.
8. Open File Explorer on a second laptop.
9. Click Network.
10. Enter "\\[computer name]" in the address bar at the top.
11. Enter the username and password for the computer you want to access.