This article was co-authored by wikiHow staff writer, Darlene Antonelli, MA. Darlene Antonelli is a Technology Writer and Editor for wikiHow. Darlene has experience teaching college courses, writing technology-related articles, and working hands-on in the technology field. She earned an MA in Writing from Rowan University in 2012 and wrote her thesis on online communities and the personalities curated in such communities.
This article has been viewed 82,818 times.
Learn more...
Discord is a popular chatting program that’s highly used and favored by gamers. Users can create their own Discord channels for free and invite people to join them. Some people use Bots in Discord to keep music playing, greet new people in the channel, and so much more. This wikiHow will show you how to create a bot for Discord. You'll need to be at least a little familiar with coding since Javascript is what makes the bot work.
Steps
Preparing Your Computer
-
1Download Node.js from https://nodejs.org/en/download/. Node.js is a free JavaScript runtime that you’ll need to make your bot. You can pick either the Windows or macOS installer as well as which version. The LTS version is recommended for this process.
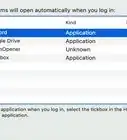
- Ideally you should have a server OS installed on your computer Windows Server, Ubuntu Server, or macOS server. You can also host your bot on Azure, AWS, or Google Cloud.
-
2Run the installer. A Windows computer just needs to click on the downloaded file to launch the installer, but a macOS computer needs to unpack the file to find the installer application. Make sure you read any and all agreements as you go through the installer.Advertisement
-
3Create a Discord account (optional). If you don’t already have a Discord account, you sign up for one at https://discord.com/.
-
4Login to your Discord account and channel. Open the Discord app on your computer and navigate to the channel you want your bot in.


Creating the Bot on Discord
-
1Go to https://discord.com/developers/applications/me in a web browser. You should be logged in already through the app, but log in again if you are prompted. In this part, you'll be creating an app that activates the bot, so you'll be creating an app as well as a bot.
-
2Click the blue New Application button. You’ll see this to the right side of the browser. A window will pop up for your app’s name.
- Type in the application's name and click “Create.” You'll want to create a name that is descriptive, like "Greeterbot" if your app bot greets people. However, "Greeterbot" will most likely trigger errors later on because it's a popular name, so add a series of numbers after the name, like "Greeterbot38764165441."
-
3Click Bot in the left-hand menu. This is also the jigsaw puzzle piece icon.
-
4Click Add Bot. This is under the “Build-A-Bot” header.
- Click “Yes, do it!” in the pop-up to confirm your action.
- If you get an error about the name being too popular, go to the application page and change the app name. For example, “Music Bot” was too popular, so adding a few numbers to the end of the app helped.
-
5Click Click to Reveal Token. You’ll see this in the information area of your bot. When you click that text, you see a string of letters and numbers.
- Click “Copy” to copy all that text. You can paste it on a sticky note somewhere, but make sure you have access to that code and don’t give it out to anyone. Whoever has that code can control the bot. This code will always be here if you need it.


Sending the Bot to the Discord Server/Channel
-
1Click General Information. This is in the menu on the left.
-
2Click Copy under Client ID. You'll see this around the middle of the web page.
-
3Paste your copied ClientID into the following URL: “https://discord.com/oauth2/authorize?&client_id=CLIENTID&scope=bot&permissions=8”
- For example, if your ClientID was 000000000000000001, your URL would look like this: https://discord.com/oauth2/authorize?&client_id=000000000000000001&scope=bot&permissions=8
-
4Paste your URL into the address bar on your web browser. You’ll be taken to a page where you can assign your bot to a channel.
- Click the drop-down box to display all your compatible channels.
- Click “Authorize” to continue. You’ll get a confirmation that the bot was moved and that you can close the active tab.


Coding the Bot
-
1Create a folder on your desktop for your bot code. You’ll be making files of code that will go in here.
- This code was provided by https://www.digitaltrends.com/gaming/how-to-make-a-discord-bot/.
- You can search the internet for bot codes you want, like ones that play music constantly. This wikiHow uses a code sample for a bot that responds to any text starting with "!"
-
2Open a text editor. You can use the default programs like Notepad for Windows or TextEdit for Mac.
-
3Type the following code:
- Make sure you enter that Bot Token number you got from the previous steps between the quotation marks in the text.
{
“token”: “Your Bot Token”
}
-
4Save the file as “auth.json”. Make sure the file doesn’t save with a .txt file extension.
-
5Start a new document. You can do this by either pressing Ctrl+N (Windows), or ⌘ Cmd+N (Mac), or clicking “New” from the “File” tab.
-
6Type the following code:
- Make sure you replace "author” name with your name. You can also change the “description” if you don’t like “My first discord bot.”
{
“name”: “greeter-bot”,
“version”: “1.0.0”,
“description”: “My First Discord Bot”,
“main”: “bot.js”,
“author”: “Your Name”,
“dependencies”: {}
}
-
7Save the file as “package.json”. Make sure the file doesn’t save with a .txt file extension.
-
8Start a new document. You can do this by either pressing Ctrl+N (Windows), or ⌘ Cmd+N (Mac), or clicking “New” from the “File” tab.
-
9Type your bot’s code. For example, if you want to create a bot that responds to any messages that start with "!", type the following code:
var Discord = require('discord.io');
var logger = require('winston');
var auth = require('./auth.json');
// Configure logger settings
logger.remove(logger.transports.Console);
logger.add(new logger.transports.Console, {
    colorize: true
});
logger.level = 'debug';
// Initialize Discord Bot
var bot = new Discord.Client({
   token: auth.token,
   autorun: true
});
bot.on('ready', function (evt) {
    logger.info('Connected');
    logger.info('Logged in as: ');
    logger.info(bot.username + ' - (' + bot.id + ')');
});
bot.on('message', function (user, userID, channelID, message, evt) {
    // Our bot needs to know if it will execute a command
    // It will listen for messages that will start with `!`
    if (message.substring(0, 1) == '!') {
        var args = message.substring(1).split(' ');
        var cmd = args[0];

        args = args.splice(1);
        switch(cmd) {
            // !ping
            case 'ping':
                bot.sendMessage({
                    to: channelID,
                    message: 'Pong!'
                });
            break;
            // Just add any case commands if you want to.
         }
     }
});
-
10Save the file as “bot.js”. Make sure the file doesn’t save with a .txt file extension.
- You can close your text editor.

Installing Bot Dependencies
-
1Open a command prompt window. On Windows, you can search “Cmd” in the Windows search field in the Start Menu. On Mac, you can search Spotlight for “Command Prompt.”
-
2Navigate to your bot folder on your desktop. For example, you can type cd\Users\Default Desktop\Desktop\DiscordBotfoldername.
-
3Type npm install discord.io winston –save and press ↵ Enter. With Node.js installed, this line will automatically download the dependencies for your bot in your desktop folder.
-
4Type npm install https://github.com/woor/discord.io/tarball/gateway_v6 and press ↵ Enter. That code will make sure there’s nothing else you need to install for your bot to work.
- You now have code for your bot and will test that your code works in the next part.


Running the Bot
-
1Type node bot.js and press ↵ Enter in the command prompt. If you get an error line, you did something wrong.
-
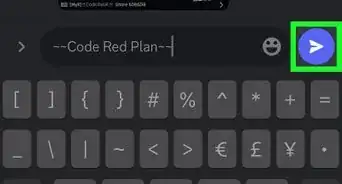
2Type “!Intro” in Discord. You’ll want to type this in the channel your bot is in. The example code provided triggers the bot to respond "Pong!" to text starting with “!”. So to test if the bot is working, type “!Intro” and wait for a response.[1]
-
3Check your coding if you didn't hear a response. If your bot didn't respond to your "!Intro" in Discord, go through this wikiHow again and check to make sure your bot is set up correctly. Make sure:
- Node.js installed correctly.
- The Bot Token is entered correctly in your auth.json file.
- You’re in the same channel as the bot.
- The bot is on the server.
- Your coding is correct in your auth.json, bot.js, and package.json files.
- You downloaded all the dependencies for your bot to work using Command Prompt with Node.js installed.


Community Q&A
-
QuestionMy bot says it's offline what do I need to do?
 Josh I GuessCommunity AnswerHave you done the code correctly? Try redoing the code. Make sure you do "node bot.js" without the quotes when you finish the code.
 -
QuestionWhat do I do if it says error when typing node bot.js into command prompt?Josh I GuessCommunity AnswerHave you done the code correctly? Try redoing the code. Make sure you're typing everything right.


About This Article

1. Download and install Node.js.
2. Open the Discord app and log in.
3. Create the bot on Discord.
4. Put the bot in a Discord channel.
5. Code the bot.
6. Install bot dependincies.
7. Test the bot works.