This article was co-authored by wikiHow Staff. Our trained team of editors and researchers validate articles for accuracy and comprehensiveness. wikiHow's Content Management Team carefully monitors the work from our editorial staff to ensure that each article is backed by trusted research and meets our high quality standards.
There are 8 references cited in this article, which can be found at the bottom of the page.
This article has been viewed 104,577 times.
Learn more...
Decorating your laptop can be a way to personalize and customize your laptop. Are you tired of looking at your boring laptop cover and want to decorate it with some more imaginative and creative ideas? Using some simple materials that you can purchase at a craft store and might already have around the house, you can make your laptop reflect who you are as a person. When decorating your laptop, be sure to take care to avoid damaging it.
Steps
Using Decals to Personalize Your Laptop
-
1Decide what parts of your laptop you want to decorate. You have a lot of options when it comes to using decals to decorate your laptop. You can decorate the top, the keyboard, or even the touch pad.
- When sticking anything directly onto your laptop (not the laptop’s protective cover), make sure you are careful to choose decals, skins, and stickers that are meant for that purpose. Stickers meant for this purpose are often made from vinyl.
-
2Turn off your laptop, then wipe it down. In order for decals, tape, skins, and stickers to apply smoothly, all of the surfaces on your laptop should be clean. Use water and avoid using surface cleaners.
- Use a damp, not soaking, towel to wipe down the surfaces to which you will be applying any kind of decoration.
- Wash your hands to help ensure the laptop stays clean after wiping it down.
- Use a dry towel after the wipe down to ensure the laptop is completely dry and ready for applying decals. [1]
Advertisement -
3Decorate your keyboard using washi tape. Using washi tape is a popular way to customize your keyboard. Washi tape is a type of decorative masking tape that is safe to apply to your keyboard. It comes in dozens of patterns that you can mix and match. [2]
- You can buy washi tape at many craft stores. It is also available online from many vendors.
- Cut strips of tape the size of individual keys, and stick them to the keyboard. You may want to gently write the corresponding letter on the tape. Sometimes washi tape is quite thin. In that case, you might be able to see the lettering through the tape anyway.
-
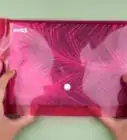
4Decorate your laptop using a skin. Skins cover the entire back (behind the screen) of the laptop with an elaborate image. Skins are great when you want a single, dramatic image.
- Many websites sell pre-made laptop skins or even allow you to upload your own images to be made into skins.
- You can also make your own laptop skin by buying sticker paper and printing the image you want onto the sticker paper using your computer’s printer.
- Apply the skin by slowly peeling one edge of the skin back and sticking it to one edge of the laptop. Then, slowly peel the back of the skin away a little at a time while smoothing the skin down with a straight edge (a credit card will do the trick).
-
5Use individual decals and stickers to customize your laptop. Individual stickers can be used on your laptop to provide personalization and customization. Decals can be purchased from a variety of online stores.
- Decals are often vinyl. Vinyl decals are easier to remove than ordinary stickers.
- Remember that stickers that look upside down when the laptop is closed and facing you will look upright to everyone else when the laptop is open.
- Ordinary stickers may be very difficult to remove, so be sure you want them before you stick them on.


Painting Your Laptop Cover
-
1Remove the cover from the laptop. Most laptop cases are made of hard plastic. You should remove the cover when painting to avoid painting the laptop itself.
- Use painter’s or masking tape to protect any parts of the cover that you don’t want to paint.
-
2Prepare your painting area. Lay down newspaper on a hard surface. Use this surface for all your work. Make sure that the surface is completely covered to protect it from the paint.
- If you do not have any old newspaper lying around, any kind of paper or an old tablecloth will work.
- Make sure the area is well ventilated and consider using a mask to prevent inhaling any fumes while spray painting. Inhaling fumes from spray paint can be dangerous.[3]
- Avoid areas with any open flame or extreme heat. Spray paint is flammable![4]
-
3Lightly sand the part of the laptop cover you want to paint. This will give you a better surface for painting. It will also reduce the likelihood of the paint flaking off. Don’t sand too hard. Your goal is to create a slightly rough surface that will better hold paint, but not scratch the surface up completely.
-
4Paint your laptop cover using spray paint. Spray paints for plastics are available in a variety of colors at most craft stores. Use the area you have set up previously. Again, be sure that it is well ventilated and away from any open flame.
- Spray evenly and avoid building up too much paint in any one area. This will help your paint job from appearing blotchy and uneven.
- Apply two to three coats, letting the cover dry in between coats. Using several coats will help ensure complete coverage.[7]


Decorating Your Laptop Cover
-
1Create your design. Be creative with your design, but keep in mind that you will be traveling with your laptop. Therefore, you do not want it to become too bulky or to include items that will easily fall off and be left behind.
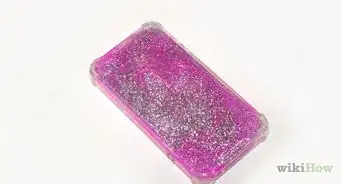
- You can use paint, stickers, photos, glitter, sequins, rhinestones, ribbons or fabric to get a laptop cover that is totally unique.
- Decide if you want to keep the base color the same.
- Use a piece of paper to sketch out your design.
-
2Gather your materials and prepare a work space. After you have decided on a design, make sure that you have everything you need.
- Some specialized decals and stickers can be purchased directly either in stores or online. You can explore this option too.
- Otherwise, most common materials can be purchased at any craft store.
- Lay down newspaper or an old tablecloth to work on to ensure you keep your workspace clean.
-
3Arrange anything that will be stuck on your laptop on the cover. This way, you can confirm that you know where everything will go. Move everything around until you are happy with it.
- Try several different options before settling on one. After you glue things down it is very difficult, if not impossible, to remove them again without damaging the cover.
-
4Stick everything to the cover. Stickers can simply be stuck onto the cover. However, much of your design will require glue to permanently attach.
- Choose a glue that is appropriate for your cover. If you are using a hard plastic cover, use an epoxy. Epoxies work best when gluing to plastic.[8]
-
5Varnish your laptop cover. This will help stop any part of the design from falling off and give a nice finish. Once again, make sure the solvent won't damage the material your cover is made from. If you have painted your laptop cover, use a varnish designed for acrylic paint. Varnish is available in liquid and spray forms.
- The most common and easier varnish is polyurethane.
- Polyurethane spray can be purchased in craft stores and is much easier than trying to paint the varnish onto a decorated surface.
-
6Allow the varnish to dry. After you have finished your layer of varnish, make sure to allow your laptop cover to dry thoroughly before attaching it back to your laptop.
- Allowing your varnish to dry will help keep everything attached, and prevent any of the glue from getting on the laptop.
-
7Finished.


Community Q&A
-
QuestionWhat kind of glue should I use to apply things to my laptop?
 Community AnswerAnything that will stick to plastic without harming it will work. I prefer to use Mod Podge because it gives some texture to the keys as well.
 -
QuestionI printed a picture, and I want to stick it onto my laptop. Tape would look ugly, but I am afraid to use glue. What else can I use?
 Community AnswerGlue would likely be fine if you used a water-soluble variety (so that it would be easily removable). Alternatively, you could buy a print-on vinyl sheet, print your image, cut it out, and apply it to the laptop.
 -
QuestionWhat can I substitute for washi tape?Community AnswerWashi tape is probably the best option as far as tape (it will not damage keys), but if you decoupage some paper or cloth to the keys, that would probably work just as well.
Warnings
- Be careful when working with spray paint, it is flammable.⧼thumbs_response⧽
- Be sure to give your cover time to dry before attaching it to the laptop to ensure no paint or glue gets on the laptop itself.⧼thumbs_response⧽
- When working with epoxy or paint, work in a well ventilated area.⧼thumbs_response⧽
Things You'll Need
- Spray paint for plastic
- Painter's tape
- Newspaper
- 100-180 sandpaper
- Epoxy glue
- Polyurethane varnish
- Decorations of your choice.
References
- ↑ https://www.decalgirl.com/support/install/
- ↑ http://www.bigdiyideas.com/diy-washi-tape-laptop-keyboard
- ↑ http://www.familyhandyman.com/painting/safe-and-healthy-spray-painting-tips/view-all
- ↑ http://www.krylon.com/how-to/safety/spray-paint-safety-tips/
- ↑ https://www.lowes.com/n/buying-guide/sandpaper-buying-guide
- ↑ http://plaza.ufl.edu/dan131/Installs/painting_plastics_universal_guid.htm
- ↑ http://www.bobvila.com/articles/how-to-paint-plastic/#.Vp7jhSorKUk
- ↑ http://www.todayshomeowner.com/how-to-glue-plastic/
About This Article

One of the easiest ways to decorate your laptop is with decals or colorful tape. Before you start, turn off your laptop and wipe it down with a damp cloth to remove dust and grime. This will help the decals stick better. Dry the laptop with a clean, lint-free towel when you’re done. Cut strips of washi tape to make a border around the cover of your laptop or add colorful touches to your keyboard, or decorate the entire back of your laptop with a decorative printed laptop skin. You can also purchase individual laptop decals and place them wherever you want. If you want to be able to remove the decals, choose vinyl stickers if possible. Ordinary paper stickers can be hard to peel off.