This article was co-authored by Norman Raverty. Norman Raverty is the owner of San Mateo Handyman, a handyman service in the San Francisco Bay Area. With over 27 years of experience, Norman has expertise in all five of the general building trades (carpentry, ceramic tile, drywall, electrical, plumbing).
There are 10 references cited in this article, which can be found at the bottom of the page.
This article has been viewed 29,223 times.
Cracked concrete is unsightly, but it's a lot easier to fix than you'd think. To fix narrow cracks, your best bet is a caulk-style concrete repair compound, which is easy to use and prevents further cracking. For larger cracks through walls, go with an epoxy injection kit, which will allow you to fill a deep crack's interior. If your concrete stairs are in disrepair, vinyl concrete patcher is durable and easy to mold into a step shape. Whichever method you use, always read your products' instructions and use them as directed.
Steps
Fixing a Narrow Crack with Concrete Repair Compound
-
1Use a caulk-style, waterproof compound to repair hairline cracks. A caulk-style liquid concrete repair compound is affordable, easy to apply, and the best choice for hairline cracks smaller than 1⁄4 in (0.64 cm) wide. Find a waterproof liquid concrete repair compound online or at a home improvement store. It'll hold up against the elements, help keep out water, and prevent the crack from reforming.[1]
-
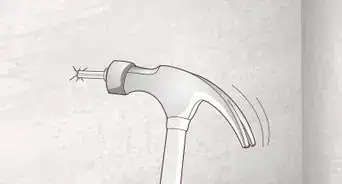
2Remove loose concrete and debris with a wire brush. Scrub the crack with a wire brush to prep the surface for repair. If necessary, chip away any thick deposits of concrete or old sealer with a small hammer and chisel.[2]
- If the crack is outdoors, such as in your driveway, work during dry weather. A stretch of at least 1 to 2 dry days is ideal.
Advertisement -
3Sweep, vacuum, or blow away any remaining dust. After scrubbing the cracked area, sweep away dust with a broom, or remove residue with a shop vac. You could also use a canister of compressed air to blow away fine surface debris.[3]
- A power washer can loosen and blow away debris all in one go. However, you'll need to allow the cracked area to dry completely if you use one. Liquid concrete repair compounds can only be applied to dry surfaces.
-
4Run a bead of epoxy concrete repair compound along the crack. Load a cartridge of liquid concrete repair compound into the cradle of a caulk gun. Snip about 1⁄8 in (0.32 cm) off of the tip, then run a continuous bead of compound along the crack. Make another pass with the caulk gun if the first bead didn't fill the entire crack.[4]
Variation: For a crack wider than 1⁄4 in (0.64 cm), slide in a strip of foam backer rod with your fingers. Then apply concrete repair compound over the rod with the caulk gun. The foam backer is needed to support the liquid repair compound.
-
5Smooth the caulked surface, then let it cure for 4 to 6 hours. Run a 1 1⁄2 in (3.8 cm) putty knife along the sealed crack to remove excess compound. Level the surface with the surrounding concrete, then allow the compound to cure for at least 4 to 6 hours, or as directed.[5]
- After smoothing the compound, wipe your putty knife promptly with mineral spirits before the epoxy begins to set.
- In addition to repairing floors and driveways, you can also use this method to seal hairline cracks in walls. For wider wall cracks, on the other hand, your best option is an epoxy injection kit.


Sealing a Wide Crack with an Epoxy Injection Kit
-
1Fix a 1⁄8 to 1⁄4 in (0.32 to 0.64 cm) wide crack with an epoxy injection kit. Purchase a concrete repair kit that includes a 2-part epoxy (an unmixed compound), caulk-type epoxy cartridges, and liquid concrete repair injection ports. The injection ports are small nozzles that help you fill the inside of the crack with sealer.
- You might need to purchase injection ports separately; you'll need 1 port for every 12 in (30 cm) of crack length.
-
2Scrub and clean the cracked area. Scrub away loose debris with a wire brush, and dislodge any chunks of mortar, concrete, or old filler with a hammer and chisel. Then vacuum up dust and debris or blow away residue with compressed air.[6]
- If you're sealing a crack in a wall, lay down a tarp or drop cloth to protect your floors from drips of epoxy.
Safety precaution: Wear a respirator so you don't inhale particles of dust, especially if you're working indoors. If there are any nearby windows or exterior doors, open them to improve ventilation.
-
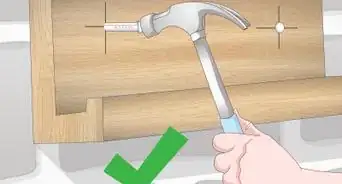
3Attach the plastic injection ports to the crack. Tap 10d finishing (headless) nails partway into the crack every 12 in (30 cm). Use separate sticks or putty knives to scoop the 2 epoxy parts onto a small scrap board. Mix the parts until you've achieved a uniform color, apply small dabs to the bottoms of the ports, and slide a port over each nail.
- The flat ends of the ports should be flush with the wall, and the nozzle ends should stick out.
- The nails align the injection ports with the crack. If you don't have finishing nails handy, use pins, toothpicks, or thin coffee stirrers.
- The 2 parts of the epoxy compound are stored in separate containers. After they're mixed, the parts cure and form a hard material. For this reason, scoop out the parts with separate sticks or putty knives to avoid contaminating one container with the contents of the other.
-
4Remove the nails after attaching the ports. After installing the ports, grasp the tip of the nail that emerges past the port's neck, and pull it from the wall. Make sure the ports stay glued in place, and try not to disturb them. Pull out all of the nails before injecting epoxy into the ports.[7]
-
5Spread the 2-part epoxy over the crack and injection ports' bases. Mix a larger batch of the 2-part compound as directed. Use a putty knife or trowel to cover the crack and the ports' bases with a 1⁄8 in (0.32 cm) layer of epoxy. Spread the compound 1 in (2.5 cm) on either side of the crack, and level it with the surrounding surface.[8]
- Check your kit's instructions for right amount of compound for the crack's surface area. Mix until you've achieved a uniform gray color.
- Be sure to scoop out each part of the epoxy with separate sticks to avoid contaminating the containers.
-
6Let the surface patch cure for 4 to 6 hours, then fill the injection ports. After 4 to 6 hours, or when the surface compound is hard, place a caulk-style cartridge of epoxy in the cradle of a caulk gun. Snip 1⁄8 in (0.32 cm) off of the tip, then insert it into the nozzle of the lowest injection port. Squeeze the trigger to inject the compound until epoxy starts oozing out of the port above the one you're filling.[9]
- The epoxy injection port kit includes small plastic caps that fit into the ports' nozzles. After you've injected a port, insert a cap into its nozzle. Then repeat the process to inject the compound into each of the ports.
-
7Saw off the injection ports' necks after 5 days, then patch the cuts. Allow the injected compound to cure for 5 days, or according to the instructions. Then use a hacksaw to cut off the ports' nozzles where they meet the wall or floor.
- Patch the spots where you sawed off the necks to disguise your work and ensure the crack is watertight. Mix a small amount of 2-part epoxy, apply a dab over the cut spots with a putty knife, and level the epoxy with the surrounding surface.


Repairing Cracked Concrete with Patching Compound
-
1Fix a crack wider than 1⁄4 in (0.64 cm) with a vinyl concrete patcher. Find a vinyl concrete repair compound online and at home improvement and hardware stores. Vinyl concrete patcher works best on wider cracks in horizontal surfaces, so it's perfect for broken steps.[10]
- Specific instructions may vary, so read your product's instructions carefully.
- Vinyl concrete repair compound will also work on wide, deep driveway and floor cracks. While you can use it to patch large cracks in a wall, you'd need to apply it in 1⁄4 to 1⁄2 in (0.64 to 1.27 cm) layers and allow each layer to cure before the next application.
-
2Dislodge loose concrete and remove debris. Prep the surface by scrubbing or chiseling away loose concrete or deposits of old filler. Additionally, use a wire brush to rough up any smooth surfaces within the crack. Then sweep, vacuum, or blow away any remaining dust and debris.[11]
- If you have a pressure washer, feel free to use it to prep the cracked stairs since the compound you'll use in this method needs a damp surface. It shouldn't be completely soaked, so mop up any puddles with an old rag.
-
3Hose down the stairs to help the patching compound bond. Run the hose evenly over the steps to get the surface damp. Dampen it, but don't drench it; you don't want any standing water.[12]
- The repair compound will stick better to a damp surface.
-
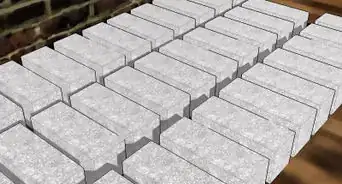
4Place a wood plank against the cracked step to create a frame. Using a circular saw, cut a wood plank to your steps' exact height. Cut the plank wide enough to span the cracked area, or use multiple planks. Place the plank against the broken step, then set a brick against the plank to keep it in place.[13]
- The plank will act as a form and help ensure the repair compound takes the shape of the step.
Safety precaution: Wear protective goggles and use caution when using a saw.
-
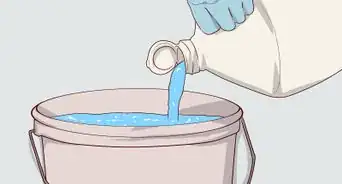
5Mix a dry concrete vinyl patch with water, if necessary. Pre-mixed vinyl concrete patch products are ready to use right out of the container. While they're more convenient, they're typically more expensive than dry products, which you mix with water. If you go with a dry product, mix it with clean water in a separate bucket using the recommended mixing ratio.[14]
- Mix the amount of repair compound recommended on the package for your repair's surface area.
-
6Use a trowel to apply the vinyl concrete patcher. Work some of the compound into the deepest part of the crack, and press it down with the trowel. Build on that layer until you've overfilled the crack. Then use the trowel to remove excess compound, smooth the surface, and level the compound with the rest of the step.[15]
- Clean your tools with water immediately after applying the vinyl concrete patch.
-
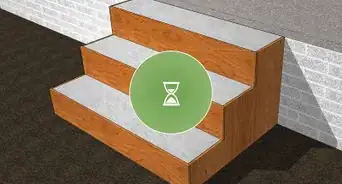
7Remove the wood plank once the patch has set. Check the manufacturer's instructions for specific information about your product's set time. Set times may range from 15 minutes to several hours, depending on the product, temperature, and moisture level. After the patch begins to harden, carefully remove the wood plank and the brick that held it steady.[16]
- The patch hasn't cured, so take care not to disturb it. If necessary, gently run the trowel over the patch to level it with the surrounding concrete.
-
8Allow the patch to cure for 24 hours, or as directed. Typically, vinyl concrete repair compounds can support foot traffic after a day. Avoid rolling wheeled objects (such as a hand truck) over the patch for 3 days.[17]
- The instructions may call for damp curing in hot, dry, or windy weather. If necessary, cover the patch with a clean sheet of plastic for 24 hours to damp cure it.


Warnings
- Epoxy and urethane-based concrete repair compounds are super sticky, so wear work gloves and old clothes when you make your repairs. If you get any on your skin, wipe it off quickly with a rag dipped in mineral spirits.⧼thumbs_response⧽
- Cracks in a concrete foundation may indicate structural problems. Consult a structural engineer for cracks that are 3⁄16 in (0.48 cm) or wider, horizontal cracks, and basement walls that bulge inward.[20]⧼thumbs_response⧽
Things You'll Need
Fixing a Cracked Floor or Driveway
- Wire brush
- Broom or shop vac
- Caulk-style epoxy concrete repair compound
- Caulk gun
- 1 1⁄2 in (3.8 cm) metal putty knife
- Work gloves
- Mineral spirits
- Rag
- Foam backer rod (optional)
Sealing a Wider Crack in a Wall
- Wire brush
- Broom or shop vac
- Liquid concrete repair kit with a 2-part epoxy sealer and caulk-type epoxy cartridges
- Caulk gun
- 3 in (7.6 cm) 10d finishing nails
- Hammer
- Work gloves
- 1 1⁄2 in (3.8 cm) putty knife
- Mineral spirits
- Rag
- Hacksaw
Repairing Cracked Concrete Steps
- Wire brush
- Hose
- Vinyl concrete repair compound
- Steel trowel
- Scrap wood plank (long enough to span the crack)
- Circular saw
- Protective eyewear
- Work gloves


References
- ↑ https://www.familyhandyman.com/masonry/concrete-repair/caulking-concrete-cracks/view-all/
- ↑ https://www.bobvila.com/articles/cracked-concrete/
- ↑ https://www.familyhandyman.com/masonry/concrete-repair/diy-concrete-crack-repair/view-all/
- ↑ https://www.familyhandyman.com/masonry/concrete-repair/caulking-concrete-cracks/view-all/
- ↑ https://www.bobvila.com/articles/cracked-concrete/
- ↑ https://www.bobvila.com/articles/cracked-concrete/
- ↑ https://www.thisoldhouse.com/walls/21014921/how-to-fix-cracks-in-concrete-walls
- ↑ https://www.thisoldhouse.com/walls/21014921/how-to-fix-cracks-in-concrete-walls
- ↑ https://www.thisoldhouse.com/walls/21014921/how-to-fix-cracks-in-concrete-walls
- ↑ https://www.bobvila.com/articles/cracked-concrete/
- ↑ https://www.familyhandyman.com/project/caulking-concrete-cracks/
- ↑ https://www.bobvila.com/articles/cracked-concrete/
- ↑ https://www.thisoldhouse.com/stairs/21019223/fixing-chipped-concrete-steps
- ↑ https://www.nytimes.com/1981/03/22/nyregion/home-clinic-vinyl-cement-effective-for-small-patches.html
- ↑ https://www.thisoldhouse.com/stairs/21019223/fixing-chipped-concrete-steps
- ↑ https://www.familyhandyman.com/masonry/concrete-repair/how-to-fix-sidewalks-that-are-chipped-and-pitted/view-all/
- ↑ https://www.familyhandyman.com/project/how-to-fix-sidewalks-that-are-chipped-and-pitted/
- ↑ https://www.familyhandyman.com/masonry/concrete-repair/caulking-concrete-cracks/view-all/
- ↑ https://www.familyhandyman.com/masonry/concrete-repair/how-to-fix-sidewalks-that-are-chipped-and-pitted/view-all/
- ↑ https://www.consumerreports.org/media-room/press-releases/2009/05/consumer-reports-warns-of-five-repairs-homeowners-shouldnt-ignore/
About This Article

To fix a crack in your concrete floor or driveway, you’ll need a caulk-style, waterproof, liquid repair compound and a caulk gun, both of which you can buy online or at a home improvement store. In order to prepare the crack for the compound, use a wire brush to scrub away any loose concrete and debris. After scrubbing, sweep or vacuum away any remaining dust. Once the cracked area is clean and dry, run the compound along the crack using the caulk gun. When the crack is filled with compound, smooth over the surface with a putty knife to get rid of any excess compound. You should then let the compound cure for 4 to 6 hours. For more help, including how to fix a crack in a concrete wall or in concrete steps, keeping reading!