This article was co-authored by Gonzalo Martinez and by wikiHow staff writer, Jack Lloyd. Gonzalo Martinez is the President of CleverTech, a tech repair business in San Jose, California founded in 2014. CleverTech LLC specializes in repairing Apple products. CleverTech pursues environmental responsibility by recycling aluminum, display assemblies, and the micro components on motherboards to reuse for future repairs. On average, they save 2 lbs - 3 lbs more electronic waste daily than the average computer repair store.
The wikiHow Tech Team also followed the article's instructions and verified that they work.
This article has been viewed 190,859 times.
Do you need to backup your computer's files, settings, and operating system? You've come to the right place! Imaging your hard drive has never been easier and luckily, we're here to walk you through the entire process. Whether you're working with a Windows or a Mac, we've got you covered. Let's get started!
Steps
Using a Windows PC
-
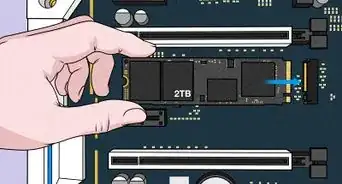
1Plug in an external hard drive. Your external drive should attach via USB cable to one of your computer's USB ports. You'll need an external drive that can hold at least as much data as your current hard drive is using.
-
2Advertisement
-
3Type file history into Start. This will search your computer for the File History backup program.
-
4Click Restore your files with File History. It should be at the top of the Start window. Clicking it opens the File History window.
-
5Click System Image Backup. You'll find this in the bottom-left corner of the window. It may take a few seconds to appear while File History searches for your external drive.[1]
- If you see a page entitled "No File History was found" here instead, click Configure File History settings before proceeding.
-
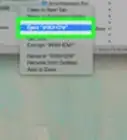
6Click Create a system image. It's in the upper-left corner of the window.
-
7Check the "On a hard disk" option. This will indicate to Windows that you want to use your external hard drive as a backup location.
- You may need to select your external hard drive's name from the "On a hard disk" drop-down box
-
8Click Next. It's in the bottom-right corner of the window.
-
9Click Start backup. This option is at the bottom of the window. Doing so will prompt Windows to begin imaging your hard drive.
-
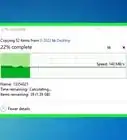
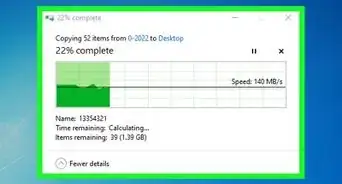
10Wait for your backup to complete. It will likely take several hours to finish, so keep your computer plugged into a power source and make the connection to the hard drive isn't disrupted.
- Once the backup finishes, you'll be prompted to create a repair disk. You can do this by clicking Yes, inserting a blank DVD into your computer, and following the on-screen instructions. A repair disk will allow you to recover your computer if it malfunctions.


Using a Mac
-
1Attach your external hard drive. Plug your hard drive into one of your Mac's USB ports. You'll need the same amount of space on the external drive as is being used on the hard drive.
- If your hard drive uses a USB 3.0 connection and your Mac doesn't have USB 3.0 ports, you'll need to buy and use a USB-C to USB 3.0 adapter.
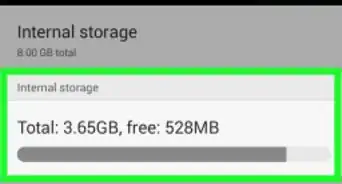
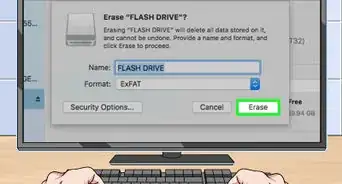
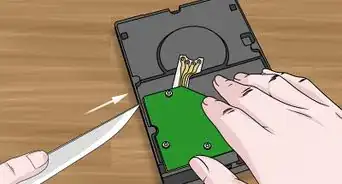
- If you haven't yet formatted your hard drive to erase it and set it up for a MacOS backup, format it before continuing.
-
2
-
3Press and hold ⌘ Command+R. Do this immediately after your Mac begins to restart.
-
4Wait for the Apple logo to appear. You may also see a spinning Earth here.
-
5Release ⌘ Command and R. As soon as you see the spinning globe or Earth icon, release the keys. You should now be at the recovery screen.
-
6Click Disk Utility. It's a grey hard drive icon in the window.[2]
-
7Click Continue. This is in the bottom-right corner of the screen.
-
8Select your external hard drive. Click the external hard drive's name in the top-left side of the page.[3]
-
9Click Edit. This menu item is at the top of the Mac's screen. A drop-down menu will appear.
-
10Click Restore…. It's at the top of the drop-down menu.
-
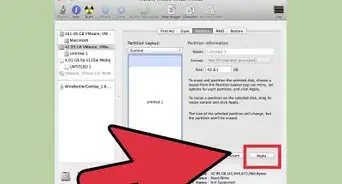
11Click the "Restore from" drop-down box. You'll find this in the middle of the window.
-
12Select your Mac's hard drive. It's in the drop-down menu.
-
13Click Restore. This blue button is in the bottom-right corner of the window. Clicking it prompts your hard drive to begin backing up to the external hard drive.
- This process may take several hours.
- If you get a "Restoration Failed" error, turn off FileVault and try again.
-
14Click Done when prompted. This signifies that your backup is complete.


Community Q&A
-
QuestionI am told that my backup drive needs needs formatting. What should I do?
 Community AnswerYou can temporarily move your important files to another storage device or rent such a storage. Just make sure that the files doesn't have or get hold of virus in that process.
Warnings
- A hard drive image isn't something with which you can interact like a regular backup.⧼thumbs_response⧽


References
- ↑ https://www.pcworld.com/article/3011736/windows/how-to-create-an-image-backup-in-windows-10-and-restore-it-if-need-be.html
- ↑ Gonzalo Martinez. Computer Repair Technician. Expert Interview. 25 July 2019.
- ↑ Gonzalo Martinez. Computer Repair Technician. Expert Interview. 25 July 2019.
About This Article