X
This article was co-authored by wikiHow Staff. Our trained team of editors and researchers validate articles for accuracy and comprehensiveness. wikiHow's Content Management Team carefully monitors the work from our editorial staff to ensure that each article is backed by trusted research and meets our high quality standards.
This article has been viewed 77,356 times.
Learn more...
This wikiHow teaches you how to insert rows in Excel using shortcuts on a Windows or Mac computer. There are keyboard shortcuts as well as custom shortcuts that you can use in Excel spreadsheets.
Things You Should Know
- On a Mac, highlight the number of rows you want to add. Then, hit Control+⇧ Shift++. The new rows will appear above the highlighted ones.
- On Windows, highlight the number of rows you want to insert and press Control+⇧ Shift++ .
- Use the toolbar by selecting a row and clicking Insert.
Steps
Method 1
Method 1 of 3:
Inserting Rows on a Mac
-
1Open an excel spreadsheet. You may use an old one or create a new one.
-
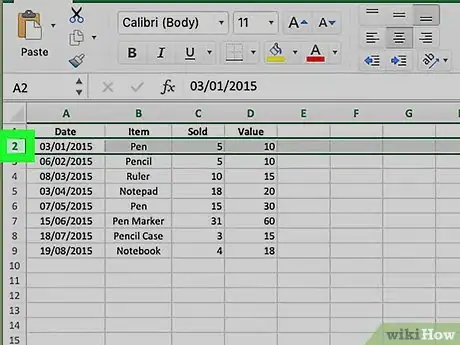
2Select a row by clicking on the row number. You should see the row number on the far left of the sheet. The new row will appear above the selected row or rows.
- Highlight the same number of rows as you want to add. So to add one row, highlight just one row, to add 2, highlight 2 rows, etc.
Advertisement -
3Type the Control+⇧ Shift++ keys at the same time to insert a row. Your new row should appear above the selected one.
- If you have no rows selected and press Control+⇧ Shift++ then it will not work.
Advertisement
Method 2
Method 2 of 3:
Inserting Rows on Windows
-
1Open an excel spreadsheet. You can use an old or new one.
-
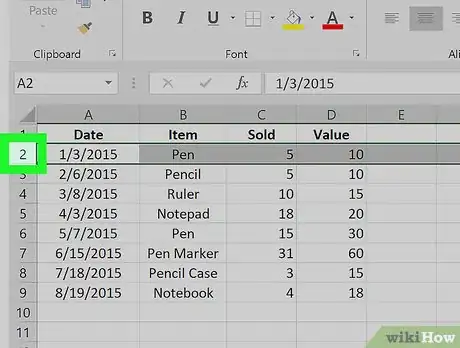
2Select a row. The new row will be inserted above the selected one. This happens only if you have one row selected.
- Highlight the same number of rows as you want to add. So to add one row, highlight just one row, to add 2, highlight 2 rows, etc.
-
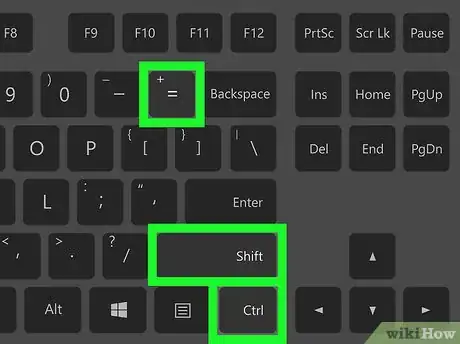
3Type Control+⇧ Shift++ at the same time to insert a row. The new row will appear above the selected one.
- This shortcut only works if you have a row selected.
Advertisement
Method 3
Method 3 of 3:
Inserting Rows with the Quick Access Toolbar
-
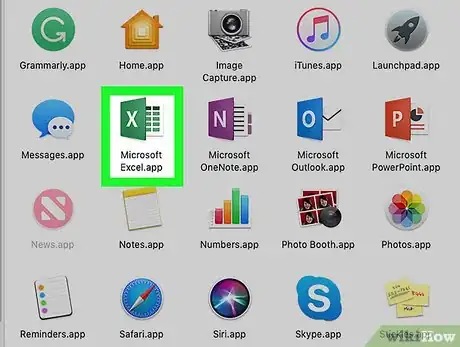
1Open Excel. The icon is green with a white “X” in it.
-
2Open an excel document. It can be an old or new document.
-
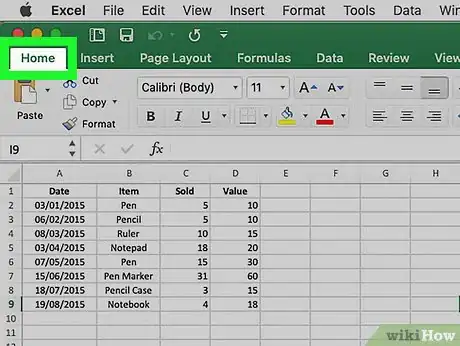
3Click on the Home tab.
-
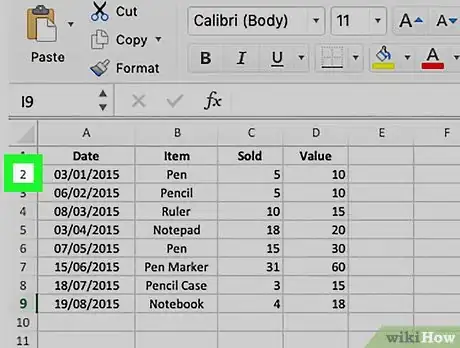
4Select a row by clicking on the row number. You should see the row number on the far left of the sheet.
-
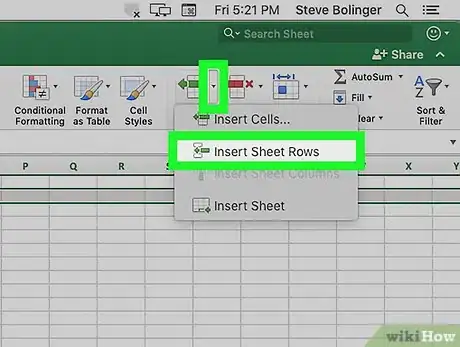
5Click on Insert. It is located near the top right of the Excel window. This should automatically insert a new row above the row you selected. To save the insert row command as a shortcut, do the following:
- Right-click on Insert Row to open up an additional drop-down menu.
- Select Add to Quick Access Toolbar. If you have nothing added to your toolbar then the next key will be assigned to F4. Press F4 whenever you want to add a new row.
Advertisement
About This Article
Article SummaryX
1. Open an excel sheet.
2. Select a row.
3. Type Control+⇧ Shift++ to insert a row above the one you selected.
Did this summary help you?
Advertisement

