This article was co-authored by Luigi Oppido and by wikiHow staff writer, Ellie Salyers. Luigi Oppido is the Owner and Operator of Pleasure Point Computers in Santa Cruz, California. Luigi has over 25 years of experience in general computer repair, data recovery, virus removal, and upgrades. He is also the host of the Computer Man Show! broadcasted on KSQD covering central California for over two years.
This article has been viewed 14,997 times.
As more forms and contracts go electronic, inserting your signature virtually is a useful tool to have in your belt. If you're a Mac user, you can easily create a signature and insert it into a Pages document. In this article, we’ll show you how to do so.
Steps
Creating a Signature in Preview
-
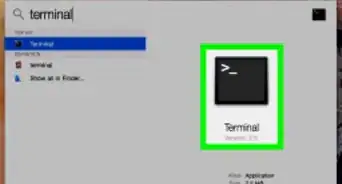
1Open Preview. This graphics app is automatically downloaded on all Mac computers. To open it, type “Preview” into your search bar.
-
2Click on Tools. This is located in the toolbar at the very top of your screen.Advertisement
-
3Click on Annotate > Signatures > Manage Signatures. All of these buttons are located within the "Tools" dropdown menu.
-
4Click on Create Signature. You will now see a grey rectangle for you to add your signature. Select Click here to begin and sign your name using your finger and trackpad.
- When you're finished creating your signature, press any key on your keyboard.
-
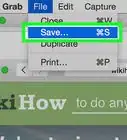
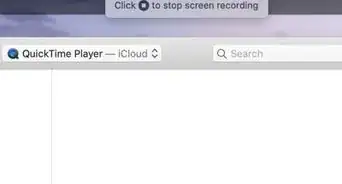
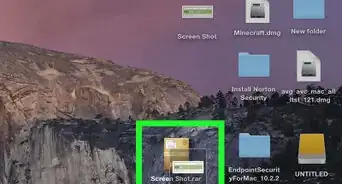
5Take a screenshot of your signature. To open the screenshot tool, use the shortcut Command+Shift+5 on your keyboard. Move the frame to capture your signature, then release. The screenshot will automatically save to your desktop.


Adding the Signature in Pages
-
1Open Pages. This is a pre-loaded application on your Mac. To open it, type "Pages" into your search bar.
-
2Open up a document. Within the pop-up window, you should select the document you want to add your signature to. Click on it, and then click Open in the bottom right corner.
- If you want to create a new document, click New Document in the bottom left corner.
-
3Click on your desired location. Within the document, simply click on the place where you want to insert your signature.
-
4Click on Media. This is located in the window's top toolbar, and its icon looks like a landscape photo.
-
5Click on Choose. This is located within the Media drop-down menu.
-
6Select the signature screenshot. Click on Desktop in the left menu, click on the screenshot, and then click on Insert in the bottom left corner. You should now see your signature appear in the document! [1]


-Step-6.webp)
About This Article

1. Open Preview.
2. Click on Tools.
3. Create a signature.
4. Take a screenshot of your signature.
5. Open Pages.
6. Click on Media.
7. Insert your screenshot.