Everything you need to know for setting up WordPress on GoDaddy
This article was co-authored by wikiHow staff writer, Kyle Smith. Kyle Smith is a wikiHow Technology Writer, learning and sharing information about the latest technology. He has presented his research at multiple engineering conferences and is the writer and editor of hundreds of online electronics repair guides. Kyle received a BS in Industrial Engineering from Cal Poly, San Luis Obispo.
Learn more...
Trying to install WordPress through your GoDaddy account? The process is pretty quick and easy. If you're using a Linux or Windows hosted domain, you can use the Web Hosting settings on your GoDaddy product page to install WordPress. If you're using an older version of WordPress, you can use a FTP app to set up your WordPress website. This wikiHow guide will show you how to install WordPress on GoDaddy.
Things You Should Know
- If you're using a Linux-hosted domain, install WordPress through the GoDaddy product page under the Web Hosting section.
- If you're using a Windows Hosting account, install WordPress through the GoDaddy product page under the Web Hosting section.
- If you're installing an older version of WordPress, you'll need to download the WordPress package and upload it using a FTP app.
Steps
Using cPanel on a Linux-Hosted Domain
-
1Go to https://account.godaddy.com/products/. Log in to access your GoDaddy product page. This method works for users that have a Linux Hosting account.[1]
-
2Click Web Hosting and then Manage. This will open a dashboard with Web Hosting options.Advertisement
-
3Click Install Application under your domain. This is located in the "Websites" sections of the Web Hosting dashboard. The Installatron Applications Browser page will open.
-
4Click WordPress blog. It's under the "Apps for Content Management" section.
-
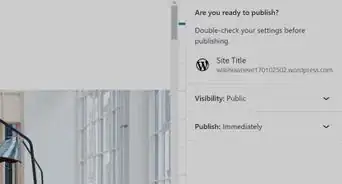
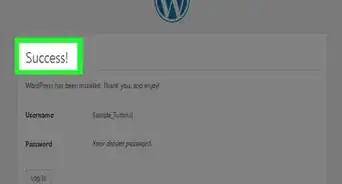
5Fill out the required fields the click Install. This includes the domain name, administrator username, password, and email, and database settings. You're done! You can start editing the website once the installation is complete.

Using a Windows Hosting Account
-
1Go to https://account.godaddy.com/products/. Log in to access your GoDaddy product page. This method works for users that have a Windows Hosting account.[2]
-
2Click Web Hosting and then Manage. Make sure to select the Windows Hosting account you want to use. This will open a dashboard with Web Hosting options.
-
3Click Plesk Admin. This is an option in the Web Hosting dashboard. The Plesk home page will open.
-
4Click Applications. This is in the left menu of the Plesk home page.
-
5Click Feature Applications.
-
6Click Install next to "WordPress." This will install WordPress using your Windows Hosting account. You're done! Now you can start editing your website and adding links to external sites.

Installing Older Versions of WordPress
-
1Download the WordPress .zip package you want to install. Go to https://wordpress.org/download/releases/ to download the .zip file for the WordPress Version you want to install.[3]
- This method uses FileZilla but you can use a different FTP program if you prefer.
- Use this method if you need to install an older version of WordPress for theme or plugin compatibility reasons.
-
2Connect FileZilla to your hosting. To do so:[4]
- Open FileZilla.
- Complete the Host, Username, Password, and Port fields.
- Click Quickconnect to connect your hosting account to FileZilla.
-
3Upload the WordPress .zip file to Windows Hosting. In FileZilla, follow these steps:
- Open the root directory. This is typically the public_html folder.
- Select the WordPress .zip file in the "Local site" section.
- Drag the WordPress file from the "Local site" section to the "Remote site" section.
- Note that if your hosting account doesn't have an unzipping tool, you'll need to unzip the WordPress folder before uploading it.
-
4Unzip the WordPress .zip file. You can use cPanel or Plesk to do so, depending on your Windows Hosting account configuration.
-
5Open the unzipped WordPress folder and select all files inside. You can use the shortcut Ctrl+A (Windows) or ⌘ Command+A (macOS) to select every file in the folder at once.
-
6Click and drag the files to the WordPress root directory. This is the two periods next to an open file folder icon in the top left of the file window.
-
7Make a MySQL user and database for your website. You can use Plesk or cPanel to do so.
-
8Set up the installation. To do so:
- Go to your domain in a web browser.
- Select a language and click Continue.
- Write down the database details.
- Click Let's Go.
- Enter your MySQL database information and click Submit.
-
9Click Run the installation and fill out the website information. This includes the website's title, username, password, and your email.
-
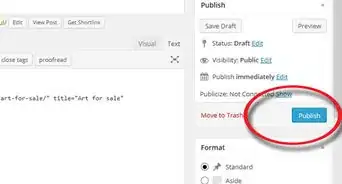
10Click Install Wordpress. This will start the installation process. You're done! After the installation is complete, you can log in to your website and start adding subpages to your WordPress website and creating informational tables.


References
- ↑ https://www.godaddy.com/help/install-wordpress-on-my-linux-hosted-domain-using-cpanel-16038
- ↑ https://www.godaddy.com/help/install-wordpress-or-other-applications-in-my-windows-hosting-account-16039
- ↑ https://www.godaddy.com/help/install-an-older-version-of-wordpress-26993
- ↑ https://www.godaddy.com/help/move-my-cpanel-website-with-ftp-and-filezilla-31870
About This Article