This article was co-authored by wikiHow staff writer, Amber Crain. Amber Crain has been a member of wikiHow’s writing staff for the last six years. She graduated from the University of Houston where she majored in Classical Studies and minored in Painting. Before coming to wikiHow, she worked in a variety of industries including marketing, education, and music journalism. She's been a radio DJ for 10+ years and currently DJs a biweekly music program on the award-winning internet radio station DKFM. Her work at wikiHow supports her lifelong passion for learning and her belief that knowledge belongs to anyone who desires to seek it.
There are 25 references cited in this article, which can be found at the bottom of the page.
The wikiHow Video Team also followed the article's instructions and verified that they work.
This article has been viewed 13,717 times.
Learn more...
Making toys with clay polymer is a fun and easy project for kids of all ages! All you need is a few different colors of clay and a flat surface to work on. Try your hand at a few easy projects, like a cute shooting star clay toy or a super simple red flower. Once you get the hang of the process, you can go on to create other cool toys in the shapes of your choice. Your imagination is the limit!
Steps
Creating Cute Shooting Stars
-
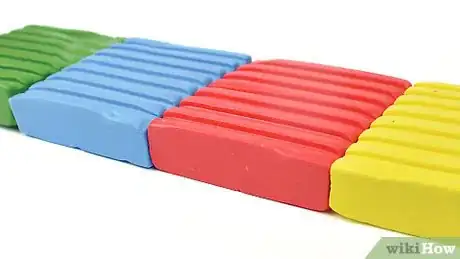
1Choose 4 different colors of clay polymer. You can choose any colors you want for your stars. You’ll need a main color for the body of the star—yellow is a popular choice, but it’s up to you. Then, choose 3 other colors to make the arc-shaped star trail. The star trail will look like a tiny rainbow and it’s what makes the star look like it’s “shooting.”[1]
- For example, you could use bright yellow for the star’s body. Then, use red, green, and blue to make the star trail.
- If you want to give your star eyes and a mouth, you’ll also need a small amount of black clay polymer. Adding a face is optional, but it looks really cute![2]
- You can get clay polymer at any craft store. You won't need more than a handful of each color!
-
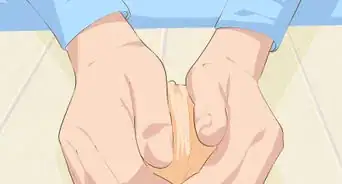
2Roll the main color into a ball and flatten it slightly with your palms. Take the colored clay you’re using for the star’s body and roll it between your palms until it forms a sphere, which is the easiest and smoothest shape to start with. Press down lightly on the clay to flatten the star’s body a little. You should now have a flattened circle shape.[3]
- Flatten the clay until it’s about 1 inch (2.5 cm) thick.
- The star shape can be any size that you want. If you aren’t sure, aim for 2–3 inches (5.1–7.6 cm) in diameter.
Advertisement -
3Use your fingers to pinch 5 points around the sides of the flattened circle. Space the points out as evenly as you can and make them about the same size. Once the points are formed the way you want them, use your fingers to perfect the final shape. Then, set the star aside.[4]
- Your star doesn’t have to be perfect, and it doesn’t have to have 5 points. You can have a 3-pointed star if you prefer! Don’t go over 5 points, though, or it might get unwieldy.
- If you want to make more than 1 star, go ahead and form the other bodies and lay them out in a row on a flat surface.
-
4Roll the black clay into tiny spheres to create the eyes. If you’re giving your stars eyes, just take a little bit of black clay and roll it into tiny spheres. You’ll need 2 spheres per star. Then, position the eyes next to each other on the star and press them in gently to secure them in place.[5]
- If you want to get really detailed, use white clay polymer to create a tiny, white, circular reflect in each eye.
- You could also use more black clay to create eyelashes, but you don’t have to! These details will give your stars an anime look.[6]
-
5Roll a thin strip of black clay into a “U” shape to create a smile. Again, the mouth is totally optional. The smile is super easy, though—just take a tiny ball of black clay, roll it into a thin strip, and mold it into a “U” shape. Then, press the smile gently into place beneath the star’s eyes.[7]
- You can try other mouth shapes if you’d like! For example, make a tiny flattened circle for a “surprised” open-mouthed star.
- Think about the different emoji expressions you’ve seen. You could try to create a range of “faces” for your stars based on emoji expressions!
-
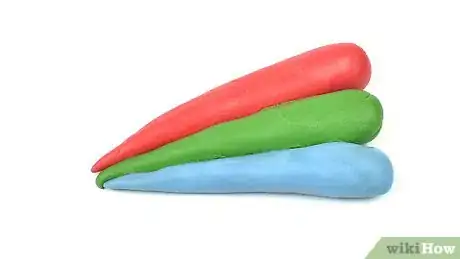
6Create 3 small, carrot-shaped strips with the other clay colors. Now it’s time to make the star trail! Each star will have 3 strips in its trail, although you can definitely make more strips if you want. Grab a small piece of clay from each of your remaining colors. Roll the pieces into balls and mold each one into a small carrot shape.[8]
- Each strip should have a pointy end and a rounded end – just like a carrot.
- You can make your strips as long as you want. About 3 inches (7.6 cm) long is a good length for a star that has a 2–3 inches (5.1–7.6 cm) diameter.
-
7Line the 3 strips up side-by-side lengthwise. You can arrange the different colors in any order you want! For example, you could have a blue strip on top, a red strip right beneath that, and a green strip beneath that. Line them up exactly so that all of the points are facing in the same direction. Lightly press the strips together to connect them.
- The star trail will look a lot like a rainbow.
-
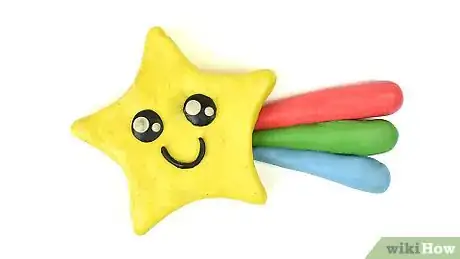
8Place the pointy tips between the top points of the star to form the trail. Choose a space between the very top point and the top right point of the star to position the star trail. You can lightly press the tips of the strips into the side of the star, or lift up your star a little and situate the tips underneath.[9]
- Your shooting star is now complete! The rainbow trail should be “shooting” off the right side of the star.
Making Easy Red Flowers
-
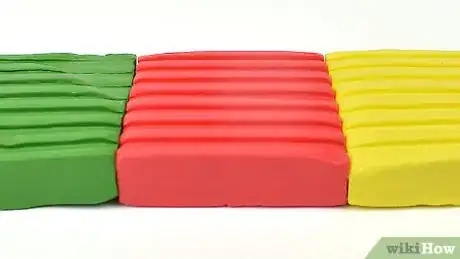
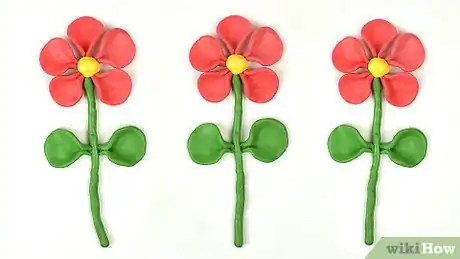
1Get out red, green, and yellow clay polymer. The red is for the flower petals and the yellow is for the circular center of each flower. The green is for the stems and leaves. You can use other colors, of course! For example, if you want purple flowers, use purple instead of red.[10]
- Green is the best color for stems and leaves, but you can get creative and make fantasy flowers, too.
- Pick up clay polymer at your local craft store or buy it online. You don't need much—a handful of each color is more than enough.
-
2Pull off 5 small chunks of red clay and roll them into balls. Aim for pieces that are about the same size as the tip if your finger. However, you can make the petals bigger or smaller than that, if you want. Once you pinch off the pieces, roll them into tiny spheres.[11]
- You’ll need 5 tiny red spheres for each flower. If you’re making more than 1 flower, don’t forget to create additional spheres.
-
3Flatten each red sphere into a thin circle. Each circle will be about the same size as a dime, with a similar thickness. Mash the sphere flat with your palms and then use your fingers to mold the piece into a circle shape.[12]
- The circles don’t have to be perfect. Just do your best!
-
4Pinch 1 side of each circle with your fingers to create a petal shape. Hold the circle in your left hand and use your thumb and index fingers on your right hand to pinch one side of the circle. Pinch until your fingers meet so that 1 side is still rounded and the pinched side is pointed.[13]
- The petal shape will look similar to a big teardrop.
-
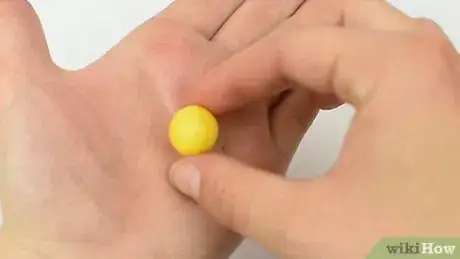
5Pull off a piece of yellow clay and roll it into a sphere. The yellow piece should be approximately the same size as 1 of the red spheres before you shaped it into a petal. If you like, it can be just a tiny bit bigger than that. Pinch the yellow clay off the main hunk and roll it in your palms to form a spherical shape.
- You’ll need 1 yellow sphere per flower.
-
6Press the pointy end of each petal around the yellow sphere. Work on 1 petal at a time and gently push the pointy end into the side of the sphere until it's connected. Do the same thing with the 4 remaining petals, working your way around the perimeter of the sphere. Space the petals out as evenly as possible.[14]
- The petals should be touching, but not overlapping.
- If you’re making multiple flowers, go ahead and connect the other petals to their yellow spheres.
-
7Pull off a piece of green clay and roll it into a long, thin cylinder for the stem. Put the green chunk between your palms and rub back and forth until you have a green strip, almost like a snake. Aim for a thickness similar to a pencil and 4–5 inches (10–13 cm) in length.[15]
- Position 1 green stem under each flower head.
- You can make the stem longer or shorter, if you want. Don’t make it much thicker than a pencil, though, or it won’t look like a stem.
-
8Create 2 green “petals” just like the red flower petals. Pinch off 2 pieces of green clay and roll them into spheres that are the same size as the original red spheres you made. Flatten them into circle shapes and pinch 1 side just like you did for the petals. These are the leaves for the flower’s stem.[16]
- You will need at least 2 leaves for each flower. If you want, you can make more.
-
9Press 1 green leaf onto each side of the stem. Don’t push too hard! You only need to push hard enough to “connect” the leaves to the stem about halfway down the stem's length. Put 1 leaf on each side of the stem and your clay flower is complete.[17]
Shaping a Fun Octopus
-
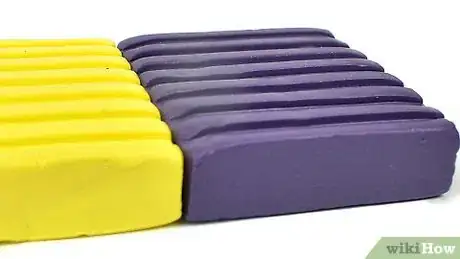
1Get out purple and yellow clay polymer. Purple will be the main color of the octopus's body and yellow will be the accent color. However, you can use any 2 colors you’d like! If you want to add eyes and a mouth to your toy, grab a tiny bit of black and white clay, too.[18]
- Grab about a handful of purple, which will be more than enough. You only need a marble sized amount of yellow, and a tiny pinch of black and white if you want to create a face.
- You can buy clay polymer at craft stores and through online retailers.
-
2Separate the purple clay into 2 equal portions. Pull the handful of purple clay in half and roll both pieces into spheres. 1 portion will form the octopus’s body and you’ll use the other half to create its tentacles. You can just eyeball it—your portions don’t have to be precise.[19]
-
3Roll 1 portion of the purple clay into an egg shape. Roll the clay in your palms until it forms a sphere. Then, use a little more pressure as you roll to elongate the sphere slightly so that it has more of an oblong, egg-like shape. This is the octopus’s body.[20]
- You can set this piece aside for now.
-
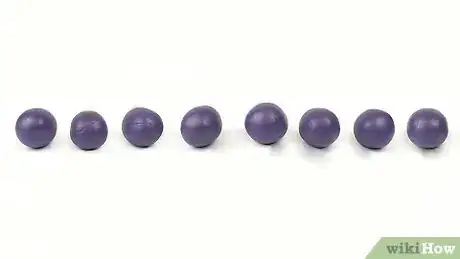
4Break the other portion of purple clay into 8 equally sized pieces. Octopi have 8 tentacles, so separate the other portion of purple clay into 8 pieces that are roughly equal in size. Then, roll each piece into a sphere.[21]
-
5Use your palm to roll the 8 spheres into 8 tube shapes. Put your palm flat on top of 1 of the spheres and roll it back and forth until it elongates and gets skinny. Stop when it gets about 3 inches (7.6 cm) long. Then, do the same thing for the remaining 7 spheres.[22]
- If you’ve ever made clay snakes, the process of rolling back and forth to elongate the clay is very similar.
- Taper the end of each tentacle slightly.
-
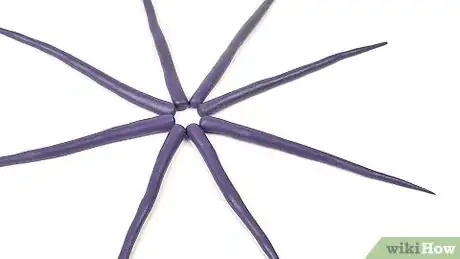
6Fan out the tentacles in a circle so the thick ends meet in the center. The tentacles should taper as they go out, so group the thick ends together until they’re touching and then fan out the tapered ends into a circular shape. It should look sort of like a clock, except with 8 hands instead of 2.[23]
- Try to space the tentacles apart as evenly as possible, but they don't have to be exact.
-
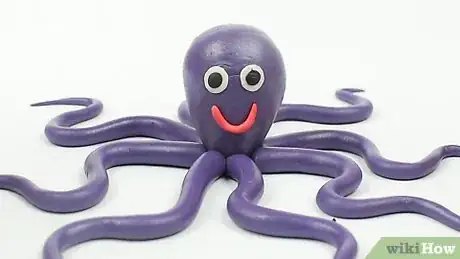
7Position the body piece on top of the 8 tentacles where they meet. Push down on the oblong shape so that it connects to all of the tentacles where they meet in the middle. Once the body is in place, it will look like the legs are coming out of the octopus’s body.[24]
- Push down lightly when you're positioning the body so that you don't squish the oval shape.
-
8Mold the tentacles pieces to have gentle curves. Tentacles wave around, so they look curvy rather than stick straight out. You can form each tentacle into an “S” shape or just give the tentacle a gentle curve.[25]
- Try to vary the curves of the tentacles so they all don’t look exactly the same!
-
9Add 2 tiny white clay circles to the body to create the eyes. If you want your toy to have a face, press on 2 small white circles. Add a smaller black circle to each white circle so the eyes have pupils. Then, use a tiny strip of black clay to create a “U” shaped mouth beneath the eyes.[26]
- Make the white circles just a little smaller than pencil erasers.
- You can use red or pink clay to make the smile if you prefer.
-
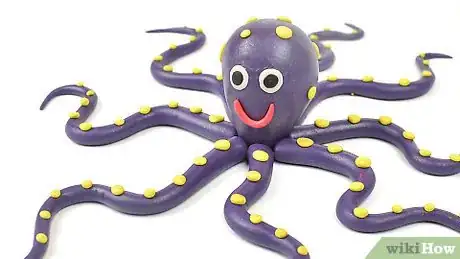
10Cover the body and legs with small yellow circles. Make the yellow circles about the same size as the white ones you made for the eyes—slightly smaller than a pencil eraser. Spread the circles out as evenly as possible all over the body and down each tentacle. The spacing doesn’t have to be perfect![27]
- After you add the yellow dots, your octopus is complete.
Things You’ll Need
Shooting Star
- 1/2 cup (or more) of 1 main clay color for the star’s body
- 1/4 cup each of 3 other clay colors to form the star trail
- Black and white clay for the eyes and mouth (optional)
Flower
- 1/2 cup (or more) of red clay for the petals
- 1/4 cup of yellow clay for the middles
- 1/2 cup of green clay for the stems and leaves
Octopus
- 1/2 cup of purple clay for the body
- 1/4 cup of yellow clay for the body and accents
- Black and white clay for the eyes and mouth (optional)
References
- ↑ https://www.youtube.com/watch?v=iQMkZYP2QOk&feature=youtu.be&t=22
- ↑ https://www.youtube.com/watch?v=iQMkZYP2QOk&feature=youtu.be&t=107
- ↑ https://www.youtube.com/watch?v=iQMkZYP2QOk&feature=youtu.be&t=35
- ↑ https://www.youtube.com/watch?v=iQMkZYP2QOk&feature=youtu.be&t=59
- ↑ https://www.youtube.com/watch?v=iQMkZYP2QOk&feature=youtu.be&t=107
- ↑ https://www.youtube.com/watch?v=iQMkZYP2QOk&feature=youtu.be&t=138
- ↑ https://www.youtube.com/watch?v=iQMkZYP2QOk&feature=youtu.be&t=201
- ↑ https://www.youtube.com/watch?v=iQMkZYP2QOk&feature=youtu.be&t=250
- ↑ https://www.youtube.com/watch?v=iQMkZYP2QOk&feature=youtu.be&t=286
- ↑ https://www.youtube.com/watch?v=d9p-TXB3Zo4&feature=youtu.be&t=15
- ↑ https://www.youtube.com/watch?v=d9p-TXB3Zo4&feature=youtu.be&t=26
- ↑ https://www.youtube.com/watch?v=d9p-TXB3Zo4&feature=youtu.be&t=27
- ↑ https://www.youtube.com/watch?v=d9p-TXB3Zo4&feature=youtu.be&t=51
- ↑ https://www.youtube.com/watch?v=d9p-TXB3Zo4&feature=youtu.be&t=51
- ↑ https://www.youtube.com/watch?v=d9p-TXB3Zo4&feature=youtu.be&t=76
- ↑ https://www.youtube.com/watch?v=d9p-TXB3Zo4&feature=youtu.be&t=90
- ↑ https://www.youtube.com/watch?v=d9p-TXB3Zo4&feature=youtu.be&t=97
- ↑ https://www.youtube.com/watch?v=CnRPE6h_zcw&feature=youtu.be&t=15
- ↑ https://www.youtube.com/watch?v=CnRPE6h_zcw&feature=youtu.be&t=25
- ↑ https://www.youtube.com/watch?v=CnRPE6h_zcw&feature=youtu.be&t=53
- ↑ https://www.youtube.com/watch?v=CnRPE6h_zcw&feature=youtu.be&t=34
- ↑ https://www.youtube.com/watch?v=CnRPE6h_zcw&feature=youtu.be&t=69
- ↑ https://www.youtube.com/watch?v=CnRPE6h_zcw&feature=youtu.be&t=108
- ↑ https://www.youtube.com/watch?v=CnRPE6h_zcw&feature=youtu.be&t=122
- ↑ https://www.youtube.com/watch?v=CnRPE6h_zcw&feature=youtu.be&t=132
- ↑ https://www.youtube.com/watch?v=CnRPE6h_zcw&feature=youtu.be&t=160
- ↑ https://www.youtube.com/watch?v=CnRPE6h_zcw&feature=youtu.be&t=197
About This Article
To make a clay shooting star, start by choosing 4 different colors of clay polymer, like yellow for the star’s body, and red, green, and blue for the trail. Roll the main color into a ball and flatten it a little with your palms until it’s about 1 inch thick. Use your fingers to pinch 5 points around the sides of the flattened circle, aiming to space them evenly apart. If you want your star to have a face, roll a little bit of black clay into tiny balls, then gently press them onto the star. You can also roll a thin strip of black clay into a “U” shape for a smile. After the star is done, create 3 small, carrot shaped strips with the other colors of clay, then line them up lengthwise. Finally, place the smaller ends of the colored strips at or under the middle of the star to make it look like the trail from the shooting star. To learn how to make easy red flowers out of clay, keep reading!
