This article was co-authored by wikiHow Staff. Our trained team of editors and researchers validate articles for accuracy and comprehensiveness. wikiHow's Content Management Team carefully monitors the work from our editorial staff to ensure that each article is backed by trusted research and meets our high quality standards.
The wikiHow Video Team also followed the article's instructions and verified that they work.
This article has been viewed 60,192 times.
Learn more...
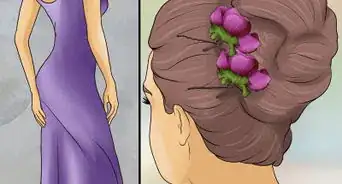
Flower headbands are making their mark everywhere. Movie stars are wearing these floral headbands, they’re featured in magazines, and they’re even making appearances in TV shows. These feminine floral accessories have been seen on Taylor Swift, Selena Gomez, and many other celebrities (not to mention their popularity at music festivals). Flower headbands are an extremely simple, yet beautiful accessory that anyone can make at home.
Steps
Forming the Headband
-
1Gather your supplies. Rather than buying a floral headband, making your own is quick, easy, and inexpensive. For this DIY project, you will need:
- 1/2” thick elastic (can be found at any craft store)
- An elastic headband can be used if you already own one
- Fake flowers (can be found at any craft store)
- Hot glue gun (E6000 or super glue can also be used)
- Scissors
- 1/2” thick elastic (can be found at any craft store)
-
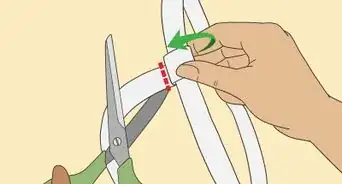
2Measure the length of your headband. Wrap the elastic around the top of your head. Once you find the right length, hold the spot with your fingers. Unwrap the elastic from your head and use scissors to cut the elastic at the spot marked by your fingers.[1]
- If you already have your own headband, you can skip this step.
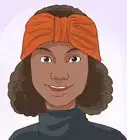
- The headband can be any color you like; both dark- and light-colored headbands look nice.
Advertisement -
3Form your headband. Use your glue gun (or other type of glue) to dab some glue on one end of your elastic. Bring the other end of the elastic to the dab of glue, and place it on top of the glue.[2] Press the two ends together for about 10 seconds. When the glue is dried, you have your headband.
- Be sure that the elastic isn’t twisted when you connect the ends with glue. It will make the flowers twist and be uneven when you glue them on.


Adding the Flowers
-
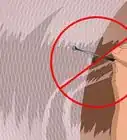
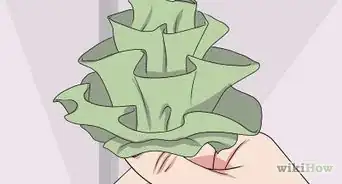
1Take apart the flowers. Pull the artificial flowers off the stems. You should easily be able to pluck them off the stems. At the bottom of the flower, there will be a small, green stem (used to hold the flowers to the longer stems). Cut off the smaller stem under the flower so the bottoms of the flowers are flat.[3]
- You can either leave the flowers whole, as they are, or pull the flowers apart to expose the different layers of petals.
-
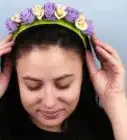
2Glue the flowers to your headband. If you leave the flowers as they are (whole), apply glue onto the back of the flower using the hot glue gun.[4] Then place the flower onto the headband and hold it in place for about 10 seconds. If you pulled the flowers apart to expose the layers of petals, it may be easier to place a small dot of glue on the headband, and then stick the petal layer onto the glue.[5] Press and hold the petal layer down for about 10 seconds. Space the flowers out as evenly as you want. Continue to add flowers to the headband until you are satisfied with the headband.
- If you are using any glue other than a glue gun, consider first applying glue to the flower, then placing it on the headband. It will create less mess.
-
3Allow the headband to dry. If you used a hot glue gun to attach the flowers to your headband, your headband will be completely dry after about 30 minutes. If you used E6000 or super glue, let the headband dry for at least a day so nothing falls off when you try to wear it.

Community Q&A
-
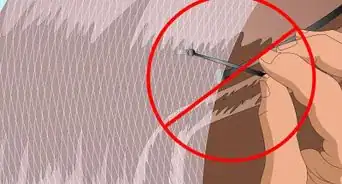
QuestionCan I used real flowers for the headband?
 Community AnswerUsing real flowers is not recommended for this method of making a flower headband because the flowers will wilt and die very quickly.
 -
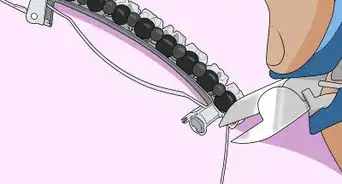
QuestionIs it better to sew the flowers instead?
 Nana_Ro'MeaveCommunity AnswerYes, because they'll stay on better than gluing them to the band. If you glue them they could fall off; sewing is stronger than glue.
 -
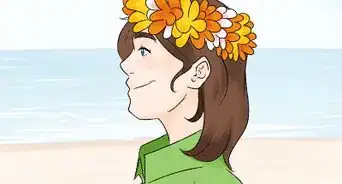
QuestionCan I see flowers all around the band or just in the front?
 Community AnswerIt depends on how you stick the flowers to the band. Try sticking flowers in a half circle because if you stick them all around the band, the flowers under your hair will not be visible.
Warnings
- Be very careful when using a hot glue gun. The tip of the gun gets extremely hot and can burn you. They can also be very messy. Ask a parent for help if you need it.⧼thumbs_response⧽
Things You'll Need
- 1/2” thick elastic or an elastic headband
- Fake flowers
- Hot glue gun (E6000 or super glue can also be used)
- Scissors


References
About This Article

To make a flower headband, start by locating a thick elastic headband to attach the flowers to. Alternatively, purchase a length of 1/2 inch elastic from your local craft store. Then pluck artificial flowers off the stems and apply glue to the back of the flowers with a glue gun. Hold each flower in place for about 10 seconds to make sure it sticks. Finally, let your headband dry for at least 30 minutes before wearing it. For tips on how to show off petal layers on your headband, keep reading!