wikiHow is a “wiki,” similar to Wikipedia, which means that many of our articles are co-written by multiple authors. To create this article, 23 people, some anonymous, worked to edit and improve it over time.
This article has been viewed 308,835 times.
Learn more...
Gel wax isn't wax at all, but a form of mineral oil. It's easier to work with in many ways than traditional waxes and allows for more light to reflect than standard candles. The clear gel allows you to achieve many interesting looks, from floating beads to underwater scenes. This is a great DIY project for gifts or to keep for yourself!
Steps
Melting the Wax
-
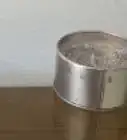
1Start the heat. There are two ways to warm up your gel wax do the desired temperature: a pouring pot on the stove or a glass measuring cup in the oven. Both ways require patience.
- If you want to use a pouring pot, cut up the gel into sizable pieces and place in the pot, on a low to medium flame. Let the gel wax melt until it takes on a thick, syrupy consistency. Using the thermometer, do not allow the gel wax to get hotter than 230 F (110 C).[1]
- If you are going to use the oven, preheat it to 225 F (107 C). While your oven is warming, cut or chunk off the desired amount of gel wax. When the oven is heated, place the gel wax into the glass container and carefully set it in the oven. Let the gel wax melt in your oven for approximately one hour. Check the temperature of the gel wax periodically using your thermometer to ensure the gel wax is at the correct level of heat.[1]
- Keep a constant eye on your wax. Do not let it exceed temperatures of 230 °F (110 °C)--it may burn and turn yellow, not to mention be hazardous.
-
2Secure your wick. Do this while the wax is melting. Though you don't necessarily need a tab, it does ensure things don't go awry.
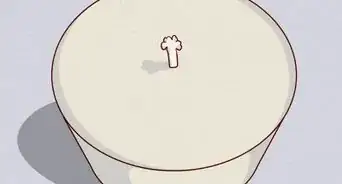
- Place a small dab of hot glue at the bottom of your container. Take an individual tabbed wick and place it on the spot, holding it for 15-20 seconds. This ensures it remains exactly how you want it.
- If you don't use a tab, wrap the top of your wick around a pencil and place it on top of your container to hang it freely, yet stabilizing it.
Advertisement -
3Consider adding color or fragrance while melting. You have a number of different options for color and timing that will all result in different looks. Add fragrance while heating, and color now if you want a uniform look.
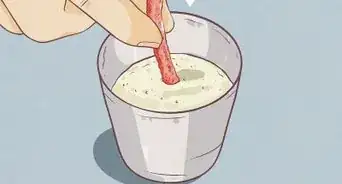
- Use a fragrance that's hydrocarbon compatible and non-polar. If you made your own gel wax, test 1 part fragrance with 3 parts mineral oil.[1] If it mixes in nicely, it's fine. If you bought your gel wax from a store, separate a bit and test the dye before possibly ruining the batch.
- Adding the color now will create a monotone candle. The color will be evenly spread throughout all the layers.
- Adding the color when just poured into the container will create a swirling effect.
- Adding the color once the gel is mostly cooled will create a ring around the top.
- You can also add color layer by layer, either in the pan (pour a bit, add color, pour a bit, add color), or in the container. The tone will get richer with each layer.
Pouring & Creating
-
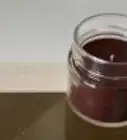
1Set up your embedded materials. If you are working with multiple layers, only worry about the bottommost layer now. To create "floating" embeds, you'll be pouring your gel wax at different times.
- Arrange your embeds around the bottom of your container. They should only move minimally when under the wax.
- Have tweezers ready to adjust your embeds as necessary without burning yourself.
- Use sand or salt to create a beach scene. Add seashells or pebbles for dynamics. Glue salt onto sticks to create white algae. Colored sand works well, too.
- Petals or flowers add well to a color scheme in any room and combine easily with fragrance. However, natural embeds may require a gel coating before placed in the container of hot wax. This can be done with the same wax gel.
- Wax pieces of fruit or ice cubes call to mind summery drinks and sunshine.
- If you do buy gel wax premade, make sure it is high density if you are wishing to embed heavy objects.
-
2Pour on. Take note: The faster you pour, the more bubbles there will be. And if you are working with layers of embeds or color, only pour enough to cover the first section.
- Grab your tweezers to adjust your embeds if they've moved under the pressure.
- If unwanted bubbles are starting to form on the top of your candle, grab a hair dryer to reheat the top, solving your problem![1]
-
3Let cool and arrange the next level. Once your first layer has mostly cooled (this should only take a matter of minutes), create your second level of embeds on top of the wax and continue pouring.
- If your wick is not tabbed, you may wish to take a careful hold of it while pouring.
- Remember, you can add more color for a gradient effect!
- Repeat this process for however many levels you desire.
-
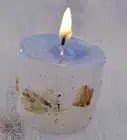
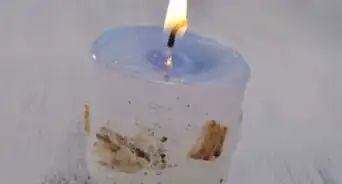
4Let your gel candle cool completely. After about four hours, it should be ready. At this time, trim the wick to 1/4 of an inch (.63 cm) before burning.
Making Your Own Gel Wax
-
1Obtain a combination of thermoplastic resin powder and white mineral oil with a flashpoint of 375 degrees Fahrenheit (190 C). There are several density grades to choose from:
- Low density gel is made with 1 lb mineral oil and .9 oz resin. It allows for a light fragrance and only holds small, light objects.
- Medium density gel is made with 1 lb mineral oil and 1.1 oz resin. It allows for a decent amount of fragrance and will hold all but heavy objects.
- High-density gel is made with 1 lb mineral oil and 1.25 oz resin. It allows plenty of fragrance and holds even heavy objects.
- Stand alone density gel is made with 1 lb mineral oil and 1.4 oz resin. It does not require a container but does need a stand. It holds the most fragrance of all and has no trouble with the heaviest of embeds.
-
2Cook your gel wax. Mix your combination of mineral oil and resin and let sit for an hour. After this time is up, heat gradually to 220 F (104 C). It should take about 2 hours for the gel wax to form and then liquify. Let cool, pour into a container, let harden and store for later use.[2]


Community Q&A
-
QuestionIs it possible to use hair gel for the process?
 Community AnswerMost hair gels are highly flammable, so I'd strongly recommend you don't try this.
 -
QuestionIs this fiberglass resin?
 Community AnswerNo. Fiberglass resin is extremely toxic if burnt.
 -
QuestionCan I use crayons with some wax for this?Community AnswerNot if you are using the gel. You can, however, use wax crayons to add color when making wax candles.
Warnings
- Trim gel wick to 1/4 of an inch before burning. That's very short! Keep it short to prevent gel fires.⧼thumbs_response⧽
- Never burn candles unattended.⧼thumbs_response⧽
- Don't use flammable embeds! Natural materials should be coated to prevent clouding and bubbles.⧼thumbs_response⧽
Things You'll Need
- Clear glass container that can withstand high temperatures
- Gel wax (mineral oil and resin if making your own)
- Wick
- Glass measuring cup or pouring pot (with thermometer)
- Embeds, gel dye and scent

References
About This Article
To make a gel candle, start by slowly warming gel wax to 225°F, either on the stove or in the oven. Once it’s thick and syrupy, remove it from the heat. Then, attach a tabbed wick to the bottom of a candle container with a small dab of glue so it stays in place. Next, place any items you want embedded in the wax, such as sand or flowers, into the jar and arrange them how you want them. Finally, pour the melted gel wax into the container and let it cool completely. For tips on how to make your own gel wax, keep reading.