X
This article was co-authored by wikiHow Staff. Our trained team of editors and researchers validate articles for accuracy and comprehensiveness. wikiHow's Content Management Team carefully monitors the work from our editorial staff to ensure that each article is backed by trusted research and meets our high quality standards.
There are 10 references cited in this article, which can be found at the bottom of the page.
This article has been viewed 28,037 times.
Learn more...
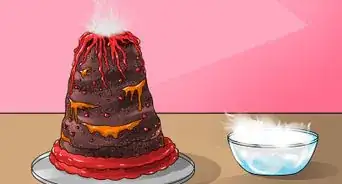
Whether you're planning a picnic to celebrate summer or a birthday party for someone who loves ladybugs, a bright, cheerful ladybug cake will be the centerpiece of any gathering. Read on to learn how to make this cute, memorable cake.
Ingredients
- Cake mix or recipe in the flavor of your choosing
- Mix may require 2-3 eggs, vegetable oil, and water
- 4 cups of white frosting, like buttercream (from scratch or store-bought)
- Black or red, blue and yellow food coloring
- Red no-taste food coloring
Steps
Part 1
Part 1 of 4:
Preparing the Ingredients for the Cake
-
1Choose a cake recipe or mix you want to use for the cake. A standard yellow cake or chocolate devil's food cake make a good base, but any flavor is fine.
- Look for a mix or recipe that makes enough batter for two 8 inch (20.3 cm) cake rounds, or a 2 layer cake. 1 box of cake mix is usually enough.[1]
- Most box cake mixes require only a few fresh ingredients--usually eggs, oil, and water.
-
2Mix the cake batter. Follow the instructions closely, and make sure you are following the steps in order. Because baking is more of a science, things like adding the dry ingredients to the wet (and not vice versa) can make a difference in how your cake turns out.[2]
- Mix the batter thoroughly--no lumps or bumps, or you will find clumps in your finished cake.
Advertisement -
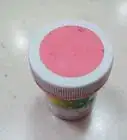
3Dye about 2 1/2 cups of the frosting red. The majority of your ladybug will be red, so you'll need most of the frosting to be this color. Add the dye several drops at a time, mixing thoroughly until you have the desired color.
- Be wary of using too much red dye. Sometimes the amount of dye needed to achieve a bright red can affect the flavor of the frosting. Look for a no-taste red dye or a highly concentrated red to avoid a bitter aftertaste.
- Some grocery stores carry pre-dyed frosting in cans with an easy to use nozzle, as with a can of cheese wiz or whipped cream. You can use this if it is easier for you to decorate, just make sure you have enough.
- Refrigerate dye until you are ready to decorate.
-
4Dye about 1 cup of the frosting black. You can buy a black dye or use equal parts red, blue, and yellow food coloring.
- Never use squid ink for black dye. This works for savory dishes only!
- Refrigerate dye until you are ready to decorate.
-
5Reserve the rest of your frosting for filling and adding white details.
- If you want your filling to be colored, you'll only need about 1/2 cup of white frosting and can dye the rest the desired color.[3]


Advertisement
Part 2
Part 2 of 4:
Baking the Cake
-
1Grease the the pan. Use a paper towel or silicone brush to cover the inside of the pan with a thin layer of butter or shortening. [4] Add about a teaspoon of flour and shake the pan so the flour begins to stick to the grease. Tilt the pan on its side and tap the pan. Turn and tap until the entire bowl is evenly coated with flour.[5]
- Greasing the pan not only ensures your cake will pop out easily, it helps the cake climb the sides of the pan and gives your it more volume.[6]
- Turn the pan over and tap gently to remove any excess flour.
- If you are baking a chocolate cake, you may want to use cocoa powder to prevent a white film that may be left by the flour.[7]
-
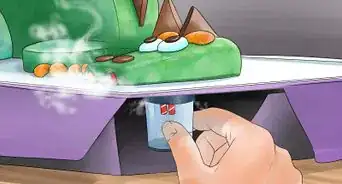
2Grease and place the heating core in the bottom of the pan. By radiating heat from the center of the cake and not just the sides of the pan, the heating core ensures your cake bakes evenly and the middle, sides, and top of the are all done at the same time.
- You can use a core shaped like a nail, placing the "head" of the nail on the bottom with the spike pointing upward, or one that is shaped like a long, narrow plug, with the opening pointing up.[8]
- You can bake this cake without a heating core, but the depth of the pan means you may over-brown the exposed top and sides of your cake.[9]
- A heating core may also prevent your cake from deflating or sagging in the middle.
-
3Pour the cake batter into the pan. Use a spatula to make sure the batter is even, but be careful not to touch the sides and scrape the grease off the side of the pan.
- If you use a plug-shaped heating core, don't forget to fill the core with cake batter, too. Fill it a little higher than the level of batter outside the core. The plug-shaped bit of cake will fit into the hole created by the core once it's removed.
-
4Bake the cake in an oven heated to 350 °F (177 °C) for 30-40 minutes, or as instructed by cake recipe. Bake on the middle rack.[10] You may want to place the round bowl in a standard 8 inch (20.3 cm) cake round pan to make sure it stays level in the oven
- Test the cake by skewering near the center (but not inside the heating core) with a toothpick or kebab stick. If the stick comes out clean (a few crumbs is ok), then the cake is ready.[11]
- If the cake is done, the sides should be just starting to pull away from the pan and the center should feel springy when you press it with your finger.[12]
-
5Place the pan on a cake rack and cool for 10 minutes. Removing the heating core (if you use the core shaped like a plug) can speed up the cooling process.
- If the top of the cake is raised above the pan, use a knife to carefully trim it flat.[13]
-
6Remove the cake from the pan. Give the pan a little shake to feel if the cake has released the pan and is moving easily. If it seems to be sticking, stick it in the oven for an additional 2-3 minutes.[14] Otherwise, place the cooling rack on top of the pan. Holding the rack against the pan, carefully turn them upside-down, together, so the rack is on the bottom you can lift the pan off the cake.
- You can loosen the sides by gently running a knife around the edges.[15]
- Allow the cake to cool for at least an hour. Frosting or slicing a cake before it has cooled can ruin your cake and will cause your icing to melt.


Advertisement
Part 3
Part 3 of 4:
Assembling the Cake
-
1Slice your cooled cake into two layers. The best way to do this is by placing the cake on a cake wheel or turn table first. Hold the top part of the cake with one hand and a long, serrated knife in the other. While continuously turning the cake, push the knife toward the center of the cake.
- Make sure you hold the knife straight and steady. It should slide easily and cleanly through the soft cake.
- You may want to trace the cut first. Before you cut all the way through, hold the knife beside the cake so the teeth will just cut into the side and turn the cake on the table. This can guide your knife better when you cut your layers.
- Be conscious of where the knife is going in relation to the hand on top of the cake. Don't accidentally slice into your hand.
-
2Fill the cake with icing. To get an even filling, first line the baking pan you just used with plastic wrap, making sure some of the wrap hangs over the sides. Place the top of your cake (the top of the hemisphere, or bottom part of the bowl) back into the pan. Spread a thick layer of icing on the cake, then place the larger, bottom part of your cake on top. You are building your cake upside-down in the pan.
- Wrap the bowl with plastic wrap and put it in the freezer for about 30 minutes.
- You may choose not to layer and fill your cake, but because the cake is so tall your guests may find they have big mouthfuls of cake with no frosting.
-
3De-pan the cake onto a platter. There are several ways to do this if the cake doesn't pop out right away (the plastic wrap should help it come out easily). Try placing the pan in a hot water bath for about three minutes and then turn it over onto the platter. Unwrap the saran wrap. Your cake should be a nice, seamless hemisphere, or bowl shape.
- You can also heat the pan with a hairdryer or blowtorch to help force the bowl to release the cake.
- Place the plattered cake on your cake wheel or turn table. You can use a bit of sticky fabric, like a mesh shelf liner, to keep the platter from slipping while you decorate.


Advertisement
Part 4
Part 4 of 4:
The Frosting
-
1Pipe the black frosting in a semi-circle of icing onto the side of the cake to make the ladybug's head. Use an open star tip, placing the stars close together so no cake shows through.
-
2
-
3Use the star tip to pipe black spots on the ladybug's wings. It is up to you how large or small the spots are, but try to keep them all about the same size.
- Remember to use consistent pressure and keep the stars close together.[20]
-
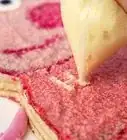
4Pipe red frosting on the remaining exposed part of the cake. Use the star tip to cover the rest of the cake, creating the ladybug's bright red wings.
-
5Add details. Use the reserved white frosting to make eyes or a smiling mouth. If you want antennas, use the round tip to draw them coming out of the head and back onto the wings.
- Experiment with borders. Try piping big red stars along the bottom edge of the cake for a nice border. Or make some green frosting and use the start tip to pipe it all over the platter to look like grass.


Advertisement
Things You'll Need
- An 8 inch hemisphere cake pan or a 2 1⁄2 US-quart (2,365.9 ml) oven-safe bowl, like Pyrex
- Plastic wrap
- Spatula
- Silicone pastry brush
- Cake nail or heating core
- Turntable or cake wheel
- Piping bags
- Open star and round decorating tips
- Long, serrated knife
- Butter or shortening and flour to grease the pan

References
- ↑ http://www.wilton.com/idea/Basketball-Cake
- ↑ http://www.cookinglight.com/cooking-101/techniques/cake-baking/cake-batter-mixing
- ↑ http://www.wilton.com/idea/Basketball-Cake
- ↑ http://baking.about.com/od/hintsandtips/ss/greaseflourpans.htm#step2
- ↑ http://baking.about.com/od/hintsandtips/ss/greaseflourpans.htm#step5
- ↑ http://latimesblogs.latimes.com/dailydish/2011/04/la-times-test-kitchen-tips-flouring-a-pan-with-cocoa-powder.html
- ↑ http://latimesblogs.latimes.com/dailydish/2011/04/la-times-test-kitchen-tips-flouring-a-pan-with-cocoa-powder.html
- ↑ http://bakingbites.com/2008/06/what-is-a-cake-heating-core/
- ↑ http://bakingbites.com/2008/06/what-is-a-cake-heating-core/
- ↑ http://www.wilton.com/idea/Basketball-Cake
- ↑ https://www.thekitchn.com/5-ways-to-tell-when-your-cake-is-done-98927
- ↑ https://www.thekitchn.com/5-ways-to-tell-when-your-cake-is-done-98927
- ↑ http://www.wilton.com/idea/Basketball-Cake
- ↑ http://busycooks.about.com/od/howtobake/a/removebakedgoods.htm
- ↑ http://busycooks.about.com/od/howtobake/a/removebakedgoods.htm
- ↑ http://www.wilton.com/technique/Star-Tip-Border
- ↑ http://www.wilton.com/technique/Star-Tip-Border
- ↑ http://www.wilton.com/idea/Lady-Bug
- ↑ http://www.wilton.com/idea/Lady-Bug
- ↑ http://www.wilton.com/idea/Lady-Bug
About This Article

wikiHow Staff
wikiHow Staff Writer
This article was co-authored by wikiHow Staff. Our trained team of editors and researchers validate articles for accuracy and comprehensiveness. wikiHow's Content Management Team carefully monitors the work from our editorial staff to ensure that each article is backed by trusted research and meets our high quality standards. This article has been viewed 28,037 times.
Co-authors: 11
Updated: November 20, 2022
Views: 28,037
Categories: Shaped and Themed Cakes
Advertisement