This article was co-authored by wikiHow Staff. Our trained team of editors and researchers validate articles for accuracy and comprehensiveness. wikiHow's Content Management Team carefully monitors the work from our editorial staff to ensure that each article is backed by trusted research and meets our high quality standards.
The wikiHow Video Team also followed the article's instructions and verified that they work.
This article has been viewed 66,824 times.
Learn more...
Butterflies are a beloved insect; their beautiful shape lends itself well to a range of food craft ideas. For the person who adores butterflies, what better than a whole cake shaped like one? Follow a few simple directions to make butterfly cakes that would be perfect for a child's birthday party, a spring celebration or a special event.
Ingredients
-
Simple butterfly cake:
- 1 round cake, flavor of choice
- Icing/frosting of choice
- 1 long candy to form the body
- Lots of candies, dragées and other edible decorations
-
Shaped butterfly cake:
- 1 round cake, approximately 9 inches/23cm in diameter
- Ordinary frosting, white
- Whipped frosting
- Colored frosting (frosting colored with your choice of food coloring)
- Candies, sugar coated almonds, edible glitter, sanding sugar, etc. (your choice)
-
Two butterfly cakes:
- 2 round cakes of choice (vanilla or chocolate are good)
- Fluffy white icing
- Cake decorations
Steps
Simple butterfly cake
-
1Cut the cake in half. This will form the butterfly's wings.
-
2Assemble the cake on the serving plate. It is easier to decorate the butterfly in position, as it can't be moved once made.
- Place the candy length down the center of the plate. This serves as the butterfly's body.
- Place the two wings on opposite sides of the candy, resting on the plate. Face the curve in toward the butterfly's body, the straight edges facing outward.
Advertisement -
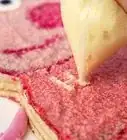
3Decorate the wings. The wings can be decorated in any fashion you like. The basics are:
- Ice or frost both sides of the cake.
- Stick candies onto the cake in symmetrical patterns on each wing (mimic the same pattern, mirror image, both sides).
- Sprinkle with edible glitter, sprinkles, or other small cake decorating items.
-
4Add a head and antennae.
- Use a round candy ball for the head.
- Unroll licorice lengths or similar candy to make the antennae––then re-roll the top portion to give it a little curl.
Shaped butterfly cake
This cake is a little more elaborate than the first one, as you'll be shaping the cake into realistic looking butterfly wings.
-
1If the cake has a dome (the raised portion of the cake), gently slice this off. The round cake needs to be flat on both sides.
-
2Turn the cake over.
-
3Cut the cake exactly in half. This will create two semi-circles.
-
4Keeping the two semi-circles together, as if the cake were still whole, cut the cake like a peace sign. To help you get this exact, use toothpicks as markers, placed before cutting the cake. Once this is done, you now have four wing pieces.
-
5Place the semi-circles back to back, with the rounded sides touching. The straight edges will be facing out. At this point, you'll already start to see the formation of a butterfly shape.
-
6Slightly part the cake pieces. Pull the top wings up and the bottom wings down and you'll see an ideal butterfly shape, ready for frosting.
-
7Place this arrangement onto the cake serving plate. As with the cake above, the cake needs to be decorated in place, as you won't be able to move it again.
-
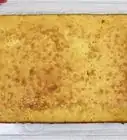
8Frost the entire cake with a basic thin layer of ordinary white frosting. This seals in the crumbs that will be starting to fall out after cutting the wing shapes. Frost down all of the sides of the wings, keeping this layer very thin.
- To set this layer, place it in the freezer for 15-20 minutes. This will make it much easier to add the whipped frosting.
-
9Add the whipped frosting in a thick layer. Add the layer generously first, then spread neatly with the frosting spatula.
-
10Decorate the wings.
- Place three colors into pastry cones or piping bags; these can be made easily from paper or cellophane if you don't own any. For the colors, choose according to the kind of butterfly you're trying to make or just use colors the cake recipient likes. Pastels are one possibility, neon colors another, and realistic colors too (look online for butterfly images to get the real colors).
- Pipe an amount of the first color on the base of the top wing. Use the spatula to spread a line of this across to the center of the wing. use the knife tip to drag the color into a point near the wing joint. Repeat with the next color just above it, then finish with another color on top. Three lines of color should fit across the top wing.
- Repeat on the opposite top wing.
- Repeat on the lower two wings. Exactly the same process, only slightly smaller blobs of frosting/icing will be needed.
- Accent the wing streaks using a piped line around the edges.
-
11Add decorations. This part is entirely up to your own creativity and can be as complex or simple as you like. Suggestions include:
- Sprinkles or edible glitter
- Coated almonds - add one per wing streak in the same color as the streak, or a different color
- Sanding sugar for a sparkle.
-
12Make the body. Simply lay a long striped candy stick down the middle wing joints to form the butterfly's body.


Two butterfly cakes
You do not need a special butterfly cake pan to make a butterfly cake; you can create your own simple butterfly cakes using two round cake pans.
-
1Bake the cake according to the directions on the cake box or recipe. The important thing is to bake the cake in two 9 inch (22 cm) round cake pans. You will be able to make two butterfly cakes (or freeze one for later).
-
2Cool the cakes for a short time after removing them from the oven. Remove the cakes from the pans and continue to cool the cakes completely.
-
3Place one round cake on a cutting board. Cut the cake in half along the diameter with a bread knife. Separate the two halves.
-
4Cut out a triangular notch of cake a little below the middle of the cut side of each half of the cake. The piece you cut away should have sides of 1 1/2 in. (4 cm) in length.
-
5Position each half of the cake on a platter or cake board. Place the pieces where the round edges are barely touching in the middle. This will form the butterfly wings.
-
6Cover the cake in cake icing. Go over the icing with a butter knife to smooth out the icing.
-
7Decorate the cake with decorator icing and assorted candies. Be sure that you keep the decorations on the butterfly wings symmetrical.
- Place a straight candy stick in the middle of the cake to form the body of the butterfly.
- Licorice or fruit roll ups make nice antennae.
- You can sprinkle the entire cake with sugar when you finish to add a glittery touch to decorate the cake.
-
8Repeat for the second cake.
-
9Store the cakes covered loosely until ready to serve. Serve side by side if you want a pair of butterfly cakes or place at different ends of the table to serve more guests with ease.


Things You'll Need
-
Simple butterfly cake:
- Cake pan for baking cake (if making from scratch)
- Sharp kitchen knife
- Icing/frosting spatula
- Piping tool (optional but possibly helpful)
- Cake serving plate
-
Shaped butterfly cake:
- Cake pan for baking cake (if making from scratch)
- Sharp kitchen knife
- Icing/frosting spatula
- Piping bags for the colored frosting (x3)
- Cake serving plate
-
Two butterfly cakes:
- Cake making equipment
- Platter
- 2 round cake pans
- Bread knife
References
- Shaped butterfly cake adapted from: Betty Crocker, http://www.bettycrocker.com/videos/videolibrary/birthday-cakes/how-to-make-a-butterfly-cake
- http://www.parenting.com/article/how-to-make-a-butterfly-cake
About This Article

To make a simple butterfly cake, cut a single-layer, round cake in half. Turn each half around so the cut sides are facing outward and the curved sides are almost touching, like butterfly wings. Then, place a long piece of candy or fondant icing between the cake halves to create the butterfly’s body. Cover both sides of the cake with frosting, then decorate the wings in symmetrical patterns using candy, edible glitter, sprinkles, or other cake decorations. Add a round head made of candy and 2 antennae made from licorice strips to finish your butterfly cake! If you’d like to learn how to make a butterfly cake with shaped wings, keep reading!