This article was co-authored by Sarah Stearns. Sarah Stearns is a DIY Specialist, Artist, Maker, Blogger, and the Founder of SarahMaker.com. With over ten years of experience, she specializes in fun, approachable crafts like crocheting, making polymer clay jewelry, quilting, and creating Cricut projects. Her work has been featured in several publications, such as Scientific American, Good Housekeeping, Vox, and Apartment Therapy. Sarah holds a BA in Psychology from Vanderbilt University.
This article has been viewed 56,950 times.
A bed quilt is an artwork created through quilting. Quilting is the craft of stitching pieces of fabric together to form a patterned bed quilt or quilted household item. Quilting can be fun and a rewarding hobby. It can be done alone, with others or with a group. Here's how to begin!
Steps
Preparation
-
1Gather your materials. To get started on your first quilt, you'll need to have everything ready and easily accessible. Get all your tools, clear an area and let's get started. You'll need:
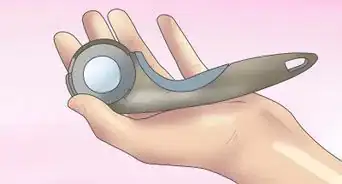
- Rotary cutter
- Scissors
- Ruler
- Thread (multiple kinds)
- Cutting mat
- Seam ripper
- Pins
-
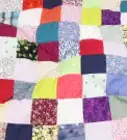
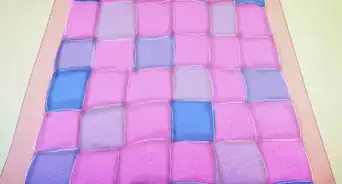
2Pick your fabric. Different kinds of fabric wear differently over time -- so it's best not to blend. Sticking to cottons will probably be your best bet. What's more, think about color and scale -- not thinking it out may result in a quilt that seems flat and off-kilter.
- Stay in the same color family, but don't use the exact same shades -- your quilt will seem monochrome and dull. Think about lights and brights, bolds and darks, and avoid ones that are a bit matchy-matchy.
- Don't pick fabrics that are all small or large prints. A good variety of both will create a dynamic, vivid piece. You may want to pick one fabric and base the rest around that specific pattern.
- Consider having a "zinger" fabric. It's one that is significantly brighter than the rest and, as a result, makes the entire quilt pop.
- You'll also need fabric for the back, the border, binding, and the batting.
- If you stick to high-quality 100% cotton quilting fabrics that come from the independent shops or the higher-end selection at JoAnn, Hancock, etc., you should not have a problem with colors bleeding, etc. If the fabric is older or lower-quality, prewash before you start cutting.
Advertisement -
3Try to get a quilting kit. A beginner must have a quilting kit to make learning easier. Quilting kits are packaged sets of materials to make a piece of work. They ordinarily include a pattern, pre-cut fabrics and instruction. However, they do not include thread, quilt backing and batting.
- Be sure the kit is for the appropriate skill level. Most kits are marked with level skills. Some are designed to fit the needs of unskilled beginners, usually for a wall hanging to start with before undertaking a full-size quilt. An alternative to a quilt kit is to buy jelly roll only which is a rolled up collection of coordinating fabric strips. One roll can make a small quilt like a wall hanging.
-Step-1.jpg)
-Step-2.jpg)
-Step-3.jpg)
Prepping Your Fabric
-
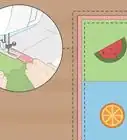
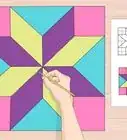
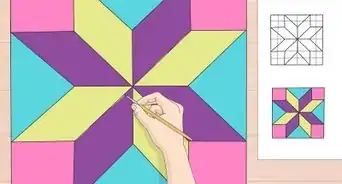
1Pick a design. You'll need to know how big you want your quilt to be and how you want to lay out your pieces. At this point, it'll be easiest to work with squares.
- You can think in large squares or you can think in smaller squares that make up larger blocks. Look at the materials you have on hand and see what arrangement they lend themselves to.
- The easiest quilt patterns are made from simple shapes like squares and rectangles.[1]
- Look for a pattern that includes step-by-step instructions with plenty of photos to guide you through the process.[2]
-
2Start cutting your fabrics. Grab your rotary cutter and start having fun. You'll need to do some math, though -- seam allowances and overall size need to be considered.
- You'll need a 1/4" (.6 cm) allowance on all sides of each piece of fabric. So if you want a 4" (10 cm) square, cut out a 4 1/2" (11.25 cm) square. If you want 4 squares to compose 1 4" block, each small square should be 2 1/2" (6.25 cm) across.
- Keep in mind that large-scale quilt blocks made with larger pieces will be faster to sew than those made with a lot of small pieces.[3]
-
3Arrange your pieces. It'll be much easier to arrange the entire quilt now than to piece them together in the middle of sewing later. Clear a space on the floor to see what your finished piece will look like.
- You'll want to see how each piece of fabric fits next to the ones around it. Piecing out the entire thing will help you avoid clumps of one color or one scale. You'll also be able to see how big the finished product will be.
-Step-4.jpg)
-Step-5.jpg)
-Step-6.jpg)
Sewing Your Quilt
-
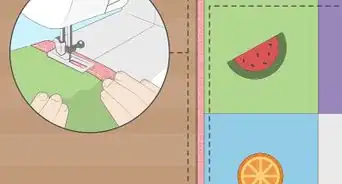
1Start sewing rows. Grab the arrangement of fabrics you have placed on the floor and put each row into a pile, going left to right. You may want to grab a piece of tape or somehow indicate which row is which.
- Take the square you have on top and lay it pretty side up. Then, pick up your second square and lay it face down on top of your first square. Pin the right sides together.
- With your machine, sew the squares together with a ¼” (.6 cm) seam allowance. You'll probably want to line up the edge of the material with your presser-foot. Adjust the needle if need be. Know that a scant ¼” is better than a wide ¼”.
- Now open up that pair, pretty sides facing you. Grab your third square and pin it facing square 2. Sew a ¼” seam just like you just did. Repeat for the rest of the row and the consecutive rows after -- but don't sew the rows together yet!
-
2Press the fabrics. This may seam tedious and unnecessary, but you'll be glad you did it later. And, yes, there’s a difference between pressing and ironing: pressing is a little more gentle. And if you sew some steam, things will turn out even crisper. Be sure to press your seams to one side – not open.
- Press the seams one way for the even rows and press the seams the other for the odd rows. Continue to do that for each row that follows.
- Once you have your two rows, match up the seams. Do the pressed seams directly touch? Great. Now pin the seams so the squares match up, too.
-
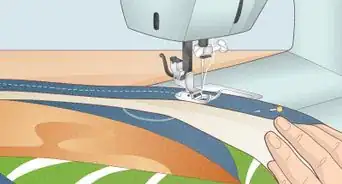
3Sew the rows together. Now that you have all the seams lined up, it'll be super easy to sew the rows. Follow the lines you have just created and get back to your machine.
- If it's not perfect, don't fret. This is a skill that is required over time. But the patchwork-ness of your quilt should help disguise any imperfections.
-Step-7.jpg)
-Step-8.jpg)
-Step-9.jpg)
Creating the Border
-
1Get four strips of fabric. This isn't necessarily a fabric you used in your actual quilt -- it could even be an opposing color to spice things up. Each strip should be the length of one side of the quilt and a few inches (at least 7.5 cm) wide.
-
2Find your border length. There are a variety of way to do this, but the simplest way is outlined below:
- Carefully trim off the selvage edges (the part that comes on the edges of fabric to keep it from fraying) of the borders themselves. Then lay 2 of the border strips across the middle of your quilt, lining up one end of the strips with the edge of the quilt. The other strip edges will hang over the side.
- Place a pin in the border strips where the quilt ends. And then carefully trim with your ruler and rotary cutter where that pin marks.
-
3Pin on the edges. Fold the border strip in half, end to end, to find the center. Pin the center of your strip to the center of the edge of your pieced quilt top and pin the ends of the strip to the ends of that quilt side.
- Space pins along the strip to secure the strip in place. It is not bad if your strip is slightly smaller than the pieced part of the quilt (the other two strips are longer), but this is why starting at the center and the ends when pinning is important.
-
4Sew your border. Pin opposite side of quilt and sew both borders on to the edges of the pieced portion. Press the borders open and flat working from the front side of the quilt.
- Repeat the process on the other edges. Lay the 2 remaining border strips across the center portion of the quilt. Place a pin to mark where to trim, cut off the remnants, pin and sew. Press once more.
-Step-10.jpg)
-Step-11.jpg)
-Step-12.jpg)
-Step-13.jpg)
Batting, Backing, & Basting Your Quilt
-
1Choose your batting. This is the stuff that is sandwiched between the pretty parts of your quilt. There may seem like a billion options to choose from (and there are), making the process fairly intimidating. But sticking to the basics now will ensure your success later. Mainly, you need to consider the loft and fiber of your fabric.
- Loft is a fancy term for how thick your batting is. A low loft means the batting is thin. A low-loft fabric is easier to work with, but will result in a thinner product.
- Fiber is what material your batting is made of. Polyester, 100% cotton, and a cotton/poly blend are your three most common options and none is necessarily better than the others. Wool and silk are also available, but they're a bit pricier. And a recent mover on the scene is bamboo, but that's just strange.
- Polyester - A cheap option that's better for hand-quilting if it's low-loft. It doesn't need to be quilted closely together, though it does tend to shift and the fibers can migrate to the edges of the quilt over time.
- Cotton - This is a good option for machine quilting. It should be quilted closely. It will shrink a bit, but it shouldn't pill. The 100% kind feels like flannel.
- Cotton blend (usually 80% cotton/20% polyester) - Probably the best option, if you had to pick. It's not super expensive and it doesn't shrink as much as the 100% kind. It's good on the machine, too.
-
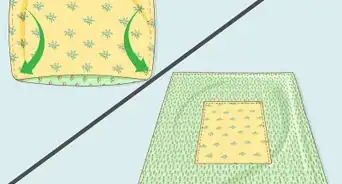
2Cut out your backing. This should be the biggest part. The batting should be smaller than your quilt back and larger than your quilt top. The quilt top will be the smallest.
- Just so long as it’s a few inches bigger on all sides than your front, you’re fine. The reason a back needs to be bigger is because you’re usually quilting from the top of the quilt and the batting and backing can shift slightly underneath. The extra inches are your insurance policy that your back doesn’t suddenly become smaller than the front.
-
3Assemble your layers. Basting a very important step in the quilting process. It seems tedious, but doing it carefully will result in a professional-looking finished project. Basting is a way to temporarily hold the three layers together while you quilt.
- Iron the backing fabric and lay on the floor face down. Carefully pull the fabric taught (but don’t stretch it) and tape it to a hard, flat surface.
- Smooth the batting and lay your quilt top over the batting. Press both layers together to get all wrinkles out. Doing so also helps the quilt top adhere slightly to the batting. When top and batting are smooth and flat, carefully roll the two together.
- Bring the top and batting to the quilt back and carefully unroll on top of the backing, smoothing all wrinkles as you unroll. Make sure you can see backing fabric around all four edges of the quilt top.
-
4Keep them together. Here's where you have some options. That is, if you're machine quilting. You can always baste in the traditional sense or use spray baste, too.
- Pin quilt top every few inches starting at the center. Use basting pins -- they're curved and easier to manipulate. When pins are in place, remove the tape and check the quilt back to make sure things are tight and flat.
- If there are puckers or excess fabric, now is the time to fix the problems. If the fabric is loose when you start quilting, there will be tucks or puckers in the quilting. There is no way to adjust the back once you start sewing without a lot of headaches or time with the seam ripper. (However, using a busy, patterned fabric for the back will help to hide any small mistakes.)
- Pin quilt top every few inches starting at the center. Use basting pins -- they're curved and easier to manipulate. When pins are in place, remove the tape and check the quilt back to make sure things are tight and flat.
-
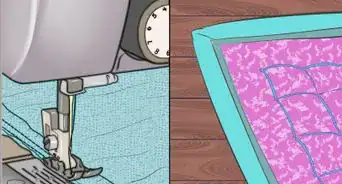
5Start basting. There are many options for machine quilting. The first is to let the seams/fabrics themselves be your guide. Sewing next to the seams themselves is called "quilting in the ditch." If you want to create more visual interest in the quilt you can stitch lines or patterns in other directions.
- It’s a good idea to start quilting from the center and work your way out. Because it’s hard for all that bulk to fit through your machine, roll the sides in. You can un-roll as you work toward the edges. You may want to use a walking foot when quilting. It’s not necessary, but it helps feed the layers of fabric evenly through the machine.
-Step-14.jpg)
-Step-15.jpg)
-Step-16.jpg)
-Step-17.jpg)
-Step-18.jpg)
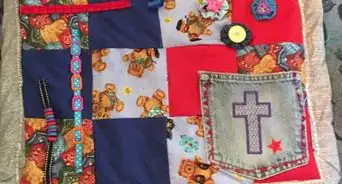
Binding Your Quilt
-
1Begin trimming and cutting. You will need to trim the excess batting and backing fabric from your quilted project. Use a rotary cutter and your ruler to have a neat, square edge. Then start cutting your strips for the binding itself.
- Trim the selvage off the strips. You'll need four that are the length of your edges, but smaller in width than your border. Around 2-3" (5-7.5 cm) is an appropriate width, depending on the size of your quilt.
-
2Sew the strips together to create one long strip. This may seem confusing or counter-intuitive, but it's the easiest way to get going. Press the seams open and fold in half lengthwise. Press once more -- you want a firm crease on the edge of your quilt.
-
3Pin your binding. Starting towards the center of one side (you don’t want you ends to join near a corner –- makes it a lot trickier), pin the raw edges of your pressed strip to the raw edges of the BACK side of the quilt.
- When you get to the corner you are going to have to miter each one. To do this:
- Fold the strip up at a 45 degree angle when you reach the corner of the quilt. Put a pin in at a 45 degree angle to hold that corner in place.
- Fold the strip down to match the raw edges with the next side of the quilt. The fold should line up with the edge of the last side you were pinning to. You will have a little triangle that sticks up – place another pin at a 45 degree angle on the other side of the little triangle flap.
- When the strip gets back around to the beginning, fold the ends down so that the strips meet-up. Press with your iron to make a crease at both folds. Trim strips to about ¼” (.6 cm) away from the fold. Pin together and sew seam right on the press marks of both strips. Press the seams open.
- When you get to the corner you are going to have to miter each one. To do this:
-
4Sew to your quilt. You're almost there! Sew the binding to the back of the quilt with a ¼” seam allowance. (If you have a walking-foot feature on your machine, use it here.) When you get to the corner, stop your seam about ¼” away from the end of that side. Lift the presser foot and rotate the quilt in the new direction, putting the triangle flap the other direction start sewing from the beginning of that side.
- When all four sides are sewn to the back of the quilt, fold the folded edge of the binding to the front of the quilt and pin in place. Mitered corners should fall into place. It’s like magic. Pin abundantly to keep the binding in place in preparation for machine sewing.
- Using either a matching thread or an invisible thread (good if you don’t want your stitching showing as much on the back of the quilt), carefully stitch the binding down working from the front of the quilt. Carefully pivot the needle when you get to the corners and continue sewing all the way around the quilt. You may want to back-stitch at the start and finish.
-Step-19.jpg)
-Step-20.jpg)
-Step-21.jpg)
-Step-22.jpg)
Community Q&A
-
QuestionHow do I use a sewing pin?
 Elizabeth BolsterCommunity AnswerA sewing pin is used to keep your fabric in place. To use it, simply weave the pin in so that it keeps the two pieces of fabric together.

References
- ↑ Sarah Stearns. DIY Specialist. Expert Interview. 4 October 2021.
- ↑ Sarah Stearns. DIY Specialist. Expert Interview. 4 October 2021.
- ↑ Sarah Stearns. DIY Specialist. Expert Interview. 4 October 2021.
- http://www.learnhowtomakequilts.com/
- http://www.diaryofaquilter.com/beginning-quilting-series/
About This Article

To make a quilt for beginners, consider getting a quilting kit, which will include a pattern, pre-cut fabrics, and instructions for making the quilt. Otherwise, start by getting different fabrics and cutting them into square pieces. Then, arrange the pieces in your desired pattern and sew them together with a sewing machine. Next, sew strips of fabric to the edges to make a border. Finally, baste some backing, batting, and your quilt together before sewing the binding to the back. To learn how to choose fabric for a quilt, keep reading!