This article was co-authored by Tanglewood Sue and by wikiHow staff writer, Luke Smith, MFA. Tanglewood Sue is a DIY and Upcycling Specialist and the Owner of Tanglewood Works out of Hyattsville, Maryland. With over nine years of experience, Sue specializes in upcycled painted furniture and other handmade, personalized, and sustainable goods. With her passion for art and reinvention, marketing experience, and Bachelor’s Degree in Broadcast Media, Sue has been able to create a business that not only provides quality pieces but empowers customers to create their works through her library of DIY tutorials and live demos as well as DIY supplies.
These paints are a home-improvement aficionado’s dream—they dry quickly, are easy to apply, non-toxic, and largely odorless. Both milk and chalk paint share a number of appealing qualities, to be sure, which explains their recent skyrocket in popularity. But though the paints are strikingly similar in many respects, there are some small differences that might sway you toward one over the other. We’ve got the scoop on everything you need to know about milk paint versus chalk paint, as well as a quick primer (pun intended) on how to apply both of them.
Things You Should Know
- Use milk paint for a distressed look that requires no sealant, but takes a little more prep in the form of sanding and paint mixing.
- Use chalk paint for more complete coverage on larger projects, so long as you don’t mind doing a little extra work by sealing the paint with wax.
- Use either paint on things like wooden furniture, upholstery, molding, cabinets, or pottery.
Steps
What is milk paint?
-
1Milk paint is made from… milk! More specifically, milk paint made from casein (a protein found in milk), calcium carbonate (lime), and sodium borate (Borax). These ingredients all come together to create a paint that has no bad odors (it smells faintly of cut grass) or toxins, and is much more eco-friendly than standard paints.[1]
- The organic ingredients of milk paint means it has a relatively short shelf-life (which varies by brand). Once mixed, it must be used within 24 hours, which makes it less ideal for larger projects.[2]
- Make your own milk paint at home for a more cost-effective alternative to off-the-shelf products.
-
2Milk paint comes in powder form. Unlike standard paint, milk paint doesn’t come as liquid in a can. Instead, it often comes in packets of powder, which are then mixed with water, which requires a little more effort on your part. Milk paint may also need to be stirred every so often while painting to prevent clumps.[3]
- Milk paint powders can be mixed together to create new, unique colors.
Advertisement -
3Milk paint has a chipped look and a slight sheen. A surface finished with milk paint will have a fairly glossy appearance, and will also appear slightly chipped or streaky, which provides a pleasing distressed look. In addition, milk paint also ages well on furniture, with that distressed look becoming more pronounced over time.[4]
- Choose milk paint if you’re after that vintage or antique feel.
-
4Milk paint doesn’t require a sealer or a primer. This means that as soon as the paint is mixed, you can start applying it to things like furniture or walls, without applying an undercoat. Then, once you’re done, you can simply let it dry and walk away, without applying another layer to seal it.[5]
- Choose milk paint if you want less aftercare (you can skip the sealant), but don’t mind a little more prep in the form of sanding and mixing.


What is chalk paint?
-
1Chalk paint is made of calcium carbonate, chalk pigment, and talc. Chalk paint is very similar in makeup to milk paint, but with one key difference: chalk paint doesn’t contain any organic compounds. This makes it vegan-friendly, and also means you can store it for long periods of time.[6]
-
2Chalk paint comes in liquid form. Like traditional paint, chalk paints most often come as a liquid packaged in a large can. This means it's premixed and usually requires little or no extra mixing before you can get painting.[7]
- Chalk paint is limited to the manufacturer-made colors, so there may be fewer color options than milk paint.
-
3Chalk paint has a matte finish, but is fairly versatile. A standard double-coat with a wax finish will give almost any surface a smooth, velvety texture. However, you can alter your application methods to achieve a different look, like using a bristly brush and a single coat for a distressed appearance.[8]
- Choose chalk paint if you’d prefer a more uniform, complete coverage to your project—it’s great for use on furniture or lighting fixtures.
- Chalk paint is also ideal for use on furniture.
-
4Chalk paint requires a sealer. Chalk paint is a bit more delicate than milk paint once applied, and it tends to flake over time. You’ll need to apply a clear sealant over dried chalk paint if you want it to last, which can reduce its textural appeal.[9]
- Chalk paint often doesn’t require a primer, but this varies by manufacturer.
- Choose chalk paint if you want to dive right into painting with little prep, but don’t mind a little aftercare in the form of sealant.


How to Use Milk Paint
-
1Combine equal parts paint powder and water, then let it sit for 20 minutes. Add both ingredients to a disposable bucket, and use the mixing attachment of a drill to thoroughly stir the mixture until it’s smooth. Hand mixing is laborious and tends to result in clumpy paint, but you can still opt to mix by hand if you don’t have a drill—just put some elbow grease into it![10]
-
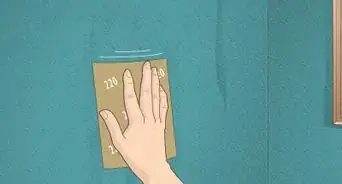
2Sand the surface to be painted. If you’re painting wood, it’s best to sand it with 150- to 220-grit sandpaper beforehand, to let the paint cling to the wood more easily. Use light pressure to achieve a distressed effect, and apply heavier pressure for a smoother surface. Then, wipe the surface clean with a damp rag.[11]
-
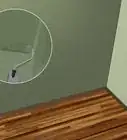
3Apply 2 coats of milk paint with a natural-bristle brush. Use confident, smooth strokes, and focus on covering the entire surface first before you begin to paint over it again. Wait about an hour for the first coat to dry, then go back in for a second coat.[12]
- After the second coat, lightly sand the painted surface with 320-grit sandpaper for a distressed look, then apply a wax, polyurethane, or oil-based sealer to protect the piece, if you like.


How to Use Chalk Paint
-
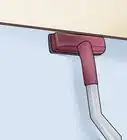
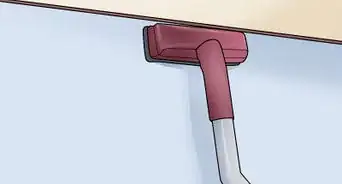
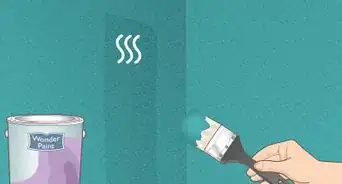
1Wipe down the surface to be painted with a damp rag. While chalk paint doesn’t require any laborious prep, it’s best to clean whatever surface you intend to paint, so that the paint clings more readily. Wet an old rag and give it a good wringing, then thoroughly clean your furniture, wall, baseboard, etc.[13]
- It is best to use some degreasing agent to clean the surface. A simple house cleaner should work well.
- While the surface is wet, sand it with a sanding sponge to get off the shine or the gloss. Don’t go too deep to avoid releasing oils from the old wood.
- You can sand the surface lightly and test your paint on a small area. If the paint doesn’t come off, no more sanding is needed. If it does, you might need to use an orbital sander or a palm sander to take off another layer.
-
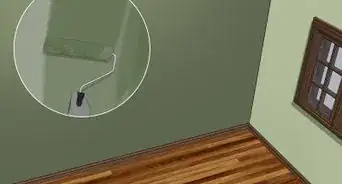
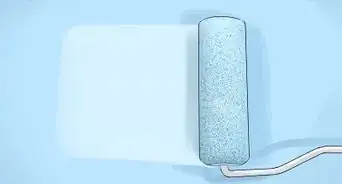
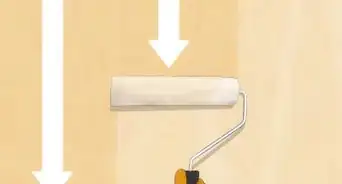
2Apply 2 coats about an hour apart and let them dry for another hour. Use a wide brush and even, confident strokes, and be sure to cover the entire surface. Let the first coat dry for about an hour—remember, chalk paint dries quickly—then go back in for round 2.[14]
- Many people opt for a single coat, or 2 light coats, so that some of the original surface is still visible beneath, which creates a chic, distressed look.
-
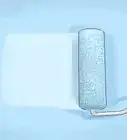
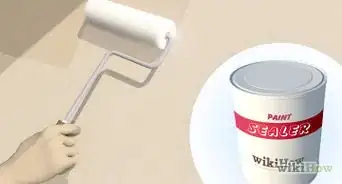
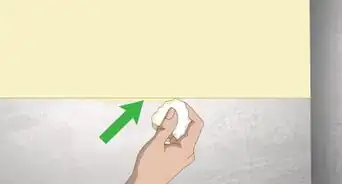
3Seal the paint with wax. Use a wax brush or a lint-free cloth to apply a dab of wax finisher to the surface. In sweeping strokes, cover the entire chalk-painted surface with wax, then use a clean cloth to remove any excess wax. Let the wax sit overnight. Then, for a polished finished, buff the wax in circular motions with a clean lint-free cloth.[15]
- Allow the wax to cure for 2 weeks—keep the furniture away from busy areas, or move carefully around other painted items in order to avoid bumping or damaging the newly waxed piece.


References
- ↑ https://www.thisoldhouse.com/painting/21528976/all-about-milk-paint
- ↑ https://www.treehugger.com/milk-paint-vs-chalk-paint-5509378
- ↑ https://www.treehugger.com/milk-paint-vs-chalk-paint-5509378
- ↑ https://www.thisoldhouse.com/painting/21528976/all-about-milk-paint
- ↑ https://www.treehugger.com/milk-paint-vs-chalk-paint-5509378
- ↑ https://resin-expert.com/en/guide/milk-paint-vs-chalk-paint
- ↑ https://www.thisoldhouse.com/painting/21528976/all-about-milk-paint
- ↑ https://www.thisoldhouse.com/painting/21528976/all-about-milk-paint
- ↑ https://www.treehugger.com/milk-paint-vs-chalk-paint-5509378
- ↑ https://www.thisoldhouse.com/painting/21528976/all-about-milk-paint
- ↑ https://www.thisoldhouse.com/painting/21528976/all-about-milk-paint
- ↑ https://www.thisoldhouse.com/painting/21528976/all-about-milk-paint
- ↑ https://www.forbes.com/home-improvement/painting/how-to-use-chalk-paint/
- ↑ https://www.housebeautiful.com/home-remodeling/interior-designers/a26990065/chalk-paint/
- ↑ https://www.anniesloan.com/techniques/how-to-use-chalk-paint-wax/
About This Article