This article was co-authored by wikiHow staff writer, Darlene Antonelli, MA. Darlene Antonelli is a Technology Writer and Editor for wikiHow. Darlene has experience teaching college courses, writing technology-related articles, and working hands-on in the technology field. She earned an MA in Writing from Rowan University in 2012 and wrote her thesis on online communities and the personalities curated in such communities.
This article has been viewed 8,046 times.
Learn more...
Have you ever wanted to rearrange text in Google Docs (like putting a text box over an image)? It's easy to insert and move text boxes to organize your text around images, shapes, or icons. This wikiHow article will teach you how to move or drag a text box in Google Docs by inserting a Google Drawing.
Steps
-
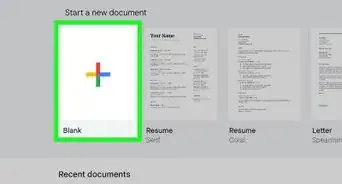
1Open your project in Google Docs. Go to https://docs.google.com/document/u/0/ and sign in. You can double-click an existing project or click the multicolored +' to create a new Doc.
-
2Click the Insert tab. It's near the top of the page with File and Help.Advertisement
-
3Hover over Drawing and click New. A "Drawing" window opens.
-
4Click the text box icon. It looks like a "T" inside a box.
-
5Drag and drop to create the text box. You'll see a blue border that indicates the text box's boundaries.
-
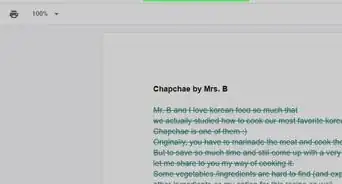
6Enter text into the box. It should resize based on your text.
- Click the three-dot menu icon to see more options for formatting your text, like the color, size, and font style.
-
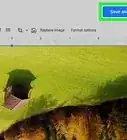
7Click Save and close. The drawing and moveable text box will be inserted into the Google Doc.
-
8Click the text box to select it. Once you select it, you'll see options at the bottom.
-
9Click the wrap or break text icons. They are usually the second and third options below your text drawing. These settings will make your box movable.
- The Wrap Text option will make text and images around your Google Drawing box hug the edges (left, right, top, and bottom while the Break Text option will prevent text or images from the left and right sides.
- If you want to drag and move this text box over an image, you also need to make sure the right option is selected here. Click to select the image, and change the layout to Behind Text if you want the image to appear behind the text.[1]
-
10Set a 0" margin. Click ⅛ margin to see a drop-down and select 0". If you want a larger margin around the edges, choose a different number, but, by default, a 0" margin is usually fine.
- You can change the size of the text box by dragging and dropping a corner or edge.[2]


References
About This Article

1. Open your project in Google Docs.
2. Click the Insert tab.
3. Hover over Drawing and click New.
4. Click the text box icon.
5. Drag and drop to create the text box.
6. Enter text into the box.
7. Click Save and close.
8. Click the text box to select it.
9. Click the wrap or break text icons.
10. Set a 0" margin.