This article was co-authored by Andres Matheu. Andres Matheu is the Owner of Hömm Certified Painting Systems, an Interior and Exterior Residential painting business based in the Washington, DC Metro area. Andres specializes in interior and exterior residential painting, color consultations, cabinet refinishing, wallpaper removal, and epoxy flooring among other services. An EPA Lead-safe Certified Firm, Hömm Certified Painting Systems has been awarded the Best of Houzz 2019 Service, Angie's List Super Service Award 2019, and Northern Virginia Magazine's 2018 Best Home Experts (painters) award.
There are 14 references cited in this article, which can be found at the bottom of the page.
This article has been viewed 42,080 times.
Any room can be brightened up with a fresh coat of paint. First, prepare your room to be painted by covering the furniture and cleaning the walls. Next, paint the edges of the walls with a paintbrush before using a roller to cover large areas. Once your walls are dry, clean your brushes, replace your furniture, and store your tools in a clean, dry place.
Steps
Preparing Your Room
-
1Protect your furniture from paint. Move all of your furniture away from the wall and towards the center of the room. You should have plenty of room to move around while you paint. Next, cover the furniture with large, plastic drop cloths.
- If you can’t move comfortably around the furniture pile, you may need to move some pieces to a different room.
-
2Cover your floors. If you drip paint onto your floor, it may be hard to remove. Protect your floors by covering them with a thick drop cloth or some newspaper. The covering should start at the base of the wall and extend out 2–3 feet (0.61–0.91 m). Secure the drop cloth or newspaper by taping it against the baseboards with painter’s tape.
- Make sure the painter’s tape doesn’t cover a part of the wall that you want to paint.
Advertisement -
3Remove any wall features. Remove wall features such as switch and outlet plates, light fixtures, wall hangings, and curtains. If you can’t remove the feature, cover it with painter’s tape or a plastic bag to protect it from paint splatters.[1]
- Store switch and outlet plates with in a resealable plastic bag to avoid misplacing them.
-
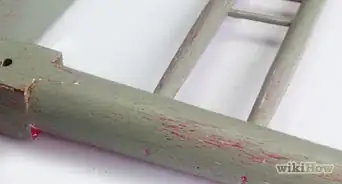
4Repair the walls. Before you paint, you must remove old wallpaper and adhesive completely, scrape off loose paint chips, and repair any holes. Small holes in drywall can be repaired with putty. Larger holes should be patched with pieces of drywall.[2]
- Make sure the wall is smooth. You may need to sand down any putty you applied to holes so the texture of the wall is even.
- If your home was built before 1978, test your paint for lead before scraping it off with a testing kit. If it tests positive, call a professional lead paint remover. Find professional lead paint removers online or by calling your local home improvement store.
- If there's wallpaper on the walls, it's best to remove the wallpaper and glue before you paint the walls. If you paint over wallpaper, it will likely start to bubble and peel.[3]
-
5Clean the walls. Fill a large bucket with warm water and about a tablespoon of mild dish detergent. Next, dampen a large sponge in the soapy water, wring it out, and wipe it along the walls to clean them. Once the entire room has been cleaned, “rinse” the walls with a clean sponge and fresh water.
- Don’t saturate the walls with water, simply wipe away soap residue with a damp sponge.
- If there is grease on the walls (such as in a kitchen), use a degreasing product to remove it so the paint will adhere smoothly.[4]
- Let the walls dry for an hour or two before continuing.
-
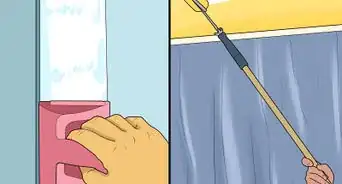
6Tape the walls. While taping, use many small sections of tape instead of one large piece of tape. Use the tape to outline the area you want to paint and protect the areas that you don’t want to paint. For example, cover the bare light switches and outlets with a small strip to protect the wiring. Use a putty knife to press down on the edges of the tape so it adheres completely.[5] Consider lining:
- Baseboards
- Wall trim
- Windowsills


Painting the Walls
-
1Ventilate the room. Paint fumes can be harmful when inhaled. Therefore, you should properly ventilate your room before beginning. First, open a door or window to encourage air flow. Next, set up a small fan to circulate the air in the room.
- You can also wear a respirator to make breathing easier while you paint.
-
2Prime the walls before painting for best results. Priming is an important step to changing your wall color as it helps the paint adhere to the walls and go on smoothly. Use a paintbrush to outline the walls with primer, such as near the trim, ceiling, floor, and any outlets or fixtures. Then, use a roller to prime the rest of the walls. Paint large “M” shapes using the roller until the whole wall is covered in a thin, even layer of primer. Let the primer dry fully before applying paint.[6]
- Be sure to wipe off excess primer from the paintbrush and roller before beginning.
-
3Choose a primer-and-paint combination for an easier option. If you don’t want to prime the walls before you paint, choose a paint that contains primer. This helps cover up existing paint, as is particularly necessary if the existing color is dark or bold.
- You can find paint and primer all-in-one at paint stores.
-
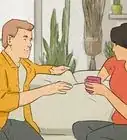
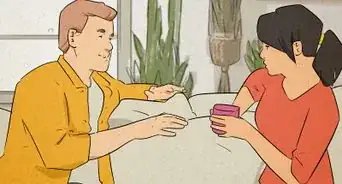
4”Cut in” with a paintbrush. Use a paintbrush to “cut in” the wall, or paint the edges. First, choose a large, angled paintbrush. Dip it into the paint bucket and wipe it along the edge to get rid of any excess paint. Next, paint about 4–5 inches (10–13 cm) along the edges of the wall using back and forth motions, framing the wall with a layer of paint.[7]
- Cut in around any taped wall features as well.
- Let the paint dry to the touch before continuing.
-
5Load a paint roller with paint. First, fill a clean painting tray with paint. Next, partially submerge the paint roller into the paint. Roll the roller along the ridged section of the painting tray to even the paint out around the roller and remove any excess paint.
- If any paint drips off the roller, there’s too much paint on it and more should be removed.
-
6Paint the walls with the roller. Gently run the roller along the wall on the section that was cut in, starting on the edges and moving towards the center. Move the roller in a zigzag pattern, overlapping each line of paint with another. Work in sections to avoid painting over semi-dry paint.
- If you have to press the roller against the wall to paint it, you need to apply more paint.
-
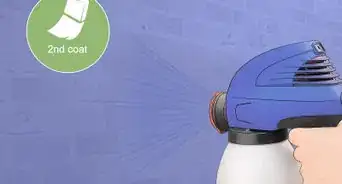
7Apply 2-4 coats of paint. Once the first layer of paint is dry to the touch, you can paint another layer. If the paint you are covering up is bright or bold, you may need as many as 4 coats of paint.[8]
- Unless you are painting a very light color over a very dark color, you don’t need to cut in the walls again.
-
8Remove the painters tape. As soon as you’ve finished painting, remove the painters tape. Slowly pull the strips of tape off of the wall at a 135-degree angle towards yourself to create clean, crisp lines in the paint. Once the tape is off of the wall, throw it away.
-
9Let the paint dry. Allow the paint to dry completely before you replace the light fixtures or wall hangings. Even if the paint is dry to the touch, it may not be completely dry yet. In fact, the paint can take anywhere from one day to one week to finish drying. Look on the back of the painting can to see the recommended drying times.


Adding Personal Touches
-
1Add stripes. Horizontal or vertical stripes can add a lot of color to a room. First, use painting tape to measure out your stripes. Next, use your roller or a large paintbrush to paint every other taped section. Once the paint is dry to the touch, remove the tape.[9]
- If the original paint is dark, you may need several coats of paint on the stripes to cover it up.
-
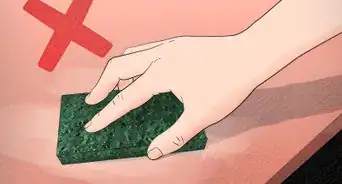
2Paint soft patterns with a sponge. A large, textured painting sponge can be used to create a soft color gradient on your walls. First, dip a small part of the sponge in the paint. Next, dab the sponge against the wall. Continue dabbing with the sponge to create a soft pattern. Dab two or three colors on top of one another to create layers of bright color. For example:
- Layers of forest green, teal, and bright yellow paint can be used to create a garden atmosphere.
- Dab on light pink, dark salmon, and a dusky rose paint to add a romantic blush to the wall.
- Create a neutral gradient by layering beige, light grey, and soft pink paint.[10]
-
3Apply wall decals. Wall decals can be used to add interesting designs to your walls. First, peel off the backing of the wall decal. Next, press the sticky side of the decal against the wall. Smooth out any wrinkles with your hand or a soft towel. Last, peel away the clear transfer paper.[11]
- Don’t peel the transfer paper too quickly or you may damage the decal.
- Let the paint dry for 2-3 days before applying decals.
-
4Paint an accent wall. If you aren’t interested in painting your whole room, add an accent wall instead. First, choose a bold, bright color that matches the decorations in your room. Next, choose a wall to paint. Section off the wall with painters tape and paint it using a roller or large paintbrush.[12]
- Remove any wall hangings or light features from the wall before painting it.


Cleaning Up
-
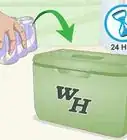
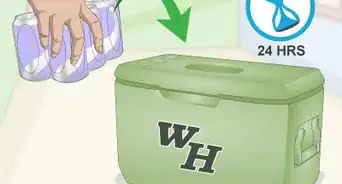
1Store any extra paint. Leftover paint can be used to touch up any areas of the wall that become damaged in the future. First, wipe away any drips of paint along the rim or on the outside. Next, replace the lid and tap it into place with a hammer. Store the covered paint in a cool dry place, such as a basement or utility closet. You’ll need to shake the paint before using it again.[13]
- Label the paint by writing on the lid with a permanent marker. Include the date and which room the paint was used in.
- If you store it properly, you can keep a gallon of paint for up to 5 years.[14]
- If you do decide to toss out your old paint, fill the can with cat litter or paint hardening powder. Once the paint has hardened, you can just toss out the can.[15]
-
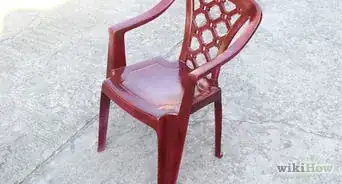
2Clean your paint brushes. Remove excess paint with paper towels or newspaper and throw it away. Don’t rinse paint down the drain, as it can clog the drain.[16] Once most of the paint is removed, clean the brush with warm, soapy water, taking care to remove the paint between the bristles. Rinse the brush to remove any soap residue.[17]
- Place the brush on its side to dry. This will help maintain the shape of the brush.
-
3Clean the paint roller. Remove the soft cover of the paint roller and throw it away. Next, use a damp dish towel to wipe paint away from the metal frame. Let the metal frame dry completely before storing it to avoid rusting.
-
4Clear the floor. If you lined the floor with newspapers, gather them up and throw them away. If you used a drop cloth, allow it to dry completely. Next, fold the drop cloths and store them in a clean, dry place.[18]
-
5Replace the furniture and wall features. Replace any switch and outlet plates, light fixtures, wall hangings, and curtains. Next, move the furniture back to its original position. If necessary, vacuum or sweep away any dried paint chips that may have fallen onto the floor.


Expert Q&A
Did you know you can get premium answers for this article?
Unlock premium answers by supporting wikiHow
-
QuestionWhat tools do you need to paint a bedroom?
 Barry ZakarBarry Zakar is a professional handyman and the founder of Little Red Truck Home Services based in the San Francisco Bay Area. With over ten years of experience, Barry specializes in a variety of carpentry projects. He is skilled at constructing decks, railings, fences, gates, and various pieces of furniture. Barry also holds his MBA from John F. Kennedy University.
Handyman -
QuestionWhich color paint is best for a bedroom?
 Katherine TlapaKatherine Tlapa is an interior designer, currently working as a Design Specialist for Modsy, a design service based in San Francisco. She also runs her own DIY Home Design blog, My Eclectic Grace. She received her BFA in Interior Architecture from Ohio University in 2016.
Interior DesignerThis depends on your style. A lot of paint colors look nice in a bedroom, but you want to steer clear of bright and vibrant colors that make the room too energizing like bright yellow, orange, red, and blue.
Support wikiHow by unlocking this expert answer.
-
QuestionWhat order do you paint a room?Katherine TlapaKatherine Tlapa is an interior designer, currently working as a Design Specialist for Modsy, a design service based in San Francisco. She also runs her own DIY Home Design blog, My Eclectic Grace. She received her BFA in Interior Architecture from Ohio University in 2016.
Interior DesignerYou should start by taping off what doesn't get painted - like trim and ceilings. Then start painting one wall and work your way around the room.Support wikiHow by unlocking this expert answer.

Things You’ll Need
- Plastic drop cloths or newspaper
- Painter’s tape
- Lead testing kit (optional)
- Large bucket
- Sponge
- Mild detergent
- Paint bucket opener
- Paint and primer or paint and primer all-in-one
- Paintbrushes
- Paint roller


References
- ↑ http://www.housepaintingguide.org/seven-steps-to-prepare-a-room-for-painting/
- ↑ http://www.planitdiy.com/how-to/painting-decor/how-to-prepare-a-room-for-painting/
- ↑ Andres Matheu. Commercial Painter. Expert Interview. 28 July 2020.
- ↑ https://www.popularmechanics.com/home/interior-projects/how-to/g151/13-painting-secrets-the-pros-wont-tell-you/
- ↑ https://www.popularmechanics.com/home/interior-projects/how-to/g151/13-painting-secrets-the-pros-wont-tell-you/
- ↑ http://www.planitdiy.com/how-to/painting-decor/priming-walls-for-painting/
- ↑ http://www.familyhandyman.com/painting/techniques/the-best-tips-for-cutting-in-paint#2
- ↑ https://www.thisoldhouse.com/how-to/how-to-paint-room
- ↑ http://www.sherwin-williams.com/homeowners/ask-sherwin-williams/painting/decorative-techniques/stripes-horizontal-and-vertical/
- ↑ http://www.familyhandyman.com/painting/techniques/how-to-sponge-paint-a-wall/view-all
- ↑ http://www.familyhandyman.com/painting/techniques/how-to-sponge-paint-a-wall/view-all
- ↑ http://retrorenovation.com/2012/06/12/accent-walls-4-steps-to-getting-them-right/
- ↑ https://household-tips.thefuntimesguide.com/2010/09/leftover_paint.php
- ↑ Andres Matheu. Commercial Painter. Expert Interview. 28 July 2020.
- ↑ Andres Matheu. Commercial Painter. Expert Interview. 28 July 2020.
- ↑ https://www.diynetwork.com/how-to/skills-and-know-how/painting/cleaning-brushes-can-be-quick-and-easy
- ↑ http://www.familyhandyman.com/tools/painting-tools/how-to-clean-paint-brushes/view-all
- ↑ http://www.planitdiy.com/how-to/painting-decor/how-to-clean-up-after-painting/
About This Article

To paint your bedroom, first you need to prep everything. Move all your furniture to the center of the room and cover it with drop cloths, cover your floor with drop cloths or newspaper, tape off any sections you don't want to paint (like the trim around your door and any outlets), and clean the walls with soapy water. Once all that's done, it's time to paint! You can either paint your walls with primer first or use a two-in-one paint and primer combination to save yourself time. Just make sure you use some kind of primer—your walls won't look nearly as good without one. Use a paint roller to paint large sections of your walls, then go in with a paintbrush to get corners and other spots the roller couldn't reach. In general, you'll need to apply at least 2 coats of paint, letting the paint dry in between coats. When you're done, remove any tape and let the paint completely dry. For step-by-step instructions with pictures, check out the full article below!