This article was co-authored by wikiHow staff writer, Darlene Antonelli, MA. Darlene Antonelli is a Technology Writer and Editor for wikiHow. Darlene has experience teaching college courses, writing technology-related articles, and working hands-on in the technology field. She earned an MA in Writing from Rowan University in 2012 and wrote her thesis on online communities and the personalities curated in such communities.
This article has been viewed 51,812 times.
Learn more...
This wikiHow will show you how to replace the battery in different models of the Amazon Kindle. When ordering a new battery, use the model number on your old battery to find the correct replacement.
Steps
Kindle Fire
-
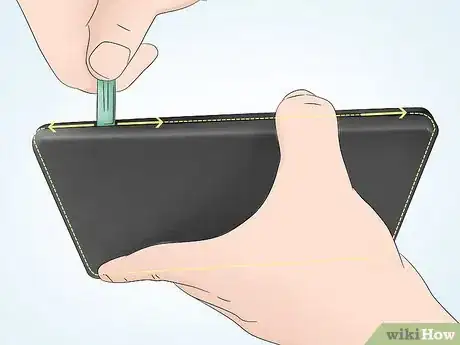
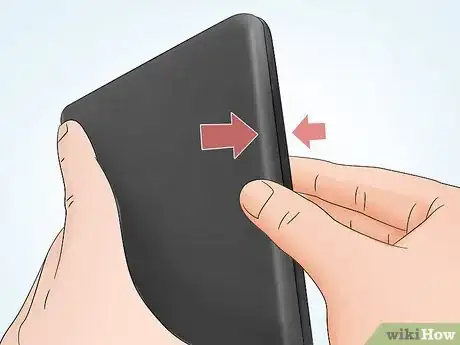
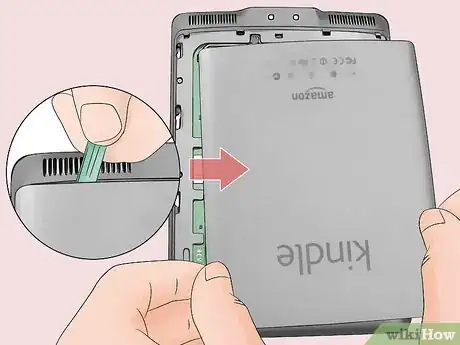
1Separate the back panel from the front. Some Kindles, like the Kindle Fire, have a removable back panel while others, like the Kindle Paperwhite, have a removable screen. You'll see a slight gap where you can separate the front and back that is more prominent at the corners. Start at a corner and make your way around with your small tool, separating the panels. You might hear clicks as some clips are undone.[1]
-
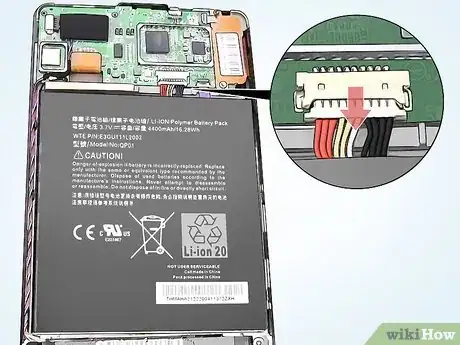
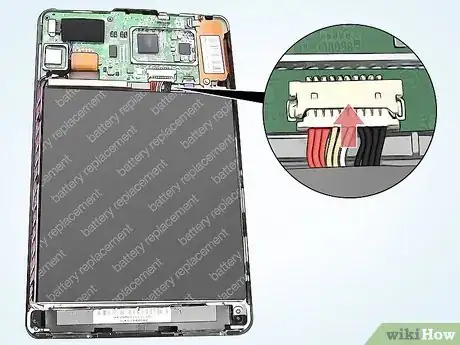
2Disconnect the battery cable. The battery is a rather large black unit, and the cable connector you're looking for is a set of multi-colored cords ending in a plastic casing. Use your small tool to wiggle the plastic casing loose.
- If you're replacing the battery on a Fire HD, you'll want to remove the antenna cable connector as well. It's a black wire tipped gold. Lift the wire to disconnect it.
Advertisement -
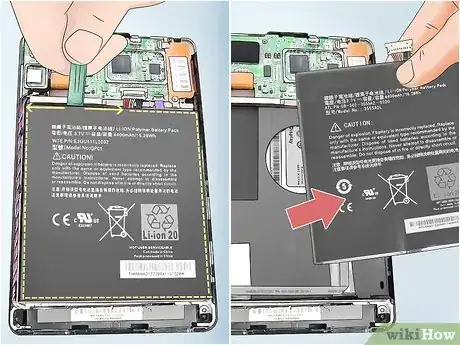
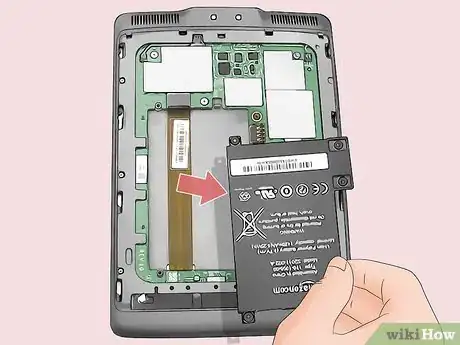
3Remove the original battery. You'll want to use your small tool to run around the edges first to dislodge any tape that might be securing the battery in place.
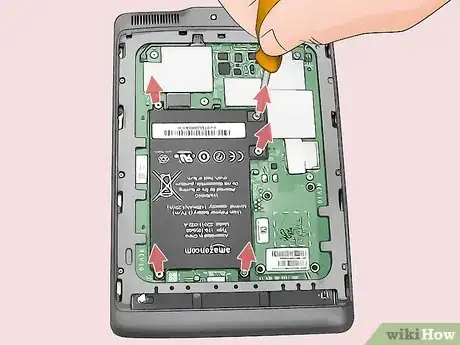
- If you're replacing the battery on a Fire HD, you'll want to remove the four screws with a Phillips-head screwdriver.
-
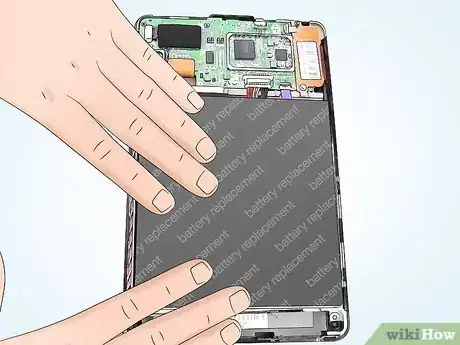
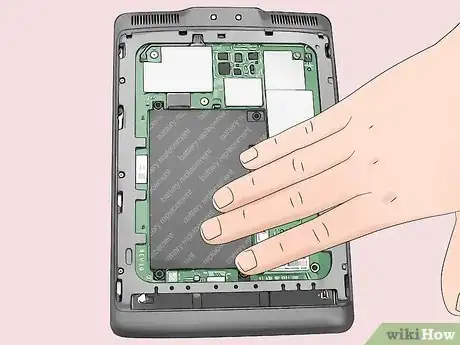
4Insert the new battery. If you used the Kindle's model number, you should have received the correct size battery to replace the original battery. It should slide into the casing without being forced.
- If you're replacing the battery on a Fire HD, you'll need to replace the screws you previously removed.
-
5Connect the battery. You can slide the multi-colored wires back into the plastic casing you removed them from earlier.
- If you're replacing a battery on a Fire HD, you'll need to reconnect the antenna cable connector as well. Just push it back to where it was originally connected.
-
6Replace the back panel. Press the two pieces together until you hear it click as the clips are snapped back in place.
Kindle Paperwhite
-
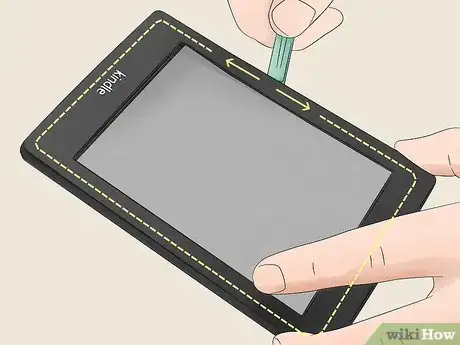
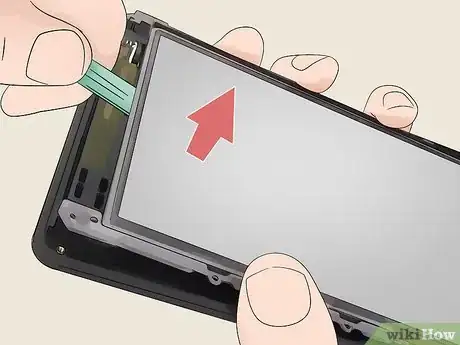
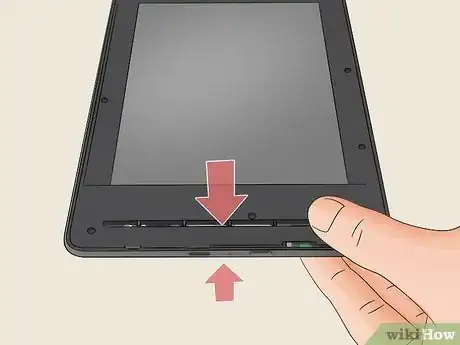
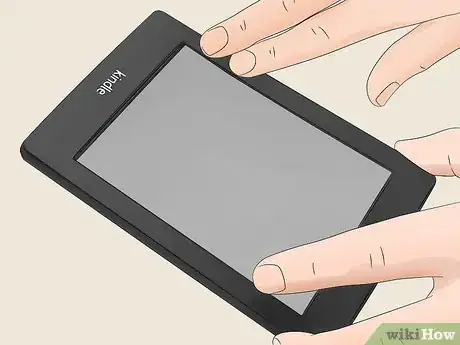
1Separate the screen faceplate at the bezel. Start at a corner and make your way around with your small tool, separating the screen faceplate from the device. You're not removing the screen, but only the faceplate around the screen. You don't want to stick your separating tool too far in or you risk damaging the screen.[2]
-
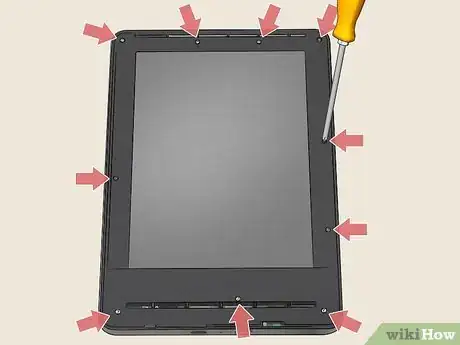
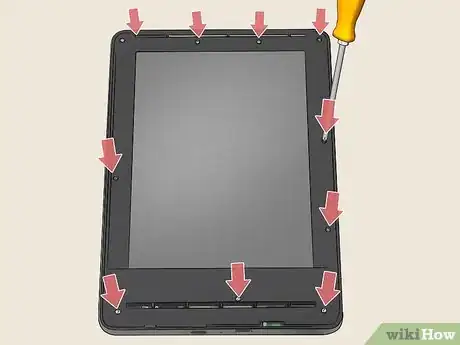
2Remove the 10 screws around the device. You'll find two across the top and five down each of the sides.
- A strip of black tape might be hiding a third screw at the top center of the display, to make a total of 11 screws.
- Don't lose these screws!
-
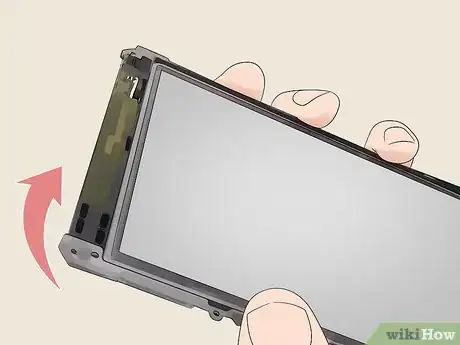
3Lift the Kindle from the back casing. After you remove all the screws that hold the display down, you should be able to lift it out of the surrounding case.
- You might need your small tool to help lift the Kindle out of the case. If you're really having trouble getting the display out, wiggle it from left to right before trying to lift it out again.
-
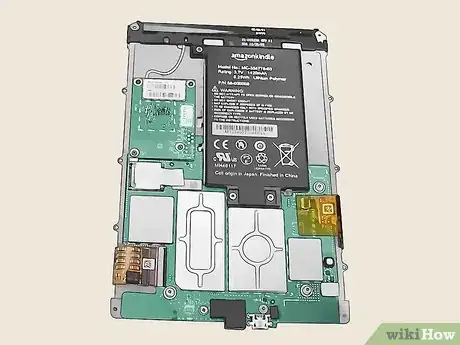
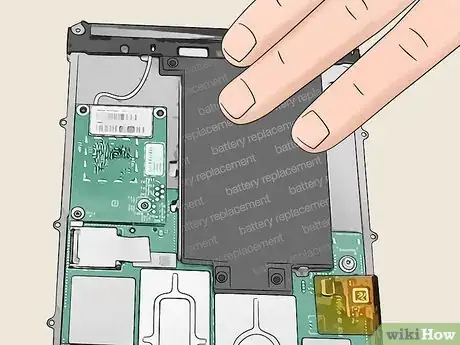
4Turn over the Kindle to reveal the battery. This is usually a black unit with a bunch of writing on it, including a model number, a rating, and a bunch of symbols.
-
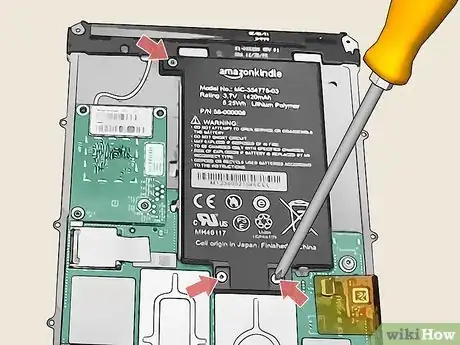
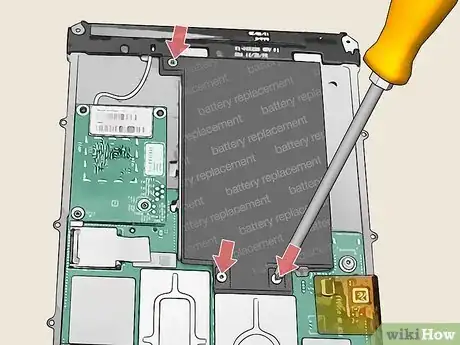
5Remove the three screws securing the battery. You'll find one screw in the upper left corner of the battery and the other two below the battery.
-
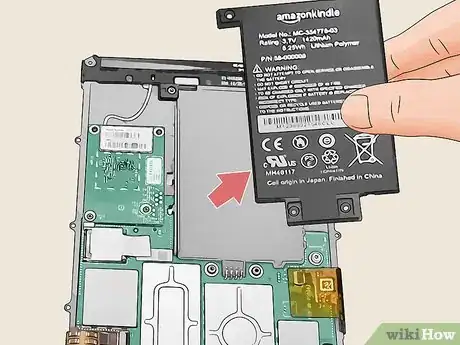
6Lift the battery from the casing. After you've unscrewed it from the case, you can use your fingers to gently take out the battery.
-
7Place the new battery inside. If you bought the right battery, it should fit snugly in the casing. You might need to slide the battery in from the bottom instead of lowering it in from above to avoid bumping a lip in the casing.
-
8Replace the three screws securing the battery. You'll want to follow the steps to taking apart your Kindle in reverse to put it back together again, including re-screwing the three screws you removed previously.
- You'll screw one screw in the upper left corner of the battery and the other two below the battery.
-
9Turn the Kindle over to reveal the display. The display should be face-up and the battery should be facing away from you.
-
10Seat the Kindle into the back casing. You might need to wiggle the Kindle to get it fully seated back in the back casing.[3]
-
11Replace the screws you took out previously. You'll replace 10 or 11 screws around the display as you took them out previously.
- Screw three or two screws along the top and five along each of the sides.
-
12Replace the screen faceplate. After you've returned all the screws, you can place the faceplate over the Kindle display. Push down on the faceplate and you'll hear clicking as the clips snap together.
Kindle 2
-
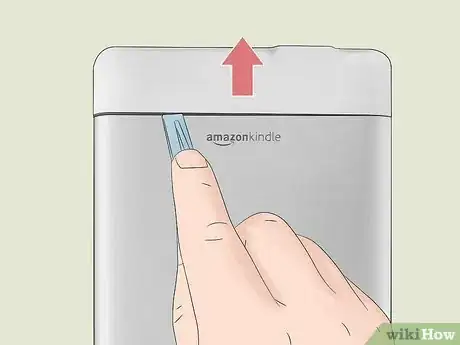
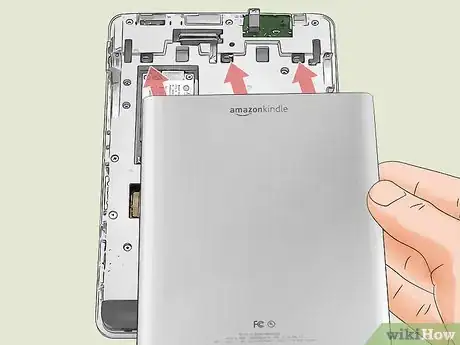
1Remove the lighter section of the back casing. Using a small tool, pry the plastic section from the rest of the metallic casing. Then, slide the plastic section up and away from the metallic casing.[4]
-
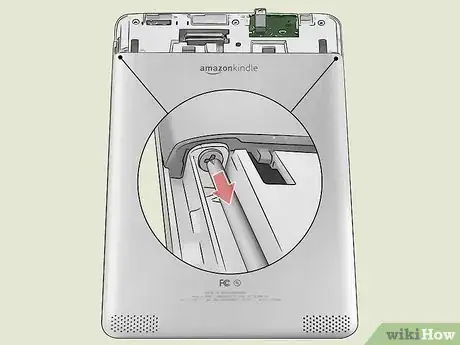
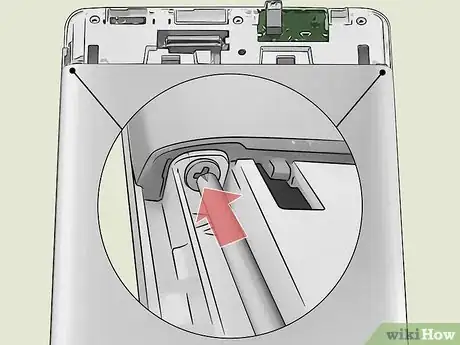
2Remove the two screws inside the metal casing. You might need to tilt the Kindle if you drop the screws inside the casing.
-
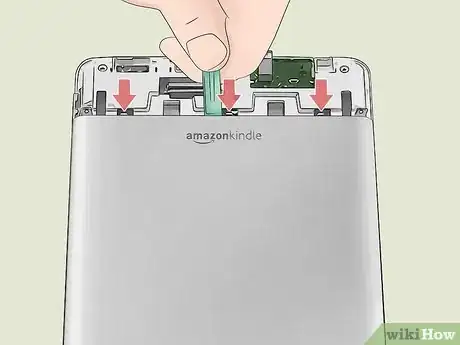
3Unfasten the three clips holding the casing together. Once you remove the screws, you'll be able to press down on the lip of the metal case near the clips with your small tool to unclip them. When the case is loose, you can remove the metal casing.[5]
-
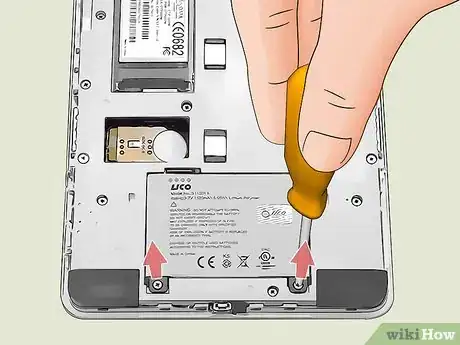
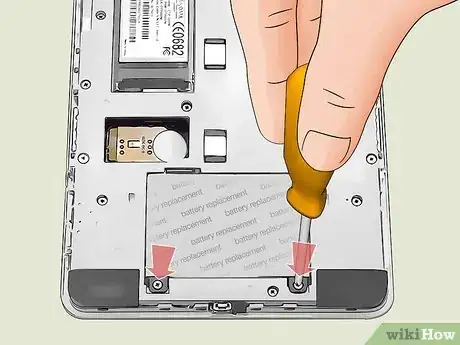
4Remove the two screws securing the battery. This is a white unit with black text and symbols, including a model number and the screws are below the unit.
-
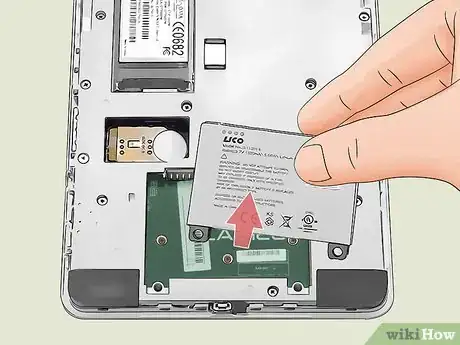
5Remove the original battery. Using your small tool or by tilting the Kindle, dislodge the original battery from its casing.
-
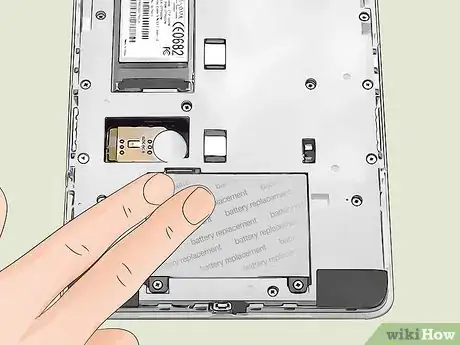
6Place a new battery inside. If the battery does not fit without you pushing to force it to fit, you may have purchased the wrong battery. Search for a replacement of the model number on the battery to find the correct replacement.
-
7Replace the two screws securing the battery. You'll replace the two screws below the battery.
-
8Replace the metallic cover and snap it into place. As you unfastened the clips earlier, you'll need to push on the case to refasten the clips holding the metallic case to the unit.
-
9Return the two screws inside the metal casing. You might need to hold the Kindle upright to do this.
-
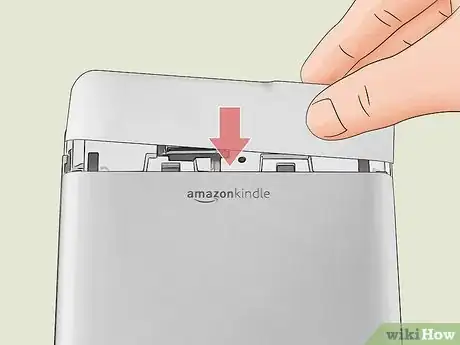
10Replace the lighter section of the back casing. Slide the plastic piece back down on the unit toward the metallic casing. You'll hear clicks as it secures back in its original position.
Kindle Touch
-
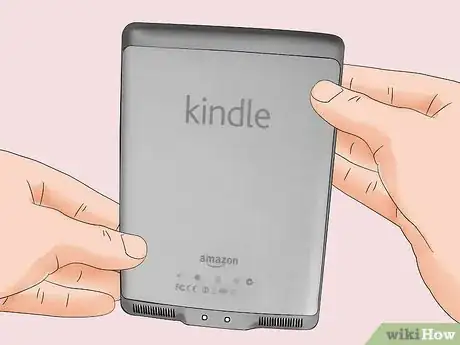
1Remove the back panel. You'll see a slight indentation around where the back panel is located. Using a small tool, pry off the lower half of the panel and then slide it off the Kindle casing.[6]
-
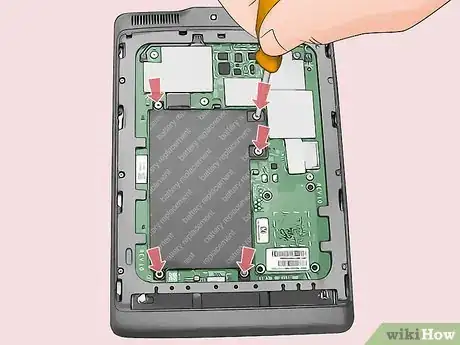
2Remove the five screws securing the battery. You'll find a screw at each corner of the battery and one extra screw next to a corner screw.
- The battery is the black unit with lots of white text and symbols, including type and model number.
-
3Remove the original battery from the casing. Using a small tool, you can lift the battery out of the casing.
-
4Replace the battery. You can use your Kindle's model number to find an accurate battery replacement.
-
5Replace the five screws securing the battery. You'll return the screws at each corner of the battery and one extra screw next to a corner screw.[7]
-
6Replace the back panel. You'll need to slide the panel back into place and then push down to resecure the clips.
Things You'll Need
- Phillips-head screwdriver
- Tweezers/Wedge/A similarly thin tool
References
- ↑ https://www.ifixit.com/Guide/Kindle+Fire+HD+Battery+Replacement/39830
- ↑ https://www.ifixit.com/Guide/Kindle+Paperwhite+1st+Generation+Battery+Replacement/13044
- ↑ https://youtu.be/VEVwTBspZ58
- ↑ https://www.ifixit.com/Guide/Kindle+2+Battery+Replacement/14081
- ↑ https://www.youtube.com/watch?time_continue=75&v=NE1U1zNxTP0&feature=emb_logo
- ↑ https://www.youtube.com/watch?time_continue=55&v=KmwQbc6TWMg&feature=emb_logo
- ↑ https://www.youtube.com/watch?time_continue=55&v=KmwQbc6TWMg&feature=emb_logo
About This Article
1. Remove the back casing.
2. Disconnect the battery.
3. Remove the battery.
4. Replace the battery.
5. Reconnect the battery.
6. Replace the back casing.
