This article was co-authored by wikiHow staff writer, Travis Boylls. Travis Boylls is a Technology Writer and Editor for wikiHow. Travis has experience writing technology-related articles, providing software customer service, and in graphic design. He specializes in Windows, macOS, Android, iOS, and Linux platforms. He studied graphic design at Pikes Peak Community College.
The wikiHow Tech Team also followed the article's instructions and verified that they work.
This article has been viewed 1,243,150 times.
Learn more...
Do you have a Canon All in One printer, such as a Pixma TS, TR, MX, or MG model, and need to scan a document or photo? As long as your Canon printer has a scanner, it'll be incredibly easy to scan from your printer to your computer! This wikiHow article will show you how to use Canon's IJ scanning utility, as well as the scanning features built in to Windows and macOS, to quickly scan any document with your Canon All in One printer.
Steps
Preparing to Scan
-
1Make sure that your Canon printer can scan. If your printer is an "all-in-one" model, it can scan. Some other printer models can scan as well, though you'll need to check the printer's documentation or product page to ensure that this is the case.
-
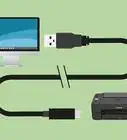
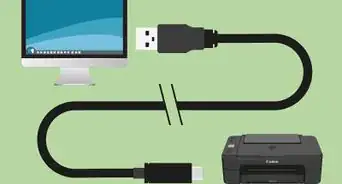
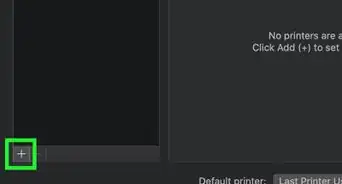
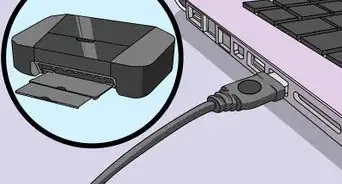
2Connect your printer to your computer. Most Canon printers that can scan will also be able to connect wirelessly via a touch-screen panel, but you may need to connect your printer to your computer via USB cable.
Tip: Most printers include a USB cable that you can use in case the wireless feature doesn't work.
Advertisement -
3Download and install the printer drivers and utilities. If your printer came with a CD or DVD, you can use that to install the drivers for your printer. The printer drivers also come with the IJ Scan Utility that you can use to scan documents.[1] If it did not come with a CD or DVD, use the following steps to download the drivers for your printer:
- Go to https://www.usa.canon.com/internet/portal/us/home/support/drivers-downloads in your web browser.
- Click Printers.
- Select your model number or enter your model number in the search bar and press Enter.
- Select your operating system using the drop-down menu next to "Operating System." (If drivers aren't available for your operating system, you may not need install drivers).
- Click Select next to the drivers you want to download.
- Click Download.
- Open the installation file and follow the instructions.
-
4Turn on your printer if necessary. Press the printer's "On" button. If the printer won't turn on, make sure that it's connected to a working power source.
-
5Open the scanner. Lift up the scanner's lid so that you can see the glass bottom of the scanner.
-
6Place your document face-down in the scanner. Look for an arrow in the back-left corner and align the document with that arrow. Your document should be aligned with the top and left side of the glass.[2]
- If your Canon printer has an automatic document feeder, insert the document into the automatic document feeder tray face up. Align the guides on the side to the width of your document. You should hear a beep when the document is inserted properly.
- Consult your Canon's instruction manual if you can't figure out how to use the built-in scanner.
-
7Close the scanner lid. Make sure that it is firmly shut before you scan your document.


Scanning with the IJ Scan Utility
-
1Navigate to the IJ Scan Utility folder. Use one of the following steps to navigate to the IJ Scan Utility folder on PC and Mac:
-
Windows:
- Click the Windows Start button.
- Open the Canon Utilities folder.
-
Mac:
- Click Go in the menu bar at the top.
- Click Applications.
- Open the Canon Utilities folder.
- Open the IJ Scan Utility folder.
-
Windows:
-
2Launch the IJ Scan Utility. It has an icon that resembles a document next to a scanner. Click the icon in the IJ Scan Utility folder.
-
3Click Settings. It's in the lower-right corner of the IJ Scan Utility app.
-
4Click Document Scan. It's the second option in the menu to the left.
-
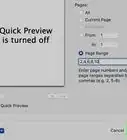
5Select "PDF (Multiple Pages)." To do so, click the drop-down menu next to "Data Format" and select "PDF (Multiple Pages). This allows you to scan multiple pages into one document.
- Some printers can be set to automatically scan both sides of a document. If this option is available on your printer, select "Document (ADF/Platen)" in the drop-down menu next to "Select source" to activate it.
-
6Select a save location and click Ok. Use the drop-down menu next to "Save in" to select a save location for your documents. Then click Ok.
- By default, documents will be saved to your "Documents" folder.
-
7Click Document. It's the second option in the IJ Scan Utility window. It has an icon that says "PDF" next to a document. This starts scanning your page. It may take a minute to finish.
-
8Insert the next page and click Scan. If you have more than one page to scan, place the next page on the glass scanner or in the automatic document feeder. Make sure the document is lined up with the arrow in the back-left corner of the glass scanner. Click Scan when you are ready to scan the next page.
-
9Click Exit. Once you are finished scanning every page of your document, click Exit. Your document will be saved as a PDF file inside your Documents folder, or wherever you chose to save your documents.[3]


Scanning Manually on Windows
-
1
-
2Type windows fax and scan into Start. Doing so will search for the Windows Fax and Scan app.
-
3Click Windows Fax and Scan. It's at the top of the Start window. The Fax and Scan app will open.
-
4Click New Scan. This is in the upper-left side of the Fax and Scan window. Clicking it opens a new window.
-
5Make sure that your scanner is correct. You should see the word "Canon" and your printer's model number. If you see something else here, click Change... and select your Canon printer.
-
6Select a type of document. Click the "Profile" drop-down box, then select the type of document (e.g., Photo) in the drop-down box.
-
7Decide on your document's color. Click the "Color format" drop-down box, then select either Color or Black and White.
- Your scanner may have additional (or limited) options for color formatting.
-
8Select a file type. Click the "File type" drop-down box, then click the file type (e.g., PDF or JPG) that you want to use to store the scanned document on your computer.
Tip: Since you're scanning a document, you'll usually select PDF here.
-
9Change any other options on the page. Depending on your scanner, you may have other options (e.g., "Resolution") that you can modify prior to scanning your document.
-
10Click Preview. It's at the bottom of the window. Doing so will bring up a preview of your document in the scanner.
Tip: If your document appears crooked, uneven, or chopped-off, you can readjust the document in your scanner and then click Preview again to see if your adjustment fixed the problem.
-
11


Scanning Manually on Mac
-
1
-
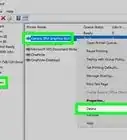
2Click System Preferences…. It's at the top of the drop-down menu.
-
3Click Printers & Scanners. This printer-shaped icon is on the right side of the System Preferences window.
-
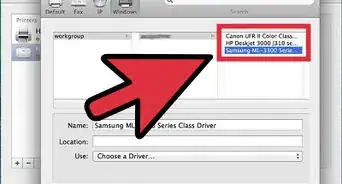
4Select your Canon printer. Click the "Canon" option in the upper-left side of the window.
-
5Click the Scan tab. It's at the top of the window.
-
6Click Open Scanner…. This option is near the top of the Scan tab window.
-
7Click Show Details. It's in the lower-right side of the window.
-
8Select a file type. Click the "Format" drop-down box, then click a file type (e.g., PDF or JPEG) that you want to use to save your file.
Tip: When scanning anything other than a photo, it's best to select PDF.
-
9Decide on a color. Click the "Kind" drop-down box at the top of the page, then select a color option (e.g., Black and White).
- Your scanner may have limited options here.
-
10Select a storage location. Click the "Save To" drop-down box, then click a folder in which you want to save your scanned document (e.g., Desktop).
-
11Change other options on the page. Depending on the type of file that you're scanning, you may want to change the "Resolution" value or the "Orientation" value here.
-
12Click Scan. It's in the bottom-right corner of the window. Your document will begin scanning into your computer. When it finishes, you'll be able to find it in your selected save location.


Community Q&A
-
QuestionHow can I increase the size of the document before printing it?
 Community AnswerWhen you start the scanner wizard, or whatever you choose to use, you will notice the resolution set to a number (ie: 300pixel/inch). Increase that for a better resolution and size. Keep in mind that this will also increase the scanning time.
 -
QuestionHow can I send a document via email after scanning it?
 Community AnswerOnce you have scanned the document and saved it to your computer, open up a blank email and use the attachment icon to attach the document file to the email.
 -
QuestionHow do I get a document on my computer without a scanner?Community AnswerIf you have a smartphone you can download the Genius Scan app. It allows you take a picture of a piece of paper and then it converts it to a .jpg that looks like a scan. From there you can send it to your computer through email or dropbox.


References
About This Article

To scan a document with your Canon printer, first plug the USB cable that came with the printer into the printer and a USB port on your computer. Then, turn the printer on if it has a dedicated power button on it. Next, open the scanner lid to access the glass plate where you will place your document. Set your document face down and line the edges of the paper up with the hash marks along the rim of the glass plate. Close the lid on your scanner. If your printer and computer are configured correctly, you can press the “Scan” button on your printer to automatically upload your scanned image. Otherwise, if you have Windows, type “Windows Fax and Scan” into the Start menu and click on the app. This will open the Fax and Scan tool. Click the “New Scan” button and wait for your document to appear. On an Mac, click the Apple in the top left of the screen to open the drop down menu. Select “System Preferences” and click “Printers and Scanners.” Then, click your printer’s name on the menu of active devices. Select “Open Scanner,” select your preferences in the menu, and press the “Scan” button.