This article was co-authored by wikiHow Staff. Our trained team of editors and researchers validate articles for accuracy and comprehensiveness. wikiHow's Content Management Team carefully monitors the work from our editorial staff to ensure that each article is backed by trusted research and meets our high quality standards.
There are 7 references cited in this article, which can be found at the bottom of the page.
This article has been viewed 82,406 times.
Learn more...
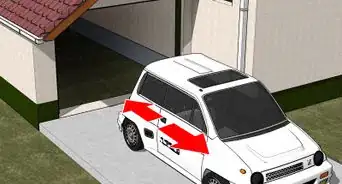
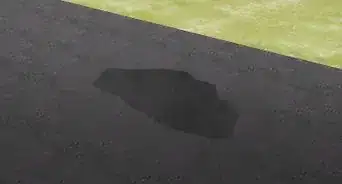
Weather can have a harsh effect on asphalt driveways. Erosion from wind and rain can cause small cracks on the surface of the driveway, which can quickly lead to larger cracks. Eventually, sizable holes can form and cause accidents or damage to your car. The best method of prevention for an unsightly and hazardous cracked driveway is to clean your driveway and apply driveway sealant. With the right application, you can increase your driveway's longevity and improve its appearance.
Steps
Cleaning Your Driveway
-
1Remove overgrown weeds or grass from the edges of your driveway. This will make it easier to spread the sealant and will also make the finished product look even better. Use a shovel to dig in a circle around the roots of larger weeds. After cutting through as many roots as possible, insert the shovel underneath them. Now, lever the weeds from the soil.[1]
- Use a power edge trimmer to remove small patches of grass along the perimeter of your driveway. Always hold the trimmer level and rigid, taking care to move your body instead of your arms.
-
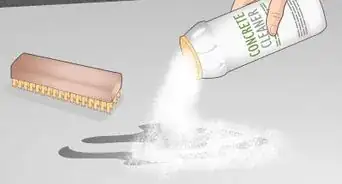
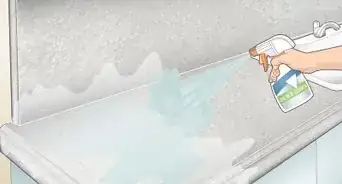
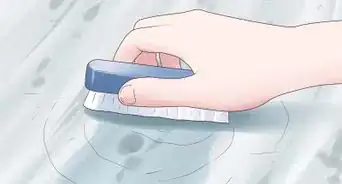
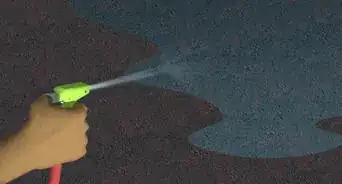
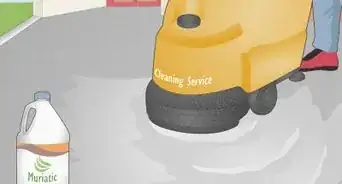
2Scrub your driveway with driveway cleaner and water. Purchase driveway cleaner indicated for asphalt application from a home hardware or automotive store. If you have a power washer, use its soap nozzle to apply the driveway cleaner. Otherwise, use a garden hose applicator. Be sure to cover the entire surface of the driveway. Now, scrub the surface of the driveway using a push broom. Afterward, clear out the dirt and soap residue using a steady stream of water from your power washer nozzle or garden hose.[2]
- If you're using your power washer to clear the dirt and soap, use the 40-degree nozzle setting.
Advertisement -
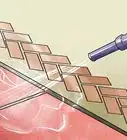
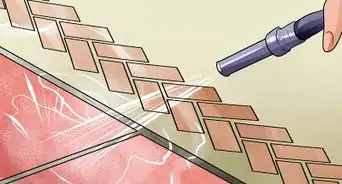
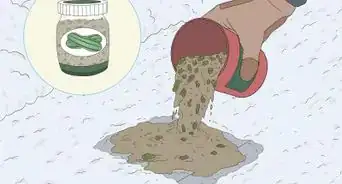
3Apply oil spot primer to stained areas of your driveway. Oil spot primer helps driveway sealer bind better to oil-stained regions. Dip a disposable chip brush into the primer and apply a layer over the driveway pores under the stain. For heavier stains, apply two coats of primer. Be sure to let the primer dry completely before applying driveway sealant.[3]
- Make sure your driveway is dry before applying oil spot primer.
- Purchase oil spot primer from a home hardware or automotive store.
-
4Measure your driveway to determine how much sealant to purchase. Use a measuring tape to determine the length and width of your driveway. Multiply the two values together to get your total square footage. Sealant usually comes in 5 gallon (19 L) containers, which can cover as much as 400 square feet (37 m2).[4]
- Consider a driveway that is 10 by 30 feet (3.0 by 9.1 m): this means the total area is 300 square feet (28 m2), which requires one 5 gallon (19 L) bucket of sealant.


Applying Filler and Sealant
-
1Wait until a dry, warm day over 50 °F (10 °C) before applying sealant. Before applying your driveway sealant, check the weather forecast for the next 24 hours. Make sure the temperature is above 50 °F (10 °C) and forecast to stay within this range over the course of the night. This will ensure that the sealant dries properly and adheres to the driveway.[5]
- Avoid extremely sunny days or the sealant might dry too fast.
- Always check the weather forecast for rain.
-
2Purchase premium asphalt sealant for the best results. Always select premium products for longer durability. Check the label for sealants with UV stabilizers, high-quality resins, and elastomeric material. Afterward, check the label for the formula: some are for newer driveways and others are for older driveways. Always use the sealant made for your driveway type.[6]
- Avoid products that come with the shortest guarantees of effectiveness.
-
3Fill cracks with rubberized tube filler or patch filler. For cracks less than 1⁄2 inch (1.3 cm), squeeze rubberized tube filler into them until it's level with the rest of the driveway. When using patch filler for deeper cracks, use a trowel to spread the filler and always make sure it's level with the surface.[7]
- Allow the crack or patch filler to dry for 1 day.
- Purchase tube or patch filler from a home hardware or automotive store.
-
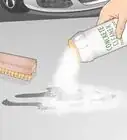
4Clear your driveway with a push broom. Use a push broom to remove any dirt or debris after the crack filler has dried. Be sure to broom the entire surface of the driveway, as sealant requires a clean surface to work properly.[8]
- Dip your broom into a solution of 1 cup (240 mL) or baking soda and 1 gallon (3.8 L) of water for additional cleaning.
-
5Create a hole in the asphalt sealant lid and insert a mixing paddle. Rent or buy a mixing paddle and power mixer from local home hardware stores. Remove the lid of the asphalt sealant and create a cut in the center. Place the mixing paddle that attaches to your power mixer into the asphalt sealant and then place the lid over the rod and attach it to the container. This will prevent splashes of asphalt from leaving the container during mixing.[9]
- Be sure to cut a hole large enough for your mixing paddle's body to fit through with a bit of extra space.
-
6Mix the asphalt sealant according to manufacturer's directions. Be sure to carefully read the manufacturer's directions for mixing times. Start by attaching the mixer to the paddle and then turn it on. From here, lower it to the bottom slowly. Now, move the paddle up and down as it spins so that it combines the solids and water in the asphalt into a consistent mixture.[10]
- Continue stirring until the asphalt is smooth.
-
7Pour enough sealant onto a driveway corner to cover 4 by 4 feet (1.2 m × 1.2 m). Always start with a small portion of asphalt sealant at the right or left edge of the driveway in the pattern of a "U."[11]
- Start pouring the sealant onto the highest point of the driveway. Gravity will make the job of applying the sealant easier.
-
8Apply the sealant in thin coats over 4 by 4 foot (1.2 m × 1.2 m) areas. Use a clean push broom to spread the sealant evenly, working in horizontal lines and moving downward to the bottom of the driveway. Work across your driveway in small sections to give you enough time to apply an even coat and make sure that it's even and consistently applied over the entire surface.[12]
- Continue to mix the sealant during the spreading process so it doesn't separate.
- Make sure you always start with a puddle of sealant each time you pour more.
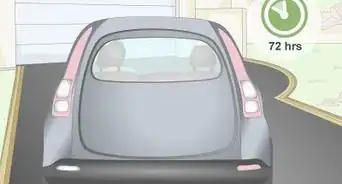
- Wait 48 hours for the sealant to dry before driving on it.
-
9Wait 24 hours and then apply a second coat of sealant if necessary. If you notice any cracked regions, repeat the sealant application process the next day. Work from the top horizontally down to the bottom, taking care to cover 4 by 4 foot (1.2 m × 1.2 m) areas at a time. Let the second sealant coat dry for 48 hours before driving on it.[13]
- Do not use the driveway even if the sealant feels dry to the touch. The sealant doesn't work until it has completely hardened.


Community Q&A
-
QuestionDoes the weather need to be dry?
 Community AnswerYes, any precipitation could wash the sealer right away or dilute it to complete ineffectiveness. Follow the manufacturer's instructions.
 -
QuestionHow long should I wait to seal a new driveway?Community Answer6 months, but, that should be 6 months of methodically driving and moving the cars from side to side for even compaction and to avoid ruts. This will not only avoid ruts, but it will also result in very small and even pores in the asphalt. Concrete shouldn't be "sealed" with blacktop, and only with RadonSeal.
-
QuestionAt what temperature is it best to seal a driveway?
 Community AnswerFollow the manufacturer's instructions. Most will say not in direct sunlight and when temperatures are no cooler than 60 F and no higher than 85 F.
Warnings
- Do not apply driveway sealant if there is rain in the forecast for the next 2 days. The rain will erase the job you've just performed. Account for extra drying time if it's humid outside.⧼thumbs_response⧽
- When purchasing a sealant, make sure you've chosen driveway sealant and not an asphalt coating for roofing purposes.⧼thumbs_response⧽
- Avoid sealing your driveway if the temperature is less than 50 °F (10 °C).⧼thumbs_response⧽
Things You'll Need
- Measuring tape
- Rubber gloves
- Asphalt sealant
- Crack or patch filler
- Push broom
- Putty knife or trowel
- Garden hose
- Handheld power mixer
- Water
- Painters tape (optional)


References
- ↑ https://www.familyhandyman.com/landscaping/how-to-remove-shrubs-and-shrub-roots/
- ↑ https://www.familyhandyman.com/masonry/how-to-seal-an-asphalt-driveway/view-all/
- ↑ https://www.familyhandyman.com/masonry/how-to-seal-an-asphalt-driveway/view-all/
- ↑ https://www.familyhandyman.com/masonry/how-to-seal-an-asphalt-driveway/view-all/
- ↑ https://www.familyhandyman.com/masonry/how-to-seal-an-asphalt-driveway/view-all
- ↑ https://www.familyhandyman.com/masonry/how-to-seal-an-asphalt-driveway/view-all/
- ↑ https://www.familyhandyman.com/masonry/how-to-seal-an-asphalt-driveway/view-all/
- ↑ https://www.apartmenttherapy.com/how-to-clean-your-driveway-59111
- ↑ https://www.familyhandyman.com/masonry/how-to-seal-an-asphalt-driveway/view-all/
About This Article

To seal a driveway, clean the surface using driveway cleaner formulated for asphalt and a power washer or garden hose applicator. If there are any oil stains, apply a small amount of oil spot primer to the area so the sealant will stick. Next, fill any cracks with rubberized tube filler or patch filler and let it dry. Then, pour enough sealant onto a corner to cover 4 by 4 feet and use a push broom to spread the sealant evenly, working in horizontal lines and moving downward to the bottom of the driveway. For tips on adding a second coat, read on!