This article was co-authored by Anthony "TC" Williams. Anthony "TC" Williams is a Professional Landscaper in Idaho. He is the President and Founder of Aqua Conservation Landscape & Irrigation, an Idaho Registered Landscape Business Entity. With over 21 years of landscaping experience, TC has worked on projects such as the Idaho Botanical Garden in Boise, Idaho. He is a Idaho Registered Contractor and a previously Licensed Irrigator in the State of Texas.
This article has been viewed 53,446 times.
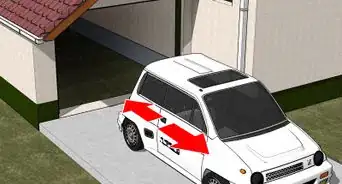
Blacktop (asphalt) driveways will eventually crack and sag, leaving unsightly and unstable damage. As long as the damage is limited to a couple locations, there is no need to call a contractor. Applying a new layer of blacktop patching material over the damage will bolster your driveway for a much lower cost.
Steps
Prepping the Driveway
-
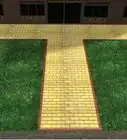
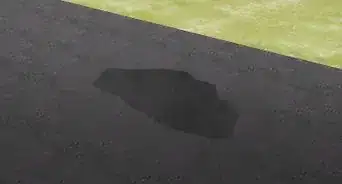
1Examine your driveway condition. Blacktop patching material can't solve every problem. Take a look at damaged areas before deciding how to progress:
- For depressions, thin cracks, and alligator cracks (cracks in a scaled pattern), repair them yourself as described below.
- If the damage covers large areas of the driveway, or if there are long cracks more than ¼" (6mm) wide, the only permanent solution is to hire a contractor to remove and replace the driveway. Also consider this for any asphalt driveway approaching 20 years old.[1]
- Hiring a contractor to overlay the driveway with more blacktop is cheaper then replacement, but it is not recommended for driveways with drainage problems, or with large areas of alligator cracks.
-
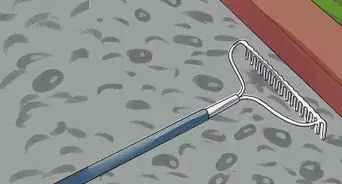
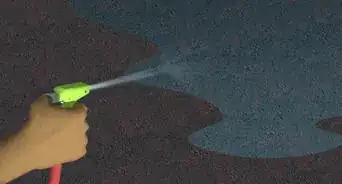
2Remove dirt and debris from the driveway. Use a leaf blower, compressed air blower with nozzle wand, or broom to clear away dirt, dust, and loose stones.Advertisement
-
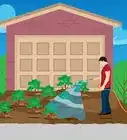
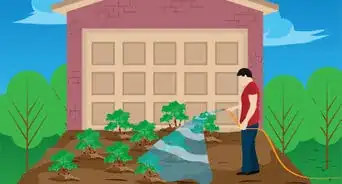
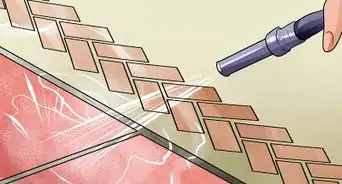
3Trim the grass and weeds away from the edges of the driveway. If there is heavy weed growth, you may want to spray the vegetation with a long-lasting herbicide at least two weeks prior to starting the project. This will ensure the plants do not grow back.
- If grass or weeds are growing in cracks in the driveway, scrape them out with a screwdriver, then sweep the cracks with a whisk broom.
-
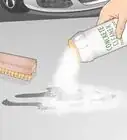
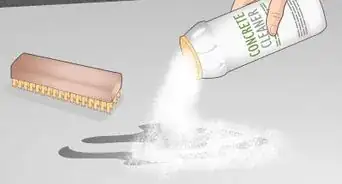
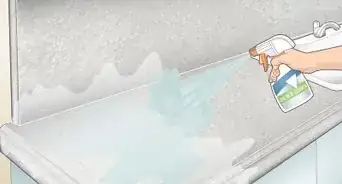
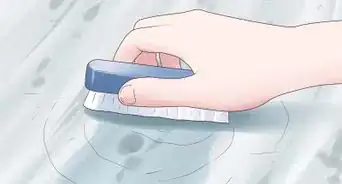
4Scrub away any grease spots. Apply a heavy degreasing detergent and scrub with a sturdy wire-bristled brush.
- Avoid using solvent-based cleaners. They will leave unseen residue behind, which will have an adverse effect on the blacktop's adhesion.
-
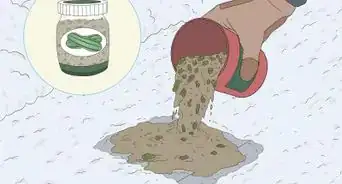
5Fill in the subsurface for deep holes. If an area of the driveway has broken off and revealed the subsurface underneath, fill the hole with dirt, gravel, or sand until it is level with the rest of the subsurface.[2]


Filling Potholes and Deep Depressions
-
1Wear protective clothing. Put on gloves, protective eyewear, and long sleeves and trousers before handling the blacktop. Check the product label for safety instructions.
-
2Select a cold pour pothole patching material. Blacktop (asphalt) repair products come in a couple different varieties. The asphalt pothole patching material is the best choice for missing chunks of asphalt (potholes), and for depressions deeper than 2 inches (5 cm).[3] You'll want a cold pour product for home repairs, since hot pour products require specialized machines.[4]
-
3Cut the hole to form straight edges. You can skip this step to save on labor, but the patching material will create a stronger, longer-lasting bond in a hole with vertical edges. An asphalt saw is the easiest way to achieve this, but you can use a hammer and chisel to break the edges of the hole instead.[5]
- Clean away any dust and broken asphalt created by this process.
-
4Pour on a layer of patching material. Pour it directly from the bag until you've added a ½ to 1" (1.25 to 2.5 cm) layer throughout the hole. For larger holes, spread the material around with a rake or shovel.[6]
- It's not a problem if the material spills over onto the surrounding surface.
-
5Tamp it down. Push the patching material down with a pothole tamper, vibrating plater, lawn roller, or any other heavy object.
- For a large area, you can oil a piece of plywood to prevent sticking, then place it oiled side down over the patch. Drive over the plywood to compact the material underneath.[7]
-
6Repeat until the hole is filled. Continue applying and compacting layers of patching material until the hole is level with the surrounding driveway. Using layers no thicker than 1" (2.5cm) will help prevent air spaces from forming and weakening the repair.[8]
-
7Seal the area when conditions allow. Applying an asphalt sealer over the repair will make it more durable. However, you can only apply the sealer in certain conditions:


Filling Cracks and Minor Depressions
-
1Follow safety instructions. Check all product labels for safety instructions before you begin. Gloves, work clothing, and protective eyewear are all recommended.
-
2Fill small cracks with asphalt crack filler. If you have single cracks less than ¼" (6mm) wide, use asphalt crack filler. Check the label for application instructions or apply as follows:[11]
- Shake the bottle to mix the product evenly.
- Cut off the top of the nozzle so the opening is narrower than the crack. (If there is no nozzle, load the product into an asphalt caulk gun instead.)
- Squeeze the filler directly into the crack until it is flush with the driveway.
- Let dry for 24 hours. If the filler has sunk below the driveway surface level, apply an additional coat.
- Wait at least 24 hours after the final coat before walking or driving over the repair.
-
3Buy alligator asphalt patch for more serious cracks. This material is intended for "alligator scale" or "spiderweb" crack patterns, single cracks wider than ¼" (6mm), and small depressions shallower than 2" (5cm).[12]
- If the alligator cracks are severe, chunks of the asphalt may be fully separated from the driveway. You may achieve a stronger repair if you remove these entirely, then refill the hole using the pothole method above.
-
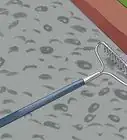
4Spread the alligator patching material with an asphalt squeegee. Pour a little of the material onto the center of the damage. Spread it out with an asphalt squeegee (or an asphalt brush) until the damage is covered with ⅛ to ¼" (3 to 6 mm) of material.[13]
- Check the label instructions first. Some products may need to be mixed in a bucket before application.
-
5Repeat until level. Spread on additional alligator patching material until the cracked area or depression is level with its surroundings.
- For a more even transition, squeegee out a thin layer one or two feet (0.3 to 0.6m) in each direction.
-
6Let dry. The material will harden over the course of a few hours, depending on climate and depth of the repair.
-
7Repeat if needed. Thick repairs may crack slightly over the course of a few days. Apply an additional thin coat if this happens.[14]
-
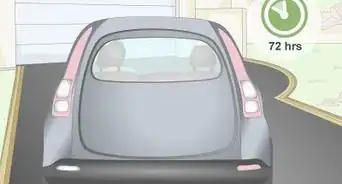
8Allow 24 hours for the blacktop to dry and cure before parking or walking on the driveway.


Community Q&A
-
QuestionHow is blacktop made?
 Community AnswerAsphalt concrete pavement mixes are typically composed of 5% asphalt/bitumen cement and 95% aggregates (stone, sand, and gravel). Due to its nature, asphalt/bitumen cement must be heated so it can be mixed with the aggregates at the asphalt mixing facility.
Things You'll Need
- Gloves
- Protective eyewear
- Work clothes
- Leaf blower, compressed air blower, or broom
- Herbicide (optional)
- Asphalt saw
- Cold pour pothole asphalt patch (for potholes and other depressions)
- Cold pour asphalt crack filler (for single cracks)
- Cold pour alligator asphalt patch (for "scaled" or spiderweb cracks)
- Pothole tamper, lawn roller, or other tamping method
- Asphalt squeegee or asphalt brush
Warnings
- Never return any unused blacktop to the can, as it will shorten the shelf life and build pressure, which may cause the lid to pop off of the can.⧼thumbs_response⧽

References
- ↑ https://www.angieslist.com/articles/driveway-repair-should-you-patch-resurface-or-replace.htm
- ↑ https://www.asphaltsealcoatingdirect.com/info/how-repair-blacktop-asphalt-driveway-diy-homeowner
- ↑ https://www.asphaltsealcoatingdirect.com/info/how-repair-blacktop-asphalt-driveway-diy-homeowner
- ↑ http://www.wsdot.wa.gov/publications/manuals/fulltext/M51-01/Chapter3.pdf
- ↑ http://www.asphaltkingdom.com/asphalt-patching.html
- ↑ https://www.asphaltsealcoatingdirect.com/info/how-repair-blacktop-asphalt-driveway-diy-homeowner
- ↑ http://www.asphaltkingdom.com/asphalt-patching.html
- ↑ http://www.asphaltkingdom.com/asphalt-patching.html
- ↑ http://www.asphaltkingdom.com/asphalt-patching.html
- ↑ http://www.wsdot.wa.gov/publications/manuals/fulltext/M51-01/Chapter3.pdf
- ↑ https://www.lowes.com/n/how-to/repair-asphalt-driveway-cracks
- ↑ https://www.asphaltsealcoatingdirect.com/info/how-repair-blacktop-asphalt-driveway-diy-homeowner
- ↑ https://www.asphaltsealcoatingdirect.com/info/how-repair-blacktop-asphalt-driveway-diy-homeowner
- ↑ https://www.asphaltsealcoatingdirect.com/info/how-repair-blacktop-asphalt-driveway-diy-homeowner
About This Article

Before you blacktop a driveway, examine the extent of the damage on it. If there's damage that covers a large portion of the driveway, or if there are cracks that are wider than 1/4 inch, you'll need to have the driveway removed and replaced first. For minor potholes and depressions, fill them in using a cold pour pothole patching product and then tamp them down, repeating the process until the patches are flush with the driveway. To repair minor cracks, fill them in with asphalt crack filler. For larger cracks, you'll need to use alligator asphalt patch. To learn how to prepare a driveway before applying blacktop over it, keep reading!