wikiHow is a “wiki,” similar to Wikipedia, which means that many of our articles are co-written by multiple authors. To create this article, volunteer authors worked to edit and improve it over time.
This article has been viewed 49,752 times.
Learn more...
Have you experienced printing something in the office shared or network printer and having to dash across the floor just to reach the printer as it prints your documents? You may not want other people to see what you’re printing due to their confidential or personal nature. To secure your printed documents, most office shared or network printers allow for spooling or print job storage. Whatever you print to the spool or to the job storage will be kept there until you print them directly from the printer, and these spools or jobs can be secured with your own PIN so that only you can unlock them for printing.
Steps
Setting the Print Options
-
1Open the document you’ll be printing. From your desktop, launch the document you’d like to print. It can be a Word document, a spreadsheet, a PDF file, a photo, or anything else you can print.
-
2Call the Print options. From the application, select “Print” from the File menu. The Print window will be displayed.Advertisement
-
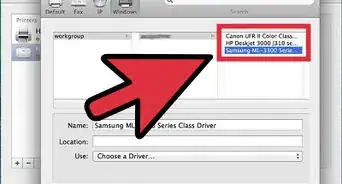
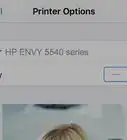
3Select the printer. From the Printer section, click on the Name drop-down box to select the printer you’d be using.
-
4Open the printer properties. Right beside the selected printer is a “Properties” button. Click on this to bring out the selected printer properties. The Document Properties window will then appear.


Configuring the Print Job
-
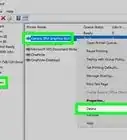
1Go to the Job Storage tab. From the Document Properties window, select the Job Storage tab by clicking on it. This is where you configure your print jobs.
- Note that only printers that support spooling or print job storage will have the extra menu options or properties.
-
2Set the Job Storage Mode. Under the Job Storage Mode, click the “Stored Job” radio button. This sets your print to be a stored job instead of an immediate print.
-
3Assign a PIN. Tick the “PIN to print” check box to indicate that a PIN is needed in order to access and print the job from the printer. In the box underneath it, key in a four-digit PIN code. This will be the PIN code that you will use to print from the printer.
- You can change this every time you set a print job.
-
4Set the Job Notification Options. Tick “Display JOB ID when printing” so you will be able to see what job currently is being printed.
-
5Indicate the User Name. In this section, you must indicate your username or your unique identifier. The username will be used by the printer to identify you and collect all the print jobs under your username.
- Some printers allow batch printing of all the print jobs under a single username.
-
6Indicate the Job Name. Configure how the print job will be named. You can manually set and change this every time by selecting “Custom” and inputting the job name, or you can set this to “Automatic” and have the job named automatically in sequence.
-
7Save the print job. Click on the “OK” button at the bottom of the window to save everything and close the window.


Printing a Print Job
-
1Print a print job. The Print window will appear after you’ve configured the print to be sent as a print job. Click on the “OK” button at the bottom of the window to send the print to the printer’s job storage.
-
2View the print job details. After sending over the print job, a confirmation message will appear. The Job Storage Identification window will show the printer name and IP address, your User Name, and the Job Name. Click on the “OK” button to close this window.
-
3Know what happens next. Your print job will be sent to the printer and stored there. Nothing will be printed until you access and unlock your job from the printer’s control panel. Depending on how the printer was set up, your print job can last there indefinitely and will only be removed with your PIN code.


Getting Your Prints
-
1Go to the printer. When you need to have your documents printed, go to the shared or network printer. No need to rush and dash across the floor. Your print jobs are safely stored and locked with your PIN.
-
2Retrieve a print job. From the printer’s control panel, navigate through it until you find the menu for “Retrieve Job.” The list of stored print jobs in the printer will be listed. Use the arrow keys to scroll through the list and find your username. The number beside your username indicates the number of print jobs waiting for you.
-
3View jobs. Once you find your username, select it. All the print jobs under your username will be listed with their respective job names. Use the arrow keys to scroll through the list.
-
4Select a job. Once you find the job you’d like to print, select it. You will be asked if you’d like to “Print” or “Delete” the job. Select “Print.”
-
5Enter the PIN. You will then be prompted for your PIN code. This is the four-digit code you set earlier. Enter it here. Use the arrow keys to input your code.
-
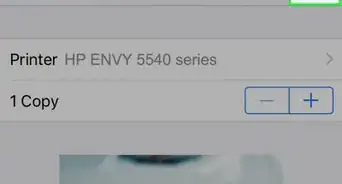
6Indicate the number of copies. Once your PIN code is accepted, you will be asked for the number of copies for this job. Indicate how many copies you’d like to be printed.
-
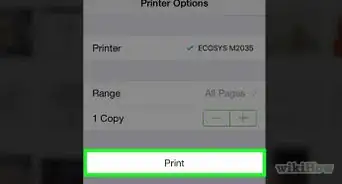
7Print. Press the green, or whatever appropriate, button on the printer to initiate processing of your print job. The printing will start immediately, provided the printer is in good working condition and there are ink and paper available.
-
8Collect the prints. Don’t leave the printer yet. Ensure all the documents under the print jobs you’ve printed are complete and in order before leaving the printer area.


Community Q&A
-
QuestionWhat should I do if I don't have a PIN?
 Community AnswerYou set your own pin, so unless your printer doesn't allow you to set one, then you can just come up with one on your own.
 -
QuestionWhat should I do if I forget the PIN number?
 Community AnswerYou can try resetting your printer or you can also check and type the last password you used.