This article was co-authored by Jeff Baldwin. Jeff Baldwin is a Residential Painter and the Owner of Baldwin Custom Painting. With two decades of painting experience, Jeff specializes in high-end residential and small commercial painting projects. Dedicated to quality craftsmanship, Jeff and Baldwin Custom Painting provide bonded/insured, licensed, and lead-safe certified services in residential painting, light commercial painting, and wood refinishing.
There are 12 references cited in this article, which can be found at the bottom of the page.
This article has been viewed 24,736 times.
Using a suede finish when painting a wall can bring a soft, silky smooth look to the interior of a home. Suede painted walls give a house an elegant and sophisticated look that is simultaneously relaxed and easy on the eyes. Using everyday painting tools and a simple brush technique, you too can bring the velvety and textured look of suede to any room in your home.
Steps
Preparing to Paint
-
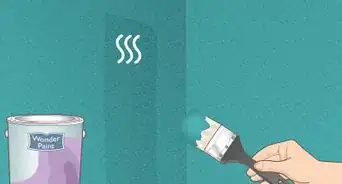
1Buy suede paint. Paints come in a variety of different categories of “sheen” or “finish,” which differ in how much light they allow to reflect off a wall. For this project, you’ll need to buy paint that is specifically designed to have a suede finish.[1]
- Although suede paint is not the most commonly used, you can generally find it at most hardware stores like Home Depot. Ralph Lauren and Valspar both also make their own versions of brushed suede paint.[2]
- You can also create a suede finish on your wall by painting a coat of suede paint over a base coat of normal paint that will show through. If you choose to go this route, make sure you buy ordinary paint as well.[3]
-
2Repair any cracks, holes, or other imperfections in the wall. Identify any holes in the wall you plan to paint and fill them.[4] If there are popped nails or screws in the wall that you don’t want to leave in, remove them and fill in the hole with joint or spackling compound. If you come across any exposed drywall, seal it with stain-blocking primer before filling it.[5]
- To more easily spot flaws in the wall, turn off the lights, close the curtains, and hold a trouble light close to the wall to better spot holes and cracks.[6]
Advertisement -
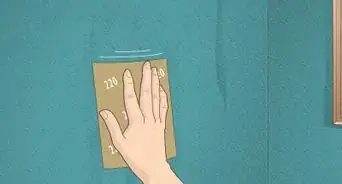
3Make sure the wall is clean and smooth. Remove any protrusions in the wall, and dust the wall from top to bottom to get rid of any dust or dirt before you begin painting.[7]
- Use sandpaper or a sanding pole to sand the wall from floor to ceiling, focusing especially on areas you had to repair in the previous step.[8]
- Don’t apply too much pressure during the sanding process, especially if you’re using a sanding pole, or else you may inadvertently damage the wall itself.[9]
- Use a long-reach duster to remove any dust and debris from the wall, including any grit left over from the sanding process.
-
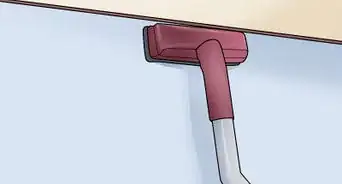
4Remove fixtures such as outlet plates and switch covers. Before removing any fixtures, shut off the circuit breakers to the room you’ll be painting in. Using a screwdriver, carefully unscrew the fixtures from the wall and set them aside, storing them together with the screws you just removed. Remove any light fixtures attached to the wall as well.[10]
- Once this is done, and any exposed light fixture wires are safely wrapped, you can restore power to the room.
- For larger fixtures, you can also cover them in painter’s plastic to protect them from unwanted paint, securing the plastic in place with painter’s tape.[11]
-
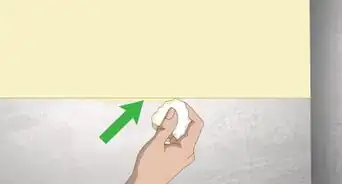
5Cover any areas you don’t want to paint. Place painter’s tape over moldings or other surfaces you don’t want to paint.[12] Press down on the tape with a putty knife to ensure no paint bleeds through to the surface below. Lay a tarp down on the floor where you’ll be working, and cover any furniture near the wall with painter’s plastic secured with tape.[13]
- If you’re able to, move furniture out of the room you intend to paint in, to protect it from wayward paint droplets and to give yourself more work space.
-
6Mix the paint and put some in a paint pail and paint tray. Don’t work directly from the gallon can your paint came in. Instead, mix the paint with a wooden paint stick, and pour about 1 inch (2.5 cm) into a paint pail and into a paint tray respectively. This will prevent you from dipping your brush too deeply and will give you a much lighter can of paint to work with.[14]
- You will use the paint in the pail when painting with your brush, and use the paint in the tray when painting with your roller.


Applying the Paint
-
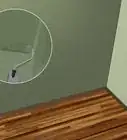
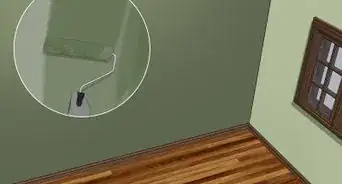
1Paint along the edges of the wall before applying the base coat. Before you begin painting with the roller, use your brush to first paint those parts of the wall that are too tight for rollers, such as along the ceiling line, molding, and corners of the wall.
- Dip your brush so that about ⅔ of the bristles are loaded with paint. Paint using horizontal and vertical strokes as you paint alongside the ceiling or the side of the wall, respectively. Your paint strokes should run for roughly 12 inches (30 cm) at a time.[15]
- The technical term for this part of the painting process is “cutting in.”[16]
- If you’re suede painting your wall by painting suede paint over ordinary paint, make sure you’re using the ordinary paint at this point. You won’t be using your suede paint until you apply the top coat.
- Use a slight wiggling motion to apply paint in tight corners or to fill in areas you missed on your first pass.[17]
-
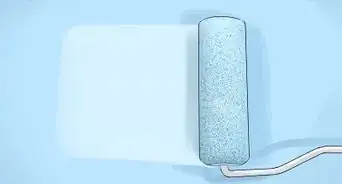
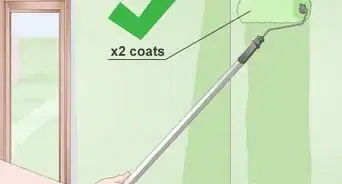
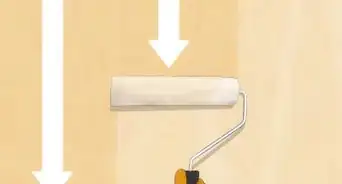
2Use your roller to apply the base coat to the rest of the wall. Dip your paint roller into the paint tray.[18] Start painting in a corner of the wall near the ceiling. Apply the paint in a large “M” shape, roughly 3 feet (0.91 m) long and 3 feet (0.91 m) high, then paint over that M in a vertical rolling motion to ultimately fill in that section of wall. Repeat this process in the adjacent section of the wall, and continue repeating it until the entire wall is painted.[19]
- Again, if you’re suede painting your wall by painting suede paint over ordinary paint, make sure you’re using the ordinary paint for this part of the process.
- Once the base coat has been applied, use the roller to apply another coat, this time only rolling from top to bottom along the entire wall, to smooth out any lap marks.[20]
- Wait 4-6 hours for this base coat to dry before moving on to your top coat.[21]
-
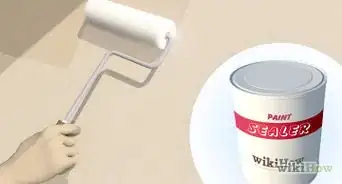
3Use your brush to apply a top coat of suede paint in an X pattern. The technique you use to apply this top coat will be very important; painting with overlapping X’s will create the variations in color tone typical of a suede finish.[22]
- Starting in the top left corner of your wall, use your brush to paint an “X” shape roughly 1 foot (0.30 m) long and 1 foot (0.30 m) high. Then fill in the area around this X with more X’s roughly half as big and slightly overlapping one another.[23]
- Repeat this process, moving diagonally across the wall in the direction of the bottom right corner, until the entire wall is painted.[24]
- The sizes of your X’s do not need to be precise; in this instance, it’s more important that you use the proper technique of slightly overlapping X’s in order to bring about the suede finish.


Expert Q&A
-
QuestionHow do you apply paint with a paint roller?
 Jeff BaldwinJeff Baldwin is a Residential Painter and the Owner of Baldwin Custom Painting. With two decades of painting experience, Jeff specializes in high-end residential and small commercial painting projects. Dedicated to quality craftsmanship, Jeff and Baldwin Custom Painting provide bonded/insured, licensed, and lead-safe certified services in residential painting, light commercial painting, and wood refinishing.
Residential PainterWet your roller sleeve with clean water and spin out the water. Remove any loose fuzz to prevent it from getting on the surface you plan to paint. Saturate the roller with plenty of paint and keep it saturated throughout. Move from one side of the wall or ceiling to the other with smooth overlapping strokes. -
QuestionHow can I choose a roller sleeve?Jeff BaldwinJeff Baldwin is a Residential Painter and the Owner of Baldwin Custom Painting. With two decades of painting experience, Jeff specializes in high-end residential and small commercial painting projects. Dedicated to quality craftsmanship, Jeff and Baldwin Custom Painting provide bonded/insured, licensed, and lead-safe certified services in residential painting, light commercial painting, and wood refinishing.
Residential PainterYou can ask your paint store what sleeve is suitable for the product you are buying and the surface you are applying it. Usually, a heavier nap is for more texture, and little to no nap is for very smooth surfaces. -
QuestionWhat preparations should I make if I am painting an interior wall?Jeff BaldwinJeff Baldwin is a Residential Painter and the Owner of Baldwin Custom Painting. With two decades of painting experience, Jeff specializes in high-end residential and small commercial painting projects. Dedicated to quality craftsmanship, Jeff and Baldwin Custom Painting provide bonded/insured, licensed, and lead-safe certified services in residential painting, light commercial painting, and wood refinishing.
Residential PainterLay a drop cloth and fill any holes. Apply tape to the areas you do not want to paint. Cover the nearby things with plastic.
Warnings
- A suede finish will leave the surface of your wall delicate and easily scratched; avoid using this finish in high-traffic areas.[26]⧼thumbs_response⧽
- Be mindful of where you leave open containers of paint during your project, and avoid placing them in areas with lots of foot traffic; you don’t want paint to end up somewhere other than the wall.⧼thumbs_response⧽
Things You’ll Need
- Brushed suede paint
- Paint brush
- Paint roller
- Paint pail
- Paint tray
- Painter’s tape
- Painter’s plastic
- Sandpaper or a sanding pole
- Spackling compound or joint compound
- Wooden paint stick
- Screwdriver
- Tarp


References
- ↑ https://www.countryliving.com/home-design/color/g1297/paint-finishes/
- ↑ http://fauxfinish.weebly.com/how-to-apply-brushed-suede-paint.html
- ↑ https://www.networx.com/article/suede-faux
- ↑ Jeff Baldwin. Residential Painter. Expert Interview. 1 March 2021.
- ↑ https://www.familyhandyman.com/drywall/drywall-repair/preparing-walls-for-painting-problem-walls/view-all/
- ↑ https://www.familyhandyman.com/drywall/drywall-repair/preparing-walls-for-painting-problem-walls/view-all/
- ↑ Jeff Baldwin. Residential Painter. Expert Interview. 1 March 2021.
- ↑ https://www.popularmechanics.com/home/interior-projects/how-to/g151/13-painting-secrets-the-pros-wont-tell-you/
- ↑ https://www.popularmechanics.com/home/interior-projects/how-to/g151/13-painting-secrets-the-pros-wont-tell-you/
- ↑ https://www.bhg.com/decorating/paint/how-tos/how-to-ready-a-room/
- ↑ https://www.builddirect.com/learning-center/old-uncategorized/how-to-paint-a-bathroom-protecting-fixtures/
- ↑ Jeff Baldwin. Residential Painter. Expert Interview. 1 March 2021.
- ↑ https://www.popularmechanics.com/home/interior-projects/how-to/g151/13-painting-secrets-the-pros-wont-tell-you/
- ↑ https://www.familyhandyman.com/painting/techniques/the-best-tips-for-cutting-in-paint/view-all/
- ↑ https://www.bobvila.com/articles/how-to-cut-in-paint/
- ↑ https://www.architecturaldigest.com/story/how-to-paint-a-room
- ↑ https://www.familyhandyman.com/painting/techniques/the-best-tips-for-cutting-in-paint/view-all/
- ↑ Jeff Baldwin. Residential Painter. Expert Interview. 1 March 2021.
- ↑ https://www.networx.com/article/suede-faux
- ↑ http://fauxfinish.weebly.com/how-to-apply-brushed-suede-paint.html
- ↑ https://www.networx.com/article/suede-faux
- ↑ https://www.popularmechanics.com/home/interior-projects/how-to/g1091/forget-ordinary-paint-use-these-8-stylish-faux-finishes/
- ↑ https://www.networx.com/article/suede-faux
- ↑ http://fauxfinish.weebly.com/how-to-apply-brushed-suede-paint.html
- ↑ https://www.architecturaldigest.com/story/how-to-paint-a-room
- ↑ https://www.popularmechanics.com/home/interior-projects/how-to/g1091/forget-ordinary-paint-use-these-8-stylish-faux-finishes/
About This Article