This article was co-authored by Catherine Cheung, DPM. Dr. Catherine Cheung is a board certified Podiatrist based in San Francisco, California. Dr. Cheung specializes in all aspects of foot and ankle care, including complex reconstruction. Dr. Cheung is affiliated with the Brown & Toland Physicians and the Sutter Medical Network. She earned a DPM from the California College of Podiatric Medicine, completed her residency at the Encino Tarzana Medical Center, and completed a fellowship at the Kaiser Permanente San Francisco Medical Center. She is board certified by the American Board of Podiatric Surgery.
This article has been viewed 44,463 times.
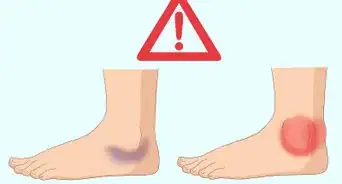
Ankle sprains are common sports-related injuries. To protect yourself, or others from future injury, taping your ankle will to prevent and protect from injuries.To start you will need some tape and pre-wrap, and preferably a friend to help tape the ankle.
Steps
Preparing your Ankle
-
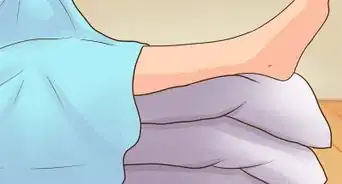
1Sit down on an elevated surface where you can allow the foot and ankle to hang off comfortably.
- It is usually easier to have someone else tape your leg. This allows them to focus on taping and you can focus on keeping your ankle still.
-
2Keep your foot at a 90-degree angle.[1]
- Taping your foot protects it from moving too quickly and furthering any injuries.
Advertisement -
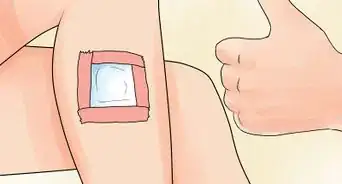
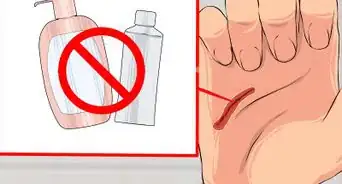
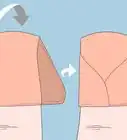
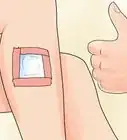
3Place a pad on the front and back of your ankle to prevent blisters.
- Place one pad where the laces will go and the other on the heel.[2]
-
4Wrap your foot and ankle with pre-wrap. Pre-wrap is stretchy, soft gauze that protects your skin and hair from tape.[3]
- Starting near the ball of your foot, wrap around your foot in pre-wrap, working towards your ankle up until the mid calf.
- Try to cover up most of your skin to protect the tape so that it does not pull out hair when you need to remove it.
- The heel can remain uncovered. there is no hair to pull off and your skin is tough.
-
5Tape anchor strips onto the pre-wrap to keep it in place.
- Place the first anchor strip on the top, then secure it with another piece of tape.[4] Make sure the tape is not too tight to constrict blood flow. Then repeat on the bottom
- The tape should feel firm, but also lose enough so that the ankle can still move from side to side.
- If you feel tingling or pins, remove tape and try again.


Taping Your Ankle
-
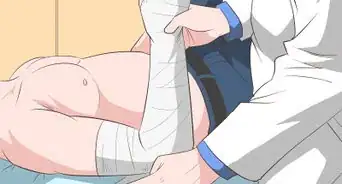
1Attach a tape stirrup around your ankle bone for stability. Take a long piece of tape and attach it just above your interior ankle bone.[5] Wrap the piece of tape under your heel and then connect it to your opposite ankle bone.
- The tape should form a “U” shape around your foot
- You should feel the tape pull down on your inside ankle bone, and then up on the outside ankle bone.
-
2Add 2-3 more stirrups of tape, overlapping each piece of tape by roughly a half inch for added stability.
- Add one more anchor strip to keep them stable.[6]
-
3Start taping the foot, moving from the inside of your foot to the outside.These pieces will begin to look like horse shoes.[7] Continue this wrap around your arch 2-3 times, overlapping each layer of tape, for added stability, as you move towards your heel.
- This will create kind of a closed tape job.
- You will continue to wrap the tape in C strips to cover up any opening spots where you can see the pre-wrap.
-
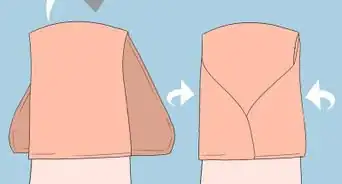
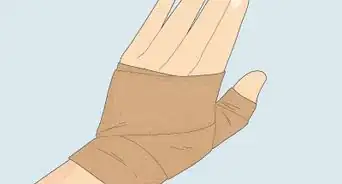
4Start taping the ankle in a figure eight motion.You will begin to place the tape at the medial side of the foot just above the ankle.[8] Next you will bring the tape under the base of the foot then bring it back over the top of the foot near the inner ankle. Finally wrap around the Achilles, which is located above the heel on the back of the ankle, and back around the outer part of the ankle.
- This is the hardest part of the ankle taping process.
-
5Continue taping in a figure eight motion, alternating around your foot and ankle 3 times.Repeat 2-3 times, overlapping half of the tape each time.[9]
-
6Flex your ankle from side to make sure you can move it.
- You want a limited range-of-motion in your ankle but still being able to move it around without any pain.
- You should be able to move up and down and to both sides, but it shouldn’t be able to move as far as you would before the tape.
-
7Keep practicing the tape job until your ankle feels comfortable and stable.
- Apply gauze or protective pads on the front and back of your ankle to prevent blisters.
- Wrap your foot and ankle with pre-wrap to protect your skin.
- Wrap 2-3 long pieces of tape from the inside of your ankle to the outside as U-shaped stirrup straps.
- Cover your ankle bone with tape from front to bottom, back to top.
-
8Remove the tape carefully with scissors when done. Insert one of the blades between your skin and the pre-wrap and carefully cut around your ankle bone to remove the tape.[10]


Expert Q&A
-
QuestionDo you have any tips on how to take care of a sprained ankle if I am still continuing to exercise?
 Catherine Cheung, DPMDr. Catherine Cheung is a board certified Podiatrist based in San Francisco, California. Dr. Cheung specializes in all aspects of foot and ankle care, including complex reconstruction. Dr. Cheung is affiliated with the Brown & Toland Physicians and the Sutter Medical Network. She earned a DPM from the California College of Podiatric Medicine, completed her residency at the Encino Tarzana Medical Center, and completed a fellowship at the Kaiser Permanente San Francisco Medical Center. She is board certified by the American Board of Podiatric Surgery.
Board Certified PodiatristIf you're continuing to exercise, you want to make sure that you're not causing more pain and swelling. If it's minor enough, you can continue exercising and doing things that have less impact, like biking, elliptical, swimming, or working your upper body. Avoid impact activities like jumping jacks, running, jumping, or anything with any kind of cutting action that may recreate the injury.
Warnings
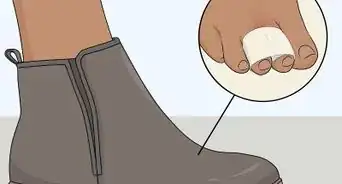
- Remove the tape if you feel tingling or numbness in your toes.⧼thumbs_response⧽
- Taping your ankle is not a substitute for rehab, physical therapy, or surgery.⧼thumbs_response⧽
Things You'll Need
- An Ankle Lender
- Tape
- Pre-Wrap
- Scissors


References
- ↑ https://www.marshfieldclinic.org/mHealthyLiving/Documents/Athletic-Taping-An-Ankle.pdf
- ↑ https://www.youtube.com/watch?v=YEJRaL5jIoM
- ↑ https://www.marshfieldclinic.org/mHealthyLiving/Documents/Athletic-Taping-An-Ankle.pdf
- ↑ https://www.youtube.com/watch?v=YEJRaL5jIoM
- ↑ https://www.youtube.com/watch?v=YEJRaL5jIoM
- ↑ https://www.footcaremd.org/resources/how-to-help/how-to-tape-an-ankle
- ↑ https://www.marshfieldclinic.org/mHealthyLiving/Documents/Athletic-Taping-An-Ankle.pdf
- ↑ https://www.footcaremd.org/resources/how-to-help/how-to-tape-an-ankle
- ↑ https://www.aook.com/sites/default/files/pdf/how-tape-ankle.pdf


Medical Disclaimer
The content of this article is not intended to be a substitute for professional medical advice, examination, diagnosis, or treatment. You should always contact your doctor or other qualified healthcare professional before starting, changing, or stopping any kind of health treatment.
Read More...