This article was co-authored by wikiHow staff writer, Darlene Antonelli, MA. Darlene Antonelli is a Technology Writer and Editor for wikiHow. Darlene has experience teaching college courses, writing technology-related articles, and working hands-on in the technology field. She earned an MA in Writing from Rowan University in 2012 and wrote her thesis on online communities and the personalities curated in such communities.
The wikiHow Tech Team also followed the article's instructions and verified that they work.
This article has been viewed 368,746 times.
Learn more...
Do you want to transfer your purchased music from your iPhone to your computer? While iTunes will work just fine for transferring music that you purchased through Apple from your iPhone to your computer, you won't be able to move music that you didn't purchase through Apple nor will you be able to transfer your entire music library from your iPhone to your computer. Macs, as long as both the iPhone and Mac are signed into the same Apple ID, are automatic, and doing anything like transferring music isn't necessary. This wikiHow article teaches you how to transfer music from your iPhone onto your Windows computer using iTunes and cloud services, as well as how to download onto your computer music purchased with an Apple ID.
Things You Should Know
- With iTunes, you can only transfer music that you've purchased to a Windows computer.
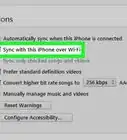
- Sign into your Apple ID on your Mac or Windows computer to transfer music wirelessly.
- Use cloud services like Dropbox to transfer music that you didn't purchase through Apple.
Steps
Transferring Purchased Music to Windows with iTunes
-
1Attach your iPhone to your computer. Plug one end of your iPhone's charging cable into the iPhone, then plug the other end (the USB end) into your computer.
- iTunes will only transfer music that you've purchased through Apple. If you ripped a CD, you won't be able to transfer that music via iTunes. You can transfer music that you didn't purchase through Apple with cloud services, like Dropbox.
- iTunes works on Windows computers. If you have a Mac, music should transfer and sync automatically if you're signed into the same Apple ID on your iPhone and Mac.
-
2Open iTunes. Its app icon resembles a multicolored musical note on a white background. The iTunes window should pop up after a few seconds.
- If prompted to update iTunes, click the Download button and wait for iTunes to update. You'll need to restart your computer before proceeding.
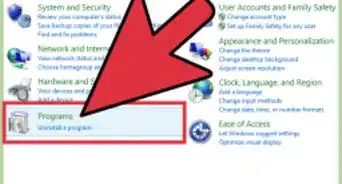
- You may need to authorize your computer if you haven't already. Go to Account > Authorizations > Authorize This Computer > Authorize.
Advertisement -
3Click File. It's on the upper-left side of the iTunes window.
-
4Select Devices. This option is near the bottom of the File drop-down menu.
-
5Click Transfer Purchases from [Name]. Instead of "[Name]", you'll see your iPhone's name here. Clicking this option prompts the purchased music to begin transferring onto your computer.
-
6Wait for the purchased music to finish transferring. Depending on the amount of music that you need to transfer, this may take a few seconds to a few minutes.[1]
-
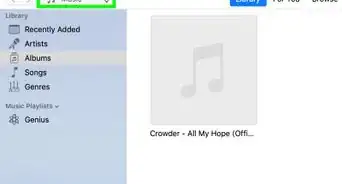
7Click Recently Added. It's a tab on the left side of the iTunes window. Doing so opens a list of recently added music.
-
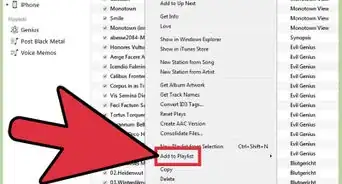
8Find the purchased music that you want to save. You may have to scroll up or down to find the music that you want to download onto your computer.
-
9Click the "Download" icon . It looks like a cloud with an arrow pointing out of it and should be to the right of your selected song (or album). This will prompt the music to download from iTunes onto your computer, ensuring that you have a backup of the music on your computer at all times.
- If you don't see the Download icon, the music is already on your computer.
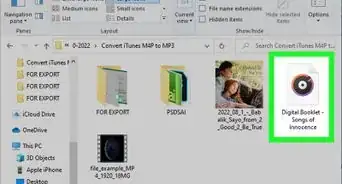
- You can go to the music's location on your computer by selecting a song, clicking File > Show in File Explorer.


Downloading Purchases with an Apple ID
-
1Open iTunes. Its app icon resembles a multicolored musical note on a white background. If you accidentally deleted iTunes music from your iPhone or iTunes, you can re-download it as long as you're signed into the account with which you purchased the music.
- This method allows you to download music that you've purchased on your iPhone without connecting with a cable.
- iTunes only works with Windows computers. Since this is an automatic process for Apple devices, like Macs, doing this on a Mac isn't necessary. However, if you are having trouble downloading your music on a Mac, you'll need to use Music.
-
2Click Account. It's at the top of your screen with File and Help.
- To check that you're signed into the same account that purchased the music, go to View My Account. If you aren't signed in, click Sign in.
-
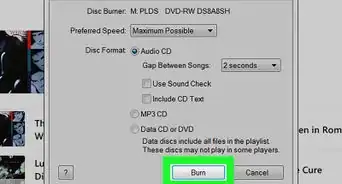
3Click Purchased. It's near the bottom of the drop-down menu. Doing so will take you to the iTunes Store tab.
-
4Click the Not in My Library tab. You'll find this near the top of the iTunes page. Clicking it shows you a list of all of your purchased songs that are not in your iTunes library.
-
5Click the "Download" button . It looks like a cloud with an arrow pointing out of it and is in the top-right corner of the song or album that you want to download. Doing so will download the song or album back onto your computer.
- You can find the music on your computer by selecting a song, clicking File, and clicking either Show in Windows Explorer (Windows) or Show in Finder (Mac).


Using Cloud Services
-
1Install the Dropbox or Google Drive app on your iPhone. You can get these cloud services for free from the app store. Free accounts have a smaller size limit, but you can pay to upgrade your storage.
- Cloud services are like Google Drive, and Dropbox.
-
2Sign into the same account on both devices. On both your computer and your iPhone, sign into the cloud service with the same account.
-
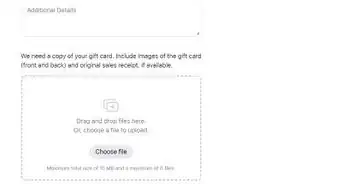
3Upload the music you want to transfer into the cloud service. The instructions will differ depending on the cloud service you're using, like Dropbox or Google Drive.
-
4Download the music to your computer. From your computer, download the files from your cloud service account. You can easily access the website of the cloud service (like https://dropbox.com or https://drive.google.com) from your computer's internet browser and download the music files that you uploaded from your iPhone.
- Many cloud services have a limited amount of space available on their free accounts, so you might have to transfer music in batches if you have a lot of songs.


Community Q&A
-
QuestionHow can I transfer music that was ripped from old CDs, or not purchased from the iTunes Store?
 MinoriteCommunity AnswerWith iTunes you can sync ripped tracks to device, but there is no official way to sync non-iTunes purchases from device to iTunes. Third-party iTunes alternative apps can do it, though.
 -
QuestionHow do I transfer music that was not purchased on iTunes?MinoriteCommunity AnswerThere is no way to transfer non-iTunes purchases from an iOS device to a computer. You will need something like iMazing or another third-party app that can transfer music from iOS to computer.
-
QuestionIf I transfer purchased songs from my IPhone to my computer, will they be deleted off my phone?
 CitylimitsCommunity AnswerNo, they will be available on both devices as long as you are logged in with the same apple ID on both.


About This Article