This article was co-authored by Luigi Oppido. Luigi Oppido is the Owner and Operator of Pleasure Point Computers in Santa Cruz, California. Luigi has over 25 years of experience in general computer repair, data recovery, virus removal, and upgrades. He is also the host of the Computer Man Show! broadcasted on KSQD covering central California for over two years.
The wikiHow Tech Team also followed the article's instructions and verified that they work.
This article has been viewed 474,570 times.
You can install an operating system onto a flash drive and use it like a portable computer by using Rufus on Windows or the Disk Utility on Mac. For each method, you'll need to acquire the OS installer or image, format the USB flash drive, and install the OS to the USB drive. Don't forget to activate USB booting in the BIOS for Windows and switch the startup disk for Mac!
Steps
Creating a Windows or Linux Bootable Drive with Rufus
-
1Enable USB booting in the BIOS. BIOS (Basic Input/Output System) helps you manage the hardware in your computer. During startup press the designated key to access the BIOS (typically F2 or Del). Use the arrow keys to navigate to the “Boot” tab. Move USB to the top of the list with ↵ Enter. Select “Save and Exit” and your computer will reboot with the new settings.
- Different manufacturers use different types of BIOS in their computers. Check your manufacturer’s specifications for exact buttons for accessing and altering the BIOS configuration.
-
2Purchase an appropriate USB flash drive. You will want a flash drive with at least 16GB capacity. USB 2.0 will work, but the greater speed of USB 3.0 is highly preferable.
- 32GB or greater is recommended if you want to fit anything beyond the operating system on the drive. The increase in storage capacity is relatively inexpensive (~$5 difference between 16 and 32 GB)!
Advertisement -
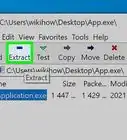
3Download the "disk image" of the operating system you want to install. The Rufus website has a collection of links to downloadable OS disk images at the bottom of the page under the header “Non-exhaustive list of ISOs Rufus is known to work with”. The file you'll need to download is called an ISO.
-
4Download and open Rufus. Rufus is a self-contained program and does not need to be installed -- only downloaded and opened.
-
5Connect your USB flash drive to the computer. It will appear listed with your other drives in “This PC”.
-
6Click the “Device” dropdown and select your USB flash drive from the list.
-
7Click the “Partition Scheme” dropdown and select “MBR for BIOS or UEFI”. MBR (Master Boot Record) is an older, but more common disk structure used widely in Windows computers.
- You can select GPT (GUID Partition Table), a newer technology, but you may have compatibility issues installing some operating systems.[1]
-
8Click the “Filesystem” dropdown menu and select the appropriate filesystem. Use “NTFS” if you are installing Windows to your bootable USB stick drive and “exFat” if you are installing Linux to your bootable USB stick drive.
-
9Click to activate the “Create Bootable Disk” checkbox. This checkbox is listed under the “Format Options” header and will allow you to use an ISO to create your bootable USB drive. An ISO (disk image) is digital file containing the contents of a disk - in this case the operating system you will install.
-
10Select “ISO image” from the menu to the right of the checkbox.
-
11Click the disk icon and select your downloaded disk image. The disk icon is located to the right of the dropdown where you selected ISO image.
-
12Press “Start”. A progress bar will display the the progress. You will be notified when the process is complete.
- Note: This process will format the flash drive. Formatting the USB drive will erase ALL content. If you have any data on your USB flash drive you want to save, copy it to your computer first to save it.
-
13Restart your computer to test your bootable drive. With USB booting enabled, your computer should restart and use the USB to boot using the disc image.
- Some BIOS have a separate menu specifically for selecting your startup disk. This menu will have a different access button on startup from the regular BIOS menu.[2] Check with your manufacturer’s specifications to determine if this is the case if you are having trouble booting into your flash drive.


Installing macOS/OSX to a Portable Drive
-
1Acquire an appropriate USB flash drive. To install a modern macOS/OSX operating system, you will want a flash drive with at least 16GB capacity. USB 2.0 will work, but the greater speed of USB 3.0 is highly preferable.
- 32GB or greater is recommended if you want to fit anything beyond the operating system on the drive. The increase in capacity is relatively inexpensive (~$5 difference between 16 and 32 GB)!
-
2Download the OS installer from the App Store. Search for the version of macOS/OSX you want to install and press “Download”. The installer will appear in your Applications folder when when the download is complete.
-
3Connect the USB flash drive to your computer. The drive will mount automatically and appear on the desktop.
-
4Go to “Applications > Utilities” and open the Disk Utility. The Disk Utility is used to manage and modify your drives. Your flash drive will appear in the list of drives on the left.
-
5Select your flash drive from the list and press “Partition”. Partitioning is a way to split your drive’s storage into separate spaces. This button is one of the tabs listed below the menu bar. The tab contains options for formatting the USB drive and setting it up to be bootable.
-
6Open the Partition Layout menu and select “1 Partition”. A single partition will maximize the space for your portable operating system.
-
7Open the Format menu and select “Mac OS Extended (Journaled)". This format is necessary to run the operating system.
- Note: Formatting the USB drive will erase ALL content. If you have any data on your USB flash drive you want to save, copy it to your computer first to save it.
-
8Press “Options…”. This button is below the partition table and opens up a menu of options for the selected partition.
-
9Select “GUID partition table” and press “OK”. This partition scheme is necessary to make the partition bootable.
- Other options are used for making a drive bootable to PowerPC or Windows computers, but a modern macOS/OSX will not function properly on most non-Mac hardware.
-
10Press “Apply” then “Partition” from the popup alert. A progress bar will appear indicating the formatting and partitioning progress. This process may take a few minutes. When complete, the progress bar will disappear.
-
11Open the macOS/OSX installer. The installer is located in your Applications folder.
-
12Press “Continue” to begin the installation process.
-
13Press “Agree” and then “Agree” a second time in the popup. Clicking this button agrees to the licensing information displayed in the installer window.
-
14Press “Show All Disks”. This will let you select which disk to install the operating system to.
-
15Select your flash drive from the list of disks and press “Install”. The installation will begin and will probably take around 30 or more minutes. When installation is complete you will be prompted to setup the new OS.
- You may be prompted to enter your computer’s login information after pressing install to verify the action.
-
16Enter the OS initialization information. You will be prompted for information like username/password, location, and wifi info to configure your new OS installation. After you finish you will be booted into your portable drive.
-
17Go to “Applications > System Settings” and open “Startup Disk”. You want to make sure to switch your default startup disk back to your computer’s hard drive to avoid problems after you remove the flash drive.
-
18Select your computer’s hard drive and press “Restart”. You will boot back into your computer’s hard drive and you can now safely eject your flash drive.


Expert Q&A
-
QuestionHow long does it take to put Windows 10 on a flash drive?
 Luigi OppidoLuigi Oppido is the Owner and Operator of Pleasure Point Computers in Santa Cruz, California. Luigi has over 25 years of experience in general computer repair, data recovery, virus removal, and upgrades. He is also the host of the Computer Man Show! broadcasted on KSQD covering central California for over two years.
Computer & Tech SpecialistOnce you format the flash drive, it takes about 20 minutes to create a bootable flash drive for Windows 10. -
QuestionWhat button do you press to interrupt the boot sequence?Luigi OppidoLuigi Oppido is the Owner and Operator of Pleasure Point Computers in Santa Cruz, California. Luigi has over 25 years of experience in general computer repair, data recovery, virus removal, and upgrades. He is also the host of the Computer Man Show! broadcasted on KSQD covering central California for over two years.
Computer & Tech SpecialistThat depends on the manufacturer: On most Dells it's F12, most HPs are F2, and Lenovo has a tiny button you have to push with a pin. -
QuestionCan I go back and forth between my original and the USB OS?
 Community AnswerYou technically can, but it does require a restart every time you want to switch OS's


References
- ↑ http://www.disk-partition.com/gpt-mbr/difference-between-mbr-and-gpt-1203.html
- ↑ Luigi Oppido. Computer & Tech Specialist. Expert Interview. 24 February 2021.
About This Article