This article was co-authored by Daniel Stoescu. Daniel Stoescu is a Master Electrician and the Owner and Operator of Home Tech Solutions, LLC in Hampton, Virginia. With over a decade of experience, Daniel specializes in wiring residential, commercial, and light industrial structures. The Home Tech Solutions team has over four decades of combined experience and offers comprehensive solutions for residential electrical needs.
This article has been viewed 78,334 times.
Dress up a room or give it a whole new appearance by learning how to change a ceiling fixture on your own. Ceiling fixtures can vary from chandeliers for a formal dining room, a new light and fan combination for a family room, or a new look in a recently remodeled room. You can save money by installing a ceiling fixture on your own with a few tools and a helper. Even if you have never attempted a home-installation project, you can learn how to wire a ceiling light by following the instructions below.
Steps
-
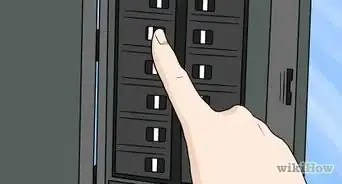
1Turn off the power to the existing light. Find the main breaker box, and turn off either the individual breaker for the room or the main power breaker.[1]
- Always test the power by flipping the light switch a few times before proceeding.
-
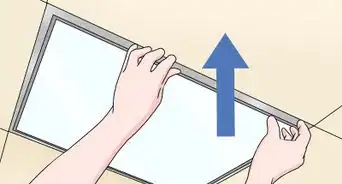
2Remove the old ceiling light. Use a Phillips screwdriver to unscrew the mounting screws, and bring down the light fixture. It is helpful to have someone to hold the fixture as you uncap the wires and remove any electrical tape. Untwist the fixture wires from the house wiring.[2]Advertisement
-
3Inspect the wiring in the outlet box. Houses built before 1985 may have wiring for fixtures rated at 90 degrees and less. Most of the more-recent fixtures require wires that can withstand hotter temperatures.[3]
- Look for wires marked NM-B, UF-B, THHN, or THWN-2. These wires are approved for the higher-temperature fixtures.
-
4Inspect the outlet box to ensure that it is securely fastened. Make sure that it is rated for the weight of your light fixture.
- According to the National Electric Code (NEC), a fixture that weighs 50 pounds or more will have to have its own independent electrical box.
-
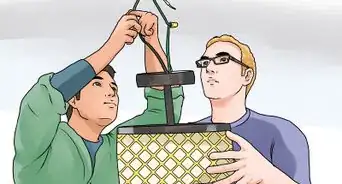
5Pre-assemble as much of the ceiling fixture on the ground as possible. This will save time and arm strain later.[4]
- Adjust the length of the rod by aligning the canopy with the crossbar and allowing a little screw thread to extend through the canopy.
- Lock the length in place with a lock nut.
- Thread the screws into holes on each side of the crossbar. If you're using a rod, thread it into the center hole of the crossbar.
-
6Move all wires to 1 side of the electrical box.
-
7Mount the crossbar to the electrical box.
-
8Connect the wires as they were in the old fixture. The ground wire is the bare copper wire and should be connected to the green grounding screw in the crossbar. Wire black to black (hot) and white to white (neutral), and make sure that all connections are snug.[5]
- Have a helper hold the rest of the fixture while you connect the wires.
-
9Tuck the wires into the electrical box.[6]
-
10Align the canopy with the mounting screws and tighten. Most light fixtures will have a keyhole-shaped hole. Align the head of the screw into the wider part of the hole, and twist the fixture to the narrower part. Tighten the mounting screws.
- If you're using a center-mounted ceiling light, slide the canopy onto the rod so the nipple shows through the center hole. Screw on, and tighten the mounting nut.
- If needed, adjust the rod so that the canopy sits flush against the ceiling.
-
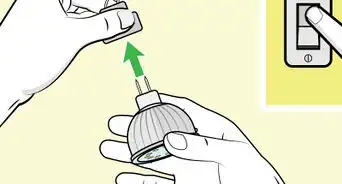
11Insert lightbulbs of the correct wattage.
-
12Hold the globe of the light into position, and tighten the setscrews on the side of the canopy.
-
13Turn the power back on.
-
14Finished.


Community Q&A
-
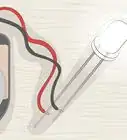
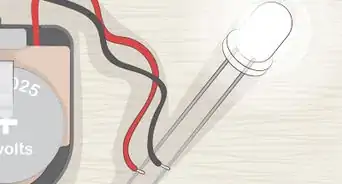
QuestionAll wires are the same color. How do I know hot from cold?
 Community AnswerGet a voltage meter. The best ones are either commercial or government, but one from Home Depot will work too!
 -
QuestionDo some receptacles have a ground wire to which to connect the new ground wire (so no need to connect copper to a ground screw)?
 Community AnswerInterior ceiling lights usually have no ground wire connection, unless there is a receptacle in addition to the socket. Remember that the "hot" (black or red) wire goes to the brass colored screw, "neutral" (white) to the silver screw. If there is a bare ground wire in the fixture, often found in ceiling fans and exterior fixtures, twist it together with the ground wire from the cable, and put a wire nut on it.
 -
QuestionCan I replace a four core cable with three core chandelier?Community AnswerYes. However, it will be less effective and will run out a lot quicker than a four core cable.
Warnings
- Do not connect a post-1985 fixture to pre-1985 wiring. The heat from the fixture may melt the insulation around the wires and become a fire hazard.⧼thumbs_response⧽
- In case of any questions or doubts contact a licensed electrician.⧼thumbs_response⧽
Things You'll Need
- Ceiling light with mounting accessories
- Wire cap nuts
- Phillips screwdriver


References
- ↑ https://www.artofmanliness.com/articles/replace-light-fixture/
- ↑ https://www.artofmanliness.com/articles/replace-light-fixture/
- ↑ https://www.familyhandyman.com/electrical/how-to-hang-a-ceiling-light-fixture/
- ↑ https://www.familyhandyman.com/electrical/how-to-hang-a-ceiling-light-fixture/
- ↑ https://www.apartmenttherapy.com/how-to-install-a-new-light-fixture-176074
- ↑ https://www.apartmenttherapy.com/how-to-install-a-new-light-fixture-176074
About This Article