This article was co-authored by Marty Stevens-Heebner, SMM-C, CPO®. Marty Stevens-Heebner is a Certified Professional Organizer (CPO) and Founder of Clear Home Solutions, a home organizing and senior moving management company based in southern California. Marty is the first Certified Senior Move Manager (SMM-C) in the United States and is a Certified Aging in Place Specialist (CAPS) through the National Association of Home Builders. She is the President-Elect and is on the board of directors of the National Association for Senior Move Managers, a member of the National Association of Professional Organizers, and has been acknowledged as a Hoarding Specialist and ADHD Specialist through the Institute for Challenging Disorganization.
There are 14 references cited in this article, which can be found at the bottom of the page.
This article has been viewed 17,646 times.
If you're on the move, trying to keep all of your glassware from breaking might seem like an impossible task. With a little effort and plenty of bubble wrap, you can rest assured that your beautiful glass pieces will survive the journey. How you wrap each piece will depend on its shape and size. In general, however, you will want to make sure that each piece has a layer of paper and bubble wrap before being placed into a cushioned box.
Steps
Covering Rounded and Hollow Items
-
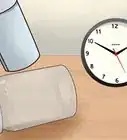
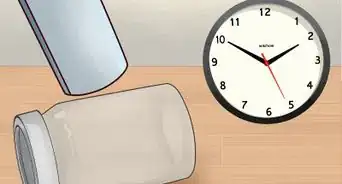
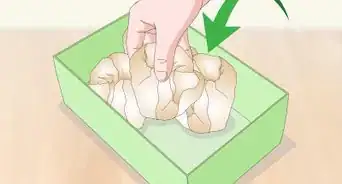
1Stuff the inside of your items with crumpled packing paper. You can also use tissue paper or plain white paper, but avoid using newspaper, which can leave ink stains on the glass.[1]
-
2Roll the item in packing paper. Place the item near 1 corner of the paper and wrap the paper over it diagonally. Make sure that the item is completely wrapped. As you roll the item, tuck the ends of the packing paper into the hollow interior of the vase or glass. Repeat to add a second layer of paper.[2]
- If you want, you can tape off the edges with a piece of packing tape. Make sure that you only tape paper to itself, however. If you tape the glass itself, it might chip away when you are unpacking.
Advertisement -
3Wrap bubble wrap around the outside of the paper. Cut out a piece of bubble wrap that is large enough to wrap around the item at least once. Fold the bubble wrap over each end to protect the ends of the wrap. Tape the edges securely with packing tape.
-
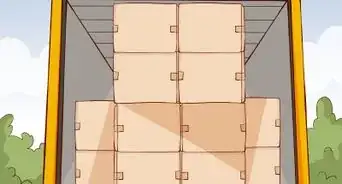
4Place the item upside down in a box. Make sure there is a layer of packing paper or peanuts on the bottom of the box before you put your items in. Keep similar items together in the box, all upside down. Do not stack glasses or other fragile items.
- It is better to pack glasses in small or medium boxes than large boxes. Glasses can become heavy quickly, and smaller boxes will prevent them from moving around too much.
- Some packing stores may sell dividers for glasses or cups. You can put these dividers in a box to keep each glass separate.
-
5Fill the empty space with more peanuts or packing paper. This will prevent the items from moving around during transit. The rest of the box should be filled to the top with these packing materials.
-
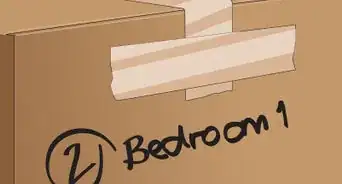
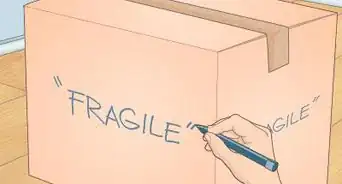
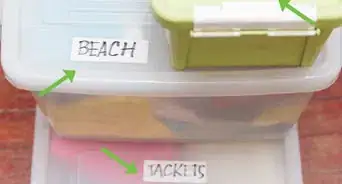
6Tape the box closed before labeling it. Tape all edges and openings with reinforced tape. Write "FRAGILE" in large letters on each side of the box and put which room it will go to.[3]


Protecting Flat Glass Pieces
-
1Lay the object gently against a flat surface. This includes plates, TV screens, computer monitors, frames, or mirrors. You may want to lay it on a blanket or other padded surface to help prevent any damage to the item while packing.[4]
- Make sure you have packing paper, packing tape, packing peanuts, bubble wrap, and boxes ready as you wrap your glass.
-
2Place 1 piece of cardboard against the glass side of larger pieces. This gives the object extra reinforcement. The cardboard should cover the entire glass screen. You can cut up a cardboard box or buy large pieces of cardboard from an office supply store. Tape it down to the bubble wrap to secure it.[5]
- You do not need to do this for small objects, like plates or small frames. Instead, you can put a piece of cardboard in between each one when you pack them in the box.
-
3Wrap packing paper completely around the item. Place the item in middle of the packing paper and fold the edges over. Use as much paper as you need to completely cover all sides of the item. Tape multiple pieces together if needed. Once you are done, tape the corners down.[6]
-
4Cover the piece with bubble wrap. Just as you did with your packing paper, wrap bubble wrap around the entire piece. Use packing tape to secure the edges and corners of the piece.[7]
-
5Stuff the bottom of a box with packing paper or peanuts. Crumple up the paper before you put it inside. You just need a single layer at this point. This will add an extra layer of cushioning to the box.[8]
- If you have a large frame, TV, or mirror, use a mirror or telescopic box. This is a slender box designed for frames and mirrors.
- Small picture frames, plates, and plaques can be stacked vertically in a medium or small box. Do not use large boxes, however, as fragile items are likelier to break inside big boxes.
-
6Add the item to the box. Make sure that there is still plenty of room left in the box. If you over pack the box, the item may break during the move. Larger items should be packed individually. If you are stacking multiple plates or small frames in a box, put a layer of bubble wrap or a piece of cardboard between each one.[9]
-
7Fill the rest of the box with packing peanuts or crumpled paper. Make sure that there is no room left for the pieces to move around during transit. Fill the box up to the top, but do not overstuff the box.[10]
-
8Tape the box and write "fragile" on the sides. Use reinforced tape to secure the bottom, top, and edges of the box. Use a broad-tipped felt marker to write “FRAGILE” in large letters on each side of the box, along with the room it belongs to. You are now ready to go![11]


Packing Oddly Shaped Items
-
1Assess the shape and size of the piece. Identify any corners, handles, or protruding parts. Consider whether you can find a box big enough for it or not. Remove any loose or collapsible pieces and pack them separately. If the item is very large, get a padded moving blanket from a moving company to cover it.[12]
-
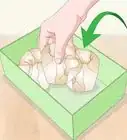
2Wrap ornaments, paper weights, and other decorations individually. First wrap the ornament in tissue, covering thin or delicate areas with extra paper. Next wrap it in packing paper or bubble wrap. Fold in the extra paper as you wrap to keep the ornament snug and protected. Tape down the edges when you are done.[13]
- While each ornament should be wrapped individually, you can put multiple ornaments or small decorations in a box together as long as it is padded with plenty of packing paper or peanuts.
-
3Wrap bubble wrap around a lamp to protect it. Remove the lightbulb and the shade. Pack the lampshade separately in a box with tissue. Wrap the cord of the lamp around the base before wrapping the entire lamp in bubble wrap. Tape the bubble wrap to itself.[14]
-
4Reinforce the handle and spout of a teapot. Wrap the lid separately in packing paper. Then crumple some packing paper inside of the teapot. Wrap paper around the entire teapot. Stick an extra piece of paper through the hole of the handle and around the spout. Put the lid back on top and wrap both pieces together with bubble wrap. Tape the bubble wrap down to secure the bundle.[15]
-
5Disassemble a glass tabletop first before wrapping. Unscrew or remove the legs from the table. Wrap the entire table in bubble wrap, taping it securely at the corners. Try to find a mirror or telescopic box that will fit your table. If you can't remove the legs, wrap the table in bubble wrap as best you can before covering the whole table in a padded moving blanket.[16]
-
6Place the item in a cardboard box if possible. Find a box that will fit the size of your glass item. Put a layer of crumpled paper and packing peanuts. If the glass item is very large, you might not be able to find a box that fits. In this case, try to safely transport the item without the box by wrapping it in a padded moving blanket.[17]
- Pack fragile objects separately whenever possible.
- If you are packing something very small, like paperweights or ornaments, use cardboard dividers or put them in their own small box before placing them in a larger box.
- Try to put things in their original boxes and packaging if possible. With the unique shape of the item, the original box may be the only one that fits it properly.
-
7Fill in the empty space with crumpled paper. You can use packing paper or plain white paper but make sure that the crumpled paper is sturdy enough that the item won't shift too much during the move.[18]
-
8Tape the box closed and mark the box fragile on each side. Use a wide-tipped marker to mark the word "FRAGILE" on several sides of the box. Make sure to write where the box will go in your new home. The glass item should now be secure.[19]


Expert Q&A
-
QuestionWhat do you use to wrap glass when moving?
 Marty Stevens-Heebner, SMM-C, CPO®Marty Stevens-Heebner is a Certified Professional Organizer (CPO) and Founder of Clear Home Solutions, a home organizing and senior moving management company based in southern California. Marty is the first Certified Senior Move Manager (SMM-C) in the United States and is a Certified Aging in Place Specialist (CAPS) through the National Association of Home Builders. She is the President-Elect and is on the board of directors of the National Association for Senior Move Managers, a member of the National Association of Professional Organizers, and has been acknowledged as a Hoarding Specialist and ADHD Specialist through the Institute for Challenging Disorganization.
Certified Professional Organizer & Senior Move ManagerCertified Professional Organizer & Senior Move ManagerExpert AnswerTo protect your most valuable items, consider purchasing special boxes called dish packs. Dish packs come with cardboard inserts that will keep your glassware and dishes separated. They often come with a little foam envelope that you can put the glass in. Then, you just slip the padded glass into the cardboard petition. However, it's still a good idea to pad the bottom of the box before you put in the insert, especially if you'll be travelling over a long distance. -
QuestionHow do you pack glass so it doesn't break?Marty Stevens-Heebner, SMM-C, CPO®Marty Stevens-Heebner is a Certified Professional Organizer (CPO) and Founder of Clear Home Solutions, a home organizing and senior moving management company based in southern California. Marty is the first Certified Senior Move Manager (SMM-C) in the United States and is a Certified Aging in Place Specialist (CAPS) through the National Association of Home Builders. She is the President-Elect and is on the board of directors of the National Association for Senior Move Managers, a member of the National Association of Professional Organizers, and has been acknowledged as a Hoarding Specialist and ADHD Specialist through the Institute for Challenging Disorganization.
Certified Professional Organizer & Senior Move ManagerCertified Professional Organizer & Senior Move ManagerExpert AnswerIf you're packing anything with a handle, fill in the gap inside and around the handle. Then, put packing paper inside the item, and then wrap more paper around the whole thing. That way, even fragile items will stay safe during your move.
Things You'll Need
Covering Rounded and Hollow Items
- Packing paper
- Tissue
- Bubble wrap
- Packing peanuts
- Packing tape
- Cardboard glass dividers
- Small and medium sized boxes
- Broad-tipped black marker
- Scissors
Protecting Flat Glass Pieces
- Packing paper
- Bubble wrap
- Packing peanuts
- Packing tape
- Reinforced tape
- Cardboard
- Small and medium sized boxes
- Mirror boxes
- Broad-tipped black marker
- Scissors
Packing Oddly Shaped Items
- Packing paper
- Bubble wrap
- Tissue
- Packing peanuts
- Packing tape
- Reinforced tape
- Cardboard
- Cardboard boxes
- Padded moving blankets
- Broad-tipped black marker
- Scissors

References
- ↑ https://www.youmoveme.com/us/blog/four-easy-tips-for-packing-fragile-items
- ↑ https://www.youtube.com/watch?v=q4Ysmp8OXig&feature=youtu.be&t=45
- ↑ https://www.moving.com/tips/how-to-pack-for-a-move/
- ↑ https://makespace.com/blog/posts/pack-picture-frames-moving-storage/
- ↑ https://www.mymovingreviews.com/move/pack-fragile-items-for-moving
- ↑ https://makespace.com/blog/posts/pack-picture-frames-moving-storage/
- ↑ https://makespace.com/blog/posts/pack-picture-frames-moving-storage/
- ↑ https://www.youtube.com/watch?v=q4Ysmp8OXig&feature=youtu.be&t=33
- ↑ https://www.mymovingreviews.com/move/pack-fragile-items-for-moving
- ↑ https://www.mymovingreviews.com/move/pack-fragile-items-for-moving
- ↑ https://makespace.com/blog/posts/pack-picture-frames-moving-storage/
- ↑ https://www.mymovingreviews.com/move/pack-fragile-items-for-moving
- ↑ https://www.youtube.com/watch?v=X9NDTqyaiyQ
- ↑ https://www.youtube.com/watch?v=u8iWvJUVDXE&feature=youtu.be&t=27
- ↑ https://www.youtube.com/watch?v=Sl1LRCuMlvA
- ↑ http://www.movers.com/packing-guides/how-to-pack-a-glass-top-table.html
- ↑ https://www.youmoveme.com/us/blog/four-easy-tips-for-packing-fragile-items
- ↑ https://www.mymovingreviews.com/move/pack-fragile-items-for-moving
- ↑ https://www.moving.com/tips/how-to-pack-for-a-move/
About This Article