X
wikiHow is a “wiki,” similar to Wikipedia, which means that many of our articles are co-written by multiple authors. To create this article, volunteer authors worked to edit and improve it over time.
The wikiHow Tech Team also followed the article's instructions and verified that they work.
This article has been viewed 63,403 times.
Learn more...
You know that image that you see when your computer is signing in? That's your user account picture (aka avatar). Changing the picture from the generic white wireframe icon to your own can add a personal touch to your PC. Read how to do that in this wikiHow article.
Steps
Part 1
Part 1 of 3:
Accessing the Account Settings
-
1
-
2Click your user profile icon. It's on the left side of start, towards the bottom above the File Explorer icon.
- Older Windows 10 versions will have it at the top of the Start menu along with the account name.
Advertisement -
3Choose Change account settings from the dropdown that appears. It's located at the top of the dropdown.
- You can also go to "Settings > Accounts > Your info".
- Now, skip to Method 2 if you want to use an existing picture. Skip to Method 3 if you want to take a new photo for use.


Advertisement
Part 2
Part 2 of 3:
Using an Existing Picture
-
1Click "Browse for one". This option is located under the "Create your picture" header towards the bottom. It has a folder icon next to it.
-
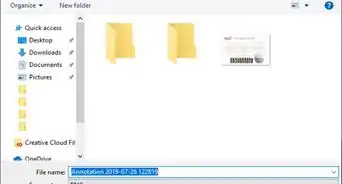
2Browse for a saved picture. The File Open dialog will open. Use the left pane to navigate around your computer.
-
3Select a picture.
-
4Submit it for use as an account picture. Click the Choose picture at the bottom-right of the dialog.
-
5Finished.


Advertisement
Part 3
Part 3 of 3:
Taking a New Photo
-
1Click "Camera". This option is located under the "Create your picture" header towards the bottom. It has a webcam icon next to it.
-
2Wait for the Camera app to open. The built-in Camera app will take a couple of seconds to launch.
-
3Ensure you're switched to camera mode. Ensure that a big white camera button is located to the right. If not, click it from right below the existing button.
- Using a video as your avatar is pointless as it will extract and use the last frame from the video. Thus, taking a photo is simpler and more efficient.
-
4Snap a photo. Click the big white camera button on the right side of the window.
-
5Review the photo. Is it to your liking? If not, you can retake it by clicking the ✕ Cancel button to the right.
-
6Crop the photo (optional). Drag the edges of the white box around. Content placed inside of the box will be used as your avatar. While dragging, a white grid will show inside the box.
- Keep in mind that Windows automatically rounds the corners of user avatars. The outcome is that the very edges to be cut off. Customarily, previous Windows versions had a square user account pictures.
-
7Save the photo. Click the ✓ Done button to the right. It's right above the ✕ Cancel button.
-
8Finished.


Advertisement
Community Q&A
-
QuestionHow do I remove the photo and restore the default icon?
 Community AnswerUnfortunately, Microsoft doesn't offer an easy way to do this. However, downloading the default icon from the internet and then setting it has the exact same effect.
 -
QuestionHow do I set an already saved picture for account picture?
 MACARTHUR GAISINCommunity AnswerGo to settings. And in settings, you should see a personalization option. Click it and in the personalization option, you should see a background option. You can change it in there.
 -
QuestionWhere is the camera capture stored? I'd like to use it elsewhere.
 Joseph PurcellCommunity AnswerYou just need to click on the folder icon on your taskbar to launch File Explorer and then scroll to Pictures. Camera Roll folder is listed under this Pictures directory and you can open it to view all your images.
Advertisement

-Step-17.webp)

About This Article
Advertisement


-Step-17.webp)


