This article was co-authored by wikiHow Staff. Our trained team of editors and researchers validate articles for accuracy and comprehensiveness. wikiHow's Content Management Team carefully monitors the work from our editorial staff to ensure that each article is backed by trusted research and meets our high quality standards.
This article has been viewed 33,180 times.
Learn more...
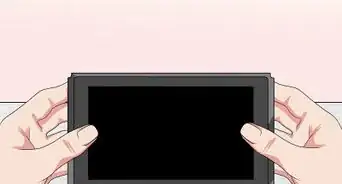
A Joy-Con is the small controller for the Nintendo Switch. A common problem on these controllers is sticky or unresponsive buttons. This is usually because of dust building up around the buttons. This is an easy fix, and all you have to do is remove that dust. You can also disinfect the entire controller to avoid spreading germs. With a quick clean, your Joy-Cons should be back to normal in no time.
Steps
Removing Dirt and Dust
-
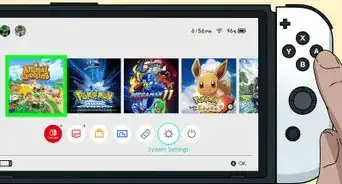
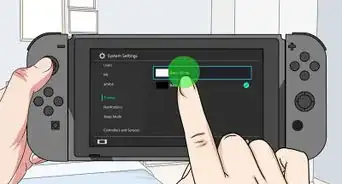
1Power off the console before cleaning the controller. This prevents you from accidentally selecting something while you’re cleaning the controller. Hold the power button on top of the Switch for 5 seconds. When the power menu appears on the screen, press "Power Options" and then "Turn Off."[1]
- Removing dirt and dust from the buttons could fix response problems or sticking. Try to clean out the button spaces before using another cleaning methods.
-
2Dig out dirt around the buttons with a toothpick. Dirt and dust build up in the small spaces around the buttons over time. Start by manually removing as much as you can with a toothpick. Insert the tip and scrape upward to pull out and dirt.[2]
- You can do this around the joysticks too. This could improve playability.
- If you don't have a toothpick, other thin items like a pin or paperclip could also work. As long as they're small enough to fit into the space around the buttons then they'll work.
- Don’t bend the toothpick while you’re cleaning or you could break it off in the space.
Advertisement -
3Scrub around the buttons with a dry, soft toothbrush. This helps pull up any remaining dirt that you couldn’t get with the toothpick. Use a dry, soft-bristled toothbrush and insert the bristles into the space around the buttons. Scrub around each button in circular motion to pull out more dirt.[3]
- To make sure the toothbrush is completely dry, use a fresh one that’s never been used.
-
4Wipe up any remaining dust on the controller with a microfiber cloth. Pulling the dust out of the buttons will probably leave some on the controller body. Give the controller a thorough wipe down with a microfiber cloth to get rid of these leftovers.[4]
- You could also use a cotton swab or soft rag to do this. Don’t use paper towels or tissues, because these could leave paper remnants behind.


Disinfecting the Buttons
-
1Dip a Q-tip into rubbing alcohol. This trick works for unsticking buttons, and also simple disinfection of your controller. Pour a bit of rubbing alcohol into a small cup. Dip the head of a Q-tip in and shake it a bit so it isn’t dripping.[5]
- Be advised that Nintendo doesn’t recommend using cleaners on Joy-Cons because the plastic can fade. However, there’s no warning that the controller won’t work anymore, so if you don’t mind the color fading a bit, then this method is fine.[6]
-
2Rub the alcohol around each button. Take the Q-tip and press it against the end of a button. Make a circle around the button to clean it. This helps remove dirt buildup that could make the button stick.[7]
- The Q-tip won't fit into the space around the buttons, so don't try to insert it. Just rub the controller surface and button border.
- If you’re having trouble with one button that’s sticking, you could focus on that one. For a general clean, wipe around all the buttons. You can also rub around the joysticks.
-
3Wipe the rest of the controller with alcohol to disinfect the whole thing. Pour some alcohol on a cotton ball or microfiber cloth. Then wipe down the entire controller surface, along with the buttons and joystick tops. This disinfects the entire thing and prevents you or your friends from getting sick.[8]
- Cleaning after a lot of people use your controllers, like if you have a party, is a good idea. This removes any germs that your controllers picked up from other people.
-
4Dry off all the areas you rubbed alcohol on. The alcohol will evaporate on its own, but drying the controller off could prevent some of the discoloration that alcohol could cause. Use a microfiber cloth or cotton ball and rub all the areas that you wiped alcohol on to remove the moisture.[9]
- Don’t use a paper towel or tissue, because these could leave paper remnants behind.


Community Q&A
-
QuestionMy switch control register movements even though I'm not pressing anything. It's known as a drift. How do I fix that problem?
 Community AnswerYou can send the controls to Nintendo to have them fixed, though it may take a while for the repair work to be completed. Or, take it back to the retailer you purchased it from and ask for a replacement if it is still under warranty or covered by your consumer laws.
Things You’ll Need
Removing Dirt and Dust
- Toothpick
- Toothbrush
- Microfiber cloth
Disinfecting the Buttons
- Rubbing alcohol
- Q-tip
- Microfiber cloth
- Cotton ball
Warnings
- Never use water to clean your controller. This could cause internal damage.⧼thumbs_response⧽


References
- ↑ https://en-americas-support.nintendo.com/app/answers/detail/a_id/46904/kw/clean%20joy%20con%20button
- ↑ https://www.thegamer.com/how-to-clean-switch-xbox-ps4-controllers/
- ↑ https://en-americas-support.nintendo.com/app/answers/detail/a_id/46904/kw/clean%20joy%20con%20button
- ↑ https://www.thegamer.com/how-to-clean-switch-xbox-ps4-controllers/
- ↑ https://youtu.be/HxPmriMQTzs?t=213
- ↑ http://www.nintendolife.com/news/2020/04/nintendo_tells_customers_to_stop_using_alcohol-based_products_to_clean_the_switch
- ↑ https://youtu.be/HxPmriMQTzs?t=228
- ↑ https://www.thegamer.com/how-to-clean-switch-xbox-ps4-controllers/
- ↑ https://youtu.be/HxPmriMQTzs?t=289
About This Article