This article was co-authored by wikiHow Staff. Our trained team of editors and researchers validate articles for accuracy and comprehensiveness. wikiHow's Content Management Team carefully monitors the work from our editorial staff to ensure that each article is backed by trusted research and meets our high quality standards.
There are 19 references cited in this article, which can be found at the bottom of the page.
This article has been viewed 70,826 times.
Learn more...
If your documents are coming out of a Brother printer with streaks and smudges, don't worry! You don't have to think about replacing it just yet. A simple cleaning can help get your printer in like-new condition. Often, all you need to do is run a cleaning cycle. However, if there is a lot of dried ink in the printer, you may need to unclog the print head nozzles. Finally, clean the rollers for streak-free print jobs.
Steps
Running a Cleaning Cycle for Inkjet Printers
-
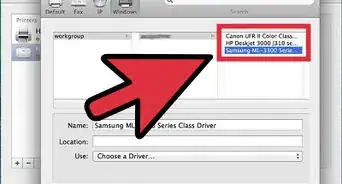
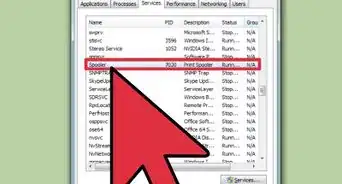
1Select the Ink option on the screen of your printer. If there is an Ink key on your printer, press it. If not, go to Menu and use the arrow and OK buttons to select Ink. For a touchscreen printer, either select Ink on the screen, or look for a square symbol with black, yellow, blue, and magenta lines. This is the Ink Indicator.[1]
- You can clean either the black ink, the color ink, or both.
-
2Select Cleaning to run a cleaning cycle. This is the easiest way to clean the printer if something seems off. The printer will take a few minutes to clean old ink out of the print head, resulting in a cleaner print.[2]
- If you notice that your print jobs are coming out smudged or sloppy-looking, a cleaning cycle might take care of the problem.
Advertisement -
3Leave the printer alone while the cleaning cycle is in progress. The cleaning cycle takes a few minutes and you won't be able to print anything or select other options on the menu. Don't unplug the printer while the cycle is running.[3]
- Once the cleaning is done, the printer will automatically go back to the home screen, ready to print.
-
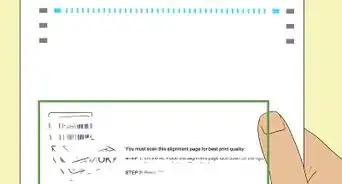
4Test print a one-page document. To see if the cleaning worked, try printing a single page. Check it for smudges. Make sure to print something in color if you cleaned the color ink or in black and white if you cleaned the black ink.[4]
- If the printing still looks off, you may have to run another cleaning cycle or unclog the print head nozzles.
-
5Run up to 4 cleaning cycles in a row. Sometimes, you will need to run more than 1 cleaning cycle to get the best results. However, try not to run more than 4 cycles in a row, as the process can actually start to draw ink out of the cartridges, making the cleaning less effective and wasting expensive ink.[5]
- If the printing still doesn't look right after several cleaning cycles, try printing 10 pages to see if this clears the nozzles.


Unclogging Inkjet Print Head Nozzles
-
1Start a cleaning cycle and open the top of the printer. Use the menu on screen to start a cleaning cycle. Open the entire top of the printer, not just the scanner. The whole top should lift open with no resistance.[6]
- You will see the print head moving back and forth when you open the printer.
-
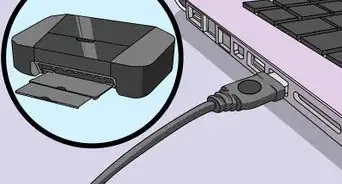
2Unplug the printer when the print head moves all the way to the left. The print head is difficult to clean when it is in its default position on the right side of the printer, but the printer needs to be off before you start cleaning it. Wait until the print head moves over and then unplug the printer.
- The printhead is the square piece of the printer that you see moving when you open the top of the printer.
-
3Place a piece of blotting paper under the print head. A paper towel works well because it can absorb the cleaning fluid and extra ink. Fold the paper towel into a long strip that will fit over the print head track, and then slide the head over it.[7]
- The print head doesn't need to be all the way in the middle of the printer, just onto the paper towel.
-
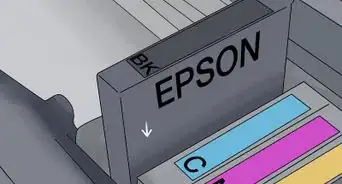
4Remove the ink cartridges from the printer. This will expose the nozzles that take the ink from the cartridge and feed it into the print head. The bottom set of nozzles are the ones that need to be cleaned.[8]
- To save the ink cartridges, wrap them in cling film.
-
5Use a syringe to inject 4 millilitres (0.14 fl oz) of water into the nozzle. You can buy plastic tubing at hardware stores and cut it to around 3–4 inches (7.6–10.2 cm) using scissors. Buy some in a width slightly larger than the size of the nozzle. Use a short length of plastic tubing to connect the end of the syringe to the nozzle. Then, press gently to slowly inject a small amount of distilled water into the nozzle. Using water that is not distilled can clog the print head even more with minerals. This will flush out any remaining ink. Let the water soak for 5 minutes.[9]
- You can also buy cleaning fluids specifically for printers online.
- If you can't inject any fluid, you may have to replace your printer.
-
6Return the print head to the right and put the cartridges back. Remove the paper towel and put the print head back in its "parked" position at the right side of the printer. Put the ink cartridges back in the printer. Then, plug in the printer and run a cleaning cycle.[10]
- The paper towel will be full of ink. Be careful when you are removing it from the printer, and wear rubber gloves if you want to protect your hands.
- Once the printer is done priming the heads and running the cleaning cycle, you can print out a test document. Print a document with both color and black and white elements to be sure all of the nozzles were cleaned. Print a small image that takes up about 1/4 of the page if you don't want to waste too much ink.


Cleaning the Rollers on Inkjet Printers
-
1Turn the printer off and unplug it. The printer needs to be off before you start cleaning the rollers. Unplugging it ensures there is no power flowing to the printer while you are cleaning.[11]
- You will use water to clean the printer, so this is especially important.
-
2Wipe the separator pad in the paper tray with a damp cloth. Take the paper tray out of the printer. The separator pad will be at the front edge of the tray, at the center. It is directly above the handle you use to remove the tray.
- For inkjet printers, the rollers might be located underneath an access panel. Open the panel under the tray. You may have to remove a toner cartridge, as well. A [12]
- Make sure to use a soft cloth that is damp, not wet.
- Do not use any cleaning fluid, as this can damage the printer parts.
-
3Use the cloth to wipe the pick-up rollers. The pick-up rollers are small, gray rollers about 1⁄2 inch (1.3 cm) wide located inside the printer on the front side, above the paper tray. There are 2 of them.[13]
- Be sure to rotate the roller to clean it on all sides.
-
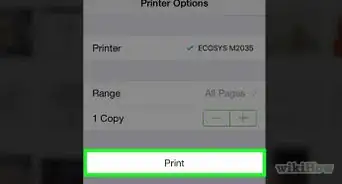
4Put the paper tray back in and print something to test it. A clean pick-up roller will help feed the paper correctly and print without streaks. Print a few pages to make sure the cleaning worked. Printing a black and white text document will be sufficient to see if the rollers are clean.[14]
- If the rollers are damaged, you may have to take the printer to a repair shop to replace them.


Cleaning a Laser Printer
-
1Turn off the printer and open it up. Make sure the printer is off before you begin. Open the printer by looking for a lever underneath the print tray. The printer will either lift up or forward to open.[15]
- You can unplug the printer to make sure it is off.
-
2Use a cloth to gently wipe the print heads if the printer opens on top. The print heads are the horizontal, metallic pieces underneath the top of the printer. Wipe back and forth with a dry cloth to remove any dry ink or lint.[16]
- Wipe gently so that you don't damage any parts.
-
3Pull the toner tray out if the printer opens in front. If the printer opens on one side, rather than on top, pull out the toner tray. The toner tray will have a handle that you can use to easily slide it out.[17]
- If the printer opens on top, you don't need to pull anything out.
-
4Take out the toner cartridges if the tray pulls out. If your printer is one of the models with a pull-out toner tray, take the cartridges out. The toner cartridges will lift out of the tray.[18]
- The print head for this kind of printer model is underneath the cartridges.
-
5Slide the tab under the toner cartridges back and forth. If you are using a model with a toner tray that pulls out, there will be a tab underneath the toner cartridges on the drums. Sliding the tab back and forth around 12 times cleans the print head.[19]
- The tab will be either blue or green.
-
6Rotate the drums under the toner cartridges and wipe any ink. Look for a cog on one side of the drum. Use one finger to rotate the cog and look for ink on the drums. Wipe any ink up with a dry cloth.[20]
- Use a dry, soft, clean cloth to wipe the drums.
-
7Put the toner cartridges back and close the printer. If you took the toner cartridges out, put them back into the printer. If not, simply close the printer.[21]
- Once everything is back in place, you can turn the printer back on.
-
8Run a calibration cycle, if necessary. On newer models, the printer will recalibrate automatically. On older models, you may have to go into the menu and find a calibration cycle. It will take a few minutes for the printer to recalibrate.[22]
- The calibration cycle is located in a different location on every printer. Look for its exact location in your printer's manual.
- Print a test page to make sure the printer is back to normal. Print a page using color and black ink to make sure all of the cartridges are working as they should be. A small image taking up 1/4 of the page should be sufficient.


Things You'll Need
- Soft cloth or paper towel
- Distilled water
Unclogging Inkjet Print Head Nozzles
- Cling film
- Syringe
- Plastic tubing
- Cleaning fluid (optional)

References
- ↑ https://support.brother.com/g/b/faqend.aspx?c=us&lang=en&prod=mfc990cw_all&faqid=faq00000735_015
- ↑ https://support.brother.com/g/b/faqend.aspx?c=us&lang=en&prod=mfc990cw_all&faqid=faq00000735_015#ts_01
- ↑ https://www.youtube.com/watch?v=w3vR-qDgfjo
- ↑ https://support.brother.com/g/b/faqend.aspx?c=us&lang=en&prod=mfc990cw_all&faqid=faq00000735_015
- ↑ https://support.brother.com/g/b/faqend.aspx?c=us&lang=en&prod=mfc990cw_all&faqid=faq00000735_015
- ↑ https://youtu.be/XERkJO7KlUI?t=66
- ↑ https://youtu.be/gQZ3ex0bwwc?t=290
- ↑ https://youtu.be/gQZ3ex0bwwc?t=341
- ↑ https://youtu.be/gQZ3ex0bwwc?t=436
- ↑ https://youtu.be/gQZ3ex0bwwc?t=567
- ↑ https://support.brother.com/g/b/faqend.aspx?c=us&lang=en&prod=hl5370dw_us&faqid=faq00002541_000
- ↑ https://youtu.be/eJBmi1_JXlQ?t=81
- ↑ https://youtu.be/eJBmi1_JXlQ?t=48
- ↑ https://support.brother.com/g/b/faqend.aspx?c=us&lang=en&prod=hl5370dw_us&faqid=faq00002541_000
- ↑ https://youtu.be/_Jfc7-LY7Uw?t=5
- ↑ https://youtu.be/5-uPYcZmxUI?t=128
- ↑ https://youtu.be/_Jfc7-LY7Uw?t=10
- ↑ https://youtu.be/_Jfc7-LY7Uw?t=12
- ↑ https://youtu.be/_Jfc7-LY7Uw?t=19
- ↑ https://youtu.be/_Jfc7-LY7Uw?t=26
- ↑ https://youtu.be/_Jfc7-LY7Uw?t=36
- ↑ https://youtu.be/5-uPYcZmxUI?t=232
About This Article