This article was co-authored by Aaron Beth. Aaron Beth is the founder of Aaron’s Refrigeration Company in New York City and a factory certified installer (FCI) for Sub-Zero products. He specializes in the service and maintenance of built-in refrigerators, wine coolers and ice machines. With over 54 years of experience, Aaron is the recipient of numerous Super-Service awards from Angie’s Lists and 2019 Best-of-the City.
There are 14 references cited in this article, which can be found at the bottom of the page.
This article has been viewed 11,112 times.
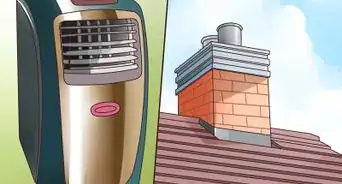
Both the coils in your air conditioning unit and the coils on the back of your fridge need to be cleaned 1 to 2 times per year. Luckily, each task should only take you 30 minutes at the most! Clean your HVAC coils with foam spray and a hose, and tackle the coils in your fridge with a specialty cleaning brush. Both tasks will help your units run more efficiently and will save you money on your energy bill.
Steps
Cleaning an HVAC Air Conditioner Coil
-
1Read the manufacturer’s safety guidelines before beginning work. Even though most instructions for cleaning air conditioning coils are similar, different units and manufacturers may have different safety guidelines. Read over the paperwork that came with your unit carefully and take note of any special precautions you need to follow.[1]
- If you no longer have the guidelines, search the name of your unit online. You should be able to find the safety guidelines on the internet.
- According to most factory manufacturers, you should clean the refrigerator coil twice yearly.
- If you have animals like cats and dogs, they tend to sit in front of the refrigerator, and their hair gets caught in the condenser and needs frequent cleaning.
- So it depends on where the refrigerator is. It is better to clean it a few times yearly.
-
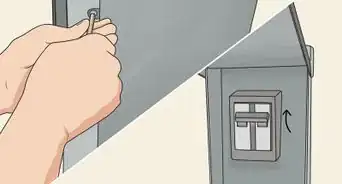
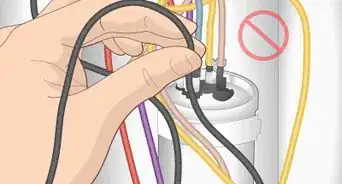
2Turn off the thermostat and the power to the air conditioning unit. Inside the house, turn off the temperature control panel so the unit doesn’t come on while you’re working. Then walk outside to your physical air conditioner and look at the side of your house to find the power box. Pull out the safety plug from the box and leave it out until you’re done cleaning the coils. Taking these precautions is essential to keeping you safe from electrical shocks![2]
- For extra safety, turn off the breaker that powers the air conditioning unit, too. The breaker will either be on the side of your house, in the basement, or in a utility closet.
Advertisement -
3Spray the unit down with cold water and clear away any debris. Use your hose to spray the coils of the AC unit to cool them down, especially if the unit has been running recently. If you’re working in the fall and haven’t been using your air conditioning unit recently, you can skip this step. Take a few minutes to clear away any branches, leaves, or weeds that are growing around the unit.[3]
- Avoid using high pressure on the unit, as that could damage the coils. A gentle spray for 1 to 2 minutes should be sufficient to cool them down.
-
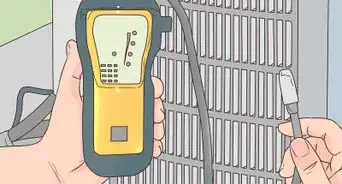
4Spray down the exterior coils with a specialty cleaning foam. Buy a coil cleaning foam from your local hardware store for about $10 per canister. Place the nozzle about 4 inches (10 cm) away from the coils, and spray the foam onto the unit. Start at the top and work your way to the bottom until the entire coil is covered. Repeat this on every side of the HVAC unit.[4]
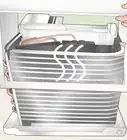
- The coils usually have a filter or grate covering them, which is what you’ll be spraying and cleaning. The coils themselves are usually bronze or silver and they snake back and forth from the top of the unit to its bottom.
- You’ll need 2 to 3 cans to clean your entire HVAC unit.
- Avoid getting foam on nearby grass or plants, as it can be harmful to them.
-
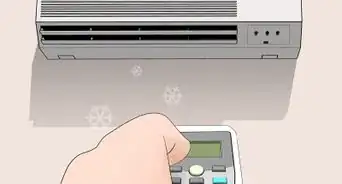
5Let the foam saturate the coils for 10 minutes. Set a timer and leave the unit alone to allow the foam to do its work. While it’s sitting, start spraying foam on the other sides of the unit if you haven’t already.[5]
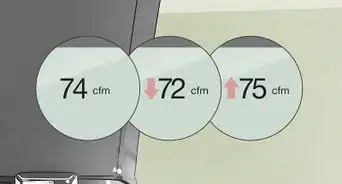
- The coils of your HVAC unit are constantly drawing in air, so they’re covered with dirt and dust. Cleaning them once a year helps keep your unit running efficiently. If you run your unit year-long, you may want to clean it twice per year.
-
6Rinse off the foam with the hose until no bubbles remain. Some sprays are “self-rinsing,” so check the instructions to make sure you need to rinse the unit with the hose. If so, use a gentle to medium spray and rinse from top to bottom. Repeat the rinsing process 2 to 3 times, or until the water running off the unit is clear. Try to direct the foam and water away from grass and plants, if you can.[6]
- You’ll notice lots of dirt and grime rinsing away from your unit. If there are any pieces of dirt lodged into the coils, you may need to pry them loose with your fingers, though most should be softened and dislodged by the foam.
-
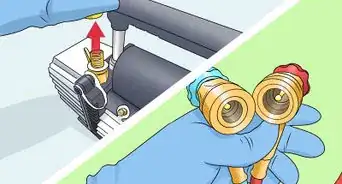
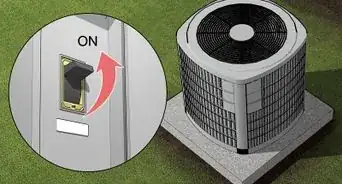
7Remember to turn the breakers, power units, and air unit back to “on.” Once you’re done rinsing off the HVAC unit, flip the breaker back on (if you turned it off). Replace the safety plug on the power unit near the air conditioner. Turn your air conditioner back on inside the house.[7]
- If for some reason you can’t get the unit to turn back on, double-check that you reinstalled the safety plug properly. It might not be snapped tightly into place.


Maintaining Refrigerator Coils
-
1Clean your refrigerator coils twice per year. Cleaning the coils in your fridge will take you 10 to 15 minutes at the most, making it an easy task to complete. Set a reminder on your calendar for every 6 months so you don’t forget to do it.[8]
- Cleaning the coils regularly will keep your electricity costs down and will save you money on potential future repair costs.
- If you have a pet that sheds a lot, you may want to clean the coils every 3 months.[9]
-
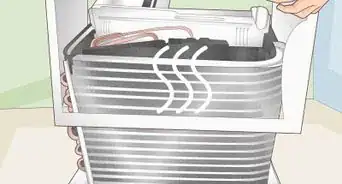
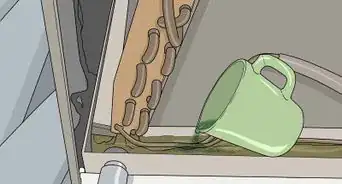
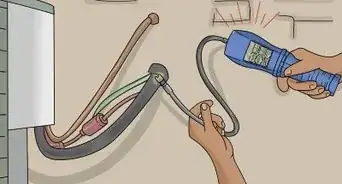
2Unplug your fridge and pull it away from the wall. Always make sure to unplug the fridge before you do any kind of work to it to prevent any accidental electrical shocks while you’re working. Carefully bring it out from the wall so that you can access the base grille that covers the coils.[10]
- If your fridge doesn’t have a base grille or coils crossing over the back of the unit, the grille is probably on top of the fridge. Use a step stool to access it safely.
- If you need to, have a friend help you pull out the fridge so that you’re safe.
-
3Take the grille off of the coils and soak it in soapy water. Most grilles simply lift off, but if yours is screwed in, use a screwdriver to remove it from the fridge. Wipe away any visible dust and then submerge the grille in a bath of warm, soapy water. Simply plug your kitchen sink, fill it with warm water and about 1 tablespoon (15 mL) of dish soap, and let the grille soak while you clean the coils.[11]
- If your fridge is older, the coils may run across the back of the unit instead of at the bottom. If this is the case, you won’t have a grille to remove and clean.
- The grille is also often called the “kickplate.”
-
4Use a coil cleaning brush to clean away dust, dirt, and grime. Take your coil cleaning brush and gently run it between the coils to dislodge the dust. As the brush fills with dust, wipe it off on a paper towel. Continue using the brush until you’ve removed as much of the dirt as possible.[12]
- Buy a coil cleaning brush from your local hardware store. They cost about $20.
- If the grille is on top of the fridge, loosen the dust with the coil cleaning brush, using an upwards-and-out motion, to keep the dust from falling further down into the condenser.
-
5Vacuum up all the dislodged dust. After you’ve cleaned the coils, use the attachments on your vacuum to suck up all the dust. Gently run the attachments over the coils, as well as over the floor around the fridge where you’ve been working.[13]
- If you’re particularly sensitive to dust, you might want to wear a face mask while performing this task.
- For unit with top grilles, vacuum away as much of the excess dust as you can, and also wipe down the top of the fridge with a damp towel.
-
6Replace the grille, push the fridge back in place, and plug it in. Rinse off the grille that has been soaking in the sink and dry it with a clean washcloth. Put it back in place over the coils, and then push the fridge back against the wall or into place. Once that is done, you can plug the fridge back in.[14]
- Don’t forget to put away the vacuum cleaner when you’re done using it, too.


Things You’ll Need
Cleaning an HVAC Air Conditioner Coil
- Hose
- HVAC coil spray
Maintaining Refrigerator Coils
- Vacuum with attachments
- Coil cleaning brush
- Dish soap
- Paper towels
- Face mask (optional)
- Washcloth

References
- ↑ https://youtu.be/30gj2h8w1Gg?t=4
- ↑ https://youtu.be/30gj2h8w1Gg?t=94
- ↑ https://youtu.be/30gj2h8w1Gg?t=223
- ↑ https://youtu.be/30gj2h8w1Gg?t=305
- ↑ https://youtu.be/30gj2h8w1Gg?t=332
- ↑ https://youtu.be/30gj2h8w1Gg?t=351
- ↑ https://youtu.be/30gj2h8w1Gg?t=408
- ↑ https://www.familyhandyman.com/appliance-repair/refrigerator-repair/how-to-avoid-refrigerator-repairs/view-all/
- ↑ https://youtu.be/cgHcsDMbMNs?t=96
About This Article

To clean your HVAC air conditioner coil, first turn off the temperature control panel and power breakers for your unit so you don’t get shocked while working. Once everything is off, use a hose to gently spray your AC unit with cold water and clear away any debris. After you’ve finished spraying with water, spray down the exterior coils with a specialty coil cleaning foam, which you can get from a hardware store. When you’ve covered the coil on all sides of your unit, let the foam sit and do its work for 10 minutes. If the spray you bought isn’t self-rinsing, then you can finish up by gently rinsing off the foam with a hose until your unit is clear. Don’t forget to turn your breaker and air conditioner back on once the coil is clean! For more information, including how to clean your refrigerator coils, scroll down.