This article was co-authored by wikiHow staff writer, Nicole Levine, MFA. Nicole Levine is a Technology Writer and Editor for wikiHow. She has more than 20 years of experience creating technical documentation and leading support teams at major web hosting and software companies. Nicole also holds an MFA in Creative Writing from Portland State University and teaches composition, fiction-writing, and zine-making at various institutions.
This article has been viewed 888,764 times.
Learn more...
Are you looking for the easiest way to turn your Word document into PowerPoint slides? By making a few quick formatting changes to your document, you can import the document into PowerPoint and automatically create pre-formatted slides without having to retype anything! This wikiHow article will show you the best way to convert a Microsoft Word document into a PowerPoint presentation on your PC or Mac.
Steps
Formatting the Document Before Converting
-
1Separate the Word document into sections with titles. Before you try to convert a Word document to a PowerPoint presentation, you'll need to break the document into separate sections that will become individual slides.
- Each section needs a title at the top, and the title should be on its own line. The title will then become the title of that section's PowerPoint slide.
- For example, let's say the first page of your Word document contains sales information that you'd like to appear on a PowerPoint slide called "Sales." At the top of that section, you'd type "Sales" as the title, since you want that to be the name of your slide. Below that would be the content of the slide.[1]
- Press Enter or Return after each section so there's at least one empty line between the end of a section and the title of the next slide.
-
2Navigate to the "Styles" menu. Click the Home tab if you're not already there—you will then see a "Styles" panel in the toolbar at the top of Word. In it are several formatting examples labeled "Normal," "No Spacing," "Heading 1," etc.
- If you don't see style examples on the toolbar, click the Styles menu to view them.
Advertisement -
3Highlight the title of your first slide/section. Just click and drag your mouse across the entire title to select it.
-
4Click the Heading 1 style. The text will become large, bolded, and colored blue. PowerPoint will know to use everything with the "Header 1" style as a new slide.
- Once you change the first title to "Header 1," go through the rest of your document and do the same with other slide titles. You'll want all of the titles to be set to this style so they'll convert properly.
-
5Highlight the rest of the content on your first page. Don't include the title in the highlighted area—just the rest of content of the page—you'll be applying another style to this information.
- Make sure you have at least one blank line between the title and the rest of the page's content.
-
6Select Heading 2 on the Styles panel. This changes the rest of the content to the Heading 2 format. All of this content will appear on the same slide as the title.
- In the content area, press the Enter or Return key to add space between every block of text you want separated on the slide. Every individual line or paragraph will be a different bullet on your final slide.
-
7Add sub-bullets using Heading 3 (optional). If you assign something to "Heading 3," it will appear indented to the right and on a separate line. The PowerPoint slide would appear like the following:
- Text formatted with "Heading 2"
- Text formatted with "Heading 3"
- Text formatted with "Heading 2"
-
8Separate each slide with a blank line. Press Enter or Return before each new title. This creates the outline for PowerPoint. Each large, bolded line indicates a title and the smaller text underneath is the content of that slide. If there is a space, then another title, PowerPoint will separate this into a new slide.
-
9Customize your text if you'd like. Once you've set up the outline you can change the size, color, and font of your text, which will convert to PowerPoint. The text no longer needs to be blue or bolded -- it has already been coded for conversion to PowerPoint
- If you delete the spaces between lines or try to add new text, it may not be formatted correctly, so always do this step last.
-
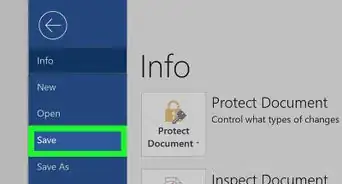
10Save the document. Once you're finished formatting your entire document, click the File menu, select Save as, click Browse, and choose a folder to save the file to. Give the file a name like "Outline" or something similar, and then click Save.
- Close Word when you're finished so there are no conflicts with PowerPoint in the remaining steps.


Converting to PowerPoint
-
1Open PowerPoint. It'll be in your Windows Start menu on Windows, or in the Applications folder on macOS.
-
2Click Blank Presentation. It's the white square near the top of the window.
-
3Click the menu icon next to "New Slide." It's the downward-pointing arrow next to "New Slide" in the toolbar. A menu will expand.
-
4Select Slides from outline…. Now you'll see your file browser.
-
5Select the Word document you saved and click Insert. PowerPoint will create slides based on your Word document.
- Every title you set to "Header 1" appears on its own slide, along with its corresponding content, which you set to "Header 2."
- You can now design the slides however you'd like using all of your favorite PowerPoint tools.
- Word will not automatically convert images for you—you will have to manually add the images into your presentation.
-
6Save the file as a PowerPoint presentation. To save your presentation, click File, select Save as, choose a saving location, and then save the file with the .PPTX extension.


References
About This Article

1. Break the document into sections with titles.
2. Apply the "Heading 1" style to each section title.
3. Apply the "Heading 2" style to each section's content.
4. Separate each slide with a blank line.
5. Save the document as a new file.
6. Open PowerPoint and click Browse.
7. Navigate to the folder containing the Word document.
8. Select All Outlines from the drop-down menu.
9. Select the Word document and click Open.
10. Edit and save as a PowerPoint presentation.