X
wikiHow is a “wiki,” similar to Wikipedia, which means that many of our articles are co-written by multiple authors. To create this article, volunteer authors worked to edit and improve it over time.
This article has been viewed 27,018 times.
Learn more...
HTML is one of the most open-sourced and creative markup languages. No matter how complicated a web page seems to be, HTML is always required as the base of your web page. However, creating different hyperlinks that connect your web pages as a whole can be confusing, especially as a beginner. This article includes different methods that can allow you to create redirects/hyperlinks in HTML.
Steps
Method 1
Method 1 of 4:
Creating a Redirect Button
-
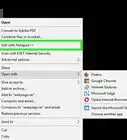
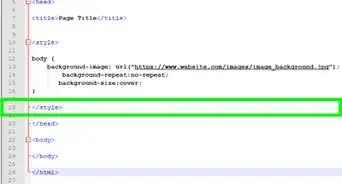
1Create a basic HTML webpage using any text editor tool. For example, you could be using Notepad, a free Windows system application. If you've already done this, you may skip this step.
- You should include the basic structure of an HTML document.
-
2Create your button using CSS. Under the <style> tag, start by creating your button.
- Your design functions go in between the brackets, depending on what you'd like to do.
<!DOCTYPE html>
<html>
<head>
  <style>
    .button {
    }
  </style>
</head>
<body>
  Click on the button to view wikiHow's main page!
</body>
</html>
Advertisement - Your design functions go in between the brackets, depending on what you'd like to do.
-
3Personalize your button. You can add color, borders, font, and many more. You can refer to this page if you'd like a more detailed list of CSS properties. Below is a basic design you may start with.
<!DOCTYPE html>
<html>
<head>
<style>
.button {
  color: pink;
  padding: 15px 32px;
  text-align: center;
  display: inline-block;
  font-size: 16px;
  margin: 4px 2px;
  cursor: pointer; }
</style>
</head>
<body>
Click on the button to view wikiHow's main page!
</body>
</html>
-
4Add your redirect. Under the <body> tag, use the <a href=""> tag.
- The <a href=""> tag is used to indicate a redirect. Your link/file should be mentioned in between the speech marks. If it is redirecting to another webpage, mention the link. If it is redirecting to another file, mention the file name including it's extension, making sure it is saved in the same location as your html file. If not, mention it's location. For example, /downloads/music.mp3.
<!DOCTYPE html>
<html>
<body>
Click on the button to view wikiHow's main page!
<a href="https://www.wikihow.com/Main-Page">
</body>
</html>
- The <a href=""> tag is used to indicate a redirect. Your link/file should be mentioned in between the speech marks. If it is redirecting to another webpage, mention the link. If it is redirecting to another file, mention the file name including it's extension, making sure it is saved in the same location as your html file. If not, mention it's location. For example, /downloads/music.mp3.
-
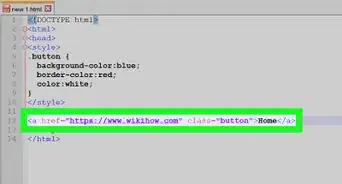
5Add your button to your redirect. Under the <a href=""> tag, use the <button class=""> to apply the redirect to your button. If you named your button "button", simply insert "button" as your button class.
- <button class=""> is used to mention which button you'd like to use, as you can create more than one. The button name is inserted between the speech marks.
- The text between <button class=""> and </button> will be displayed inside your button.
<!DOCTYPE html>
<html>
<body>
Click on the button to view wikiHow's main page!
<a href="https://www.wikihow.com/Main-Page">
<button class="button"> Click here </button>
</body>
</html>
-
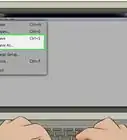
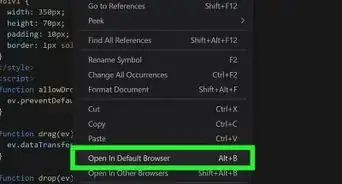
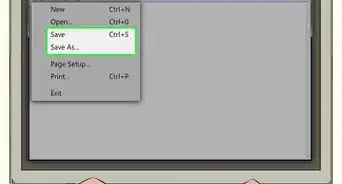
6Save your file using the .html extension. Press "file" and Save as, name your file and ensure to add the .html towards the end. This step is important, as your file will only be considered a text file if you do not change the extension.
-
7Test your button. If done correctly, you should receive the correct outcome. The location of the button depends on where you've placed it according to your code, however, this should not affect the button's functionality.


Advertisement
Method 2
Method 2 of 4:
Creating an Image Hyperlink
-
1Create a basic HTML webpage using any text editor tool. For example, you could be using Notepad, a free Windows system application. If you've already done this, you may skip this step.
- You should include the basic structure of an HTML document.
-
2Resize your image using CSS. Before placing your image, you can use CSS to specify your image dimensions on your website. Under the <style> tag, create your resize class and specify your width and height (pixels).
<!DOCTYPE html>
<html>
<h1>wikiHow Main Page</h1>
<style>
img.resize {
  width:100px;
  height:80px;
}
</style>
<body>
</body>
</html>
-
3Add your redirect. Determine where you'd like to place your Hyperlink. The Hyperlink may be placed anywhere, depending on how you'd like your webpage to look. Using the <a href=""> tag, add your desired redirect. It may be a webpage link, or any file of your choice. Ensure you place your redirect in between the speech marks.
- Note that you should not place your image file here, as this tag redirects you to the file/link between the speech marks, and does not display it. However, if you'd like to redirect to an image, you can place your image file here.
- Ensure your file is saved in the same location as your html file. If not, mention it's location. For example, /downloads/music.mp3.
<!DOCTYPE html>
<html>
<h1>wikiHow Main Page</h1>
<style>
img.resize {
  width:100px;
  height:80px;
}
</style>
<body>
<a href="https://www.wikihow.com/Main-Page">
</body>
</html>
-
4Add your image. To add an image to HTML, you use the <img class="" src='''> tag. This tag should be placed directly after your <a href=""> tag. Your resize property should be placed in the <img class="", for example, you named your property "resize". Your image file/link should be placed in the src=""> section, in between the speech marks.
- Ensure your file is saved in the same location as your html file. If not, mention it's location. For example, /downloads/wikiHow.png.
<!DOCTYPE html>
<html>
<h1>wikiHow Main Page</h1>
<style>
img.resize {
  width:100px;
  height:80px;
}
</style>
<body>
<a href="https://www.wikihow.com/Main-Page">
<img class="resize" src="wikihow.jpg">
</body>
</html>
- Ensure your file is saved in the same location as your html file. If not, mention it's location. For example, /downloads/wikiHow.png.
-
5Save your file using the .html extension. This step is important, as your file will only be considered a text file if you do not change the extension.
-
6Test your redirect. If done correctly, your image should now redirect you to your link/file when clicked on. The location of the image on your webpage depends on where you've placed it, however, this does not affect its functionality.


Advertisement
Method 3
Method 3 of 4:
Creating a Text Hyperlink
-
1Create a basic HTML webpage using any text editor tool. For example, you could be using Notepad, a free Windows system application. If you've already done this, you may skip this step.
-
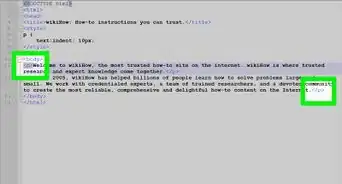
2Add your redirect. Using the <a href=""> tag, add your redirect to your text. This tag should be used directly before the portion you'd like to convert to a hyperlink. The link/file you'd like to redirect to should be mentioned in between the speech marks. Ensure to close the tag using </a>.
- If it is redirecting to another file, mention the file name including it's extension, making sure it is saved in the same location as your html file. If not, mention it's location. For example, /downloads/AboutwikiHow.pdf
<!DOCTYPE html>
<html>
<head>
wikiHow Main page
</head>
<body>
<a href="https://www.wikihow.com/Main-Page">Click Here</a>
</body>
</html>
- If it is redirecting to another file, mention the file name including it's extension, making sure it is saved in the same location as your html file. If not, mention it's location. For example, /downloads/AboutwikiHow.pdf
-
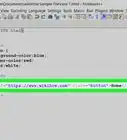
3Add your link target. In HTML, a link target is a way of nominating whether your link/file opens in a new tab, or in the current browser window. Inside the <a href=""> tag, after your link, use <a href="" target="">. Your target property is inserted inside the speech marks.
- _blank is used to open the URL/file in a new browser window.
- _self is used to open the URL/file in the current open browser window.
- _parent will open the URL/file in the parent frame, still within the currently open browser window. This is only applied if you've used frames in your website.
-
_top will open the URL/file in the current browser window, it is applied when you've used frames in your webpage, and you'd like to ignore them during the redirect.'
<!DOCTYPE html>
<html>
<head>
wikiHow Main page
</head>
<body>
<a href="https://www.wikihow.com/Main-Page" target="_self">Click Here</a>
</body>
</html>
-
4Save your file using the .html extension. This step is important, as your file will only be considered a text file if you do not change the extension.
-
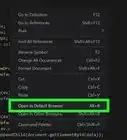
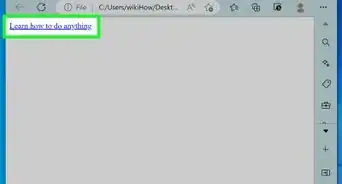
5Test your Hyperlink. If done correctly, your text should redirect you to your desired location once clicked on. The location of the hyperlink depends on where you've placed it, in this case, it is placed in the body.


Advertisement
Method 4
Method 4 of 4:
Creating a Mailto Link
-
1Create a basic HTML webpage using any text editor tool. For example, you could be using Notepad, a free Windows system application. If you've already done this, you may skip this step.
- You should include the basic structure of an HTML document.
-
2Add your redirect. Use the <a href="mailto:"> tag directly before the text you'd like to convert to a hyperlink. The email address you'd like to be redirected to should be mentioned in between the speech marks, after mailto: . If you'd like to send the same email to more than one email address, separate each email using commas. Ensure you close the tag using </a>.
<!DOCTYPE html>
<html>
<h1>wikiHow Support</h1>
<body>
<a href="mailto:wiki@wikihow.com">Email WikiHow</a>
</body>
</html>
-
3Autofill your CC/BCC. This is optional, however, HTML allows you to autofill certain properties in an email. To autofill the CC/BCC, use the ?cc= or &bcc= parameters. This should be inserted within the a href="" tag, after your mailto email address. Your cc/bcc email address should be inserted after the equal sign. If you'd like to add both CC and BCC, add the BCC after the CC using &bcc=.
<!DOCTYPE html>
<html>
<h1>wikiHow Support</h1>
<body>
<a href="mailto:wiki@wikihow.com?cc=email@example.com &bcc=email@example2.com &subject=Mail To wikiHow">Email wikiHow</a>
</body>
</html>
-
4Autofill your subject. This is optional, however, HTML allows you to autofill certain properties in an email. To autofill the subject, use the &subject= parameter. This should be inserted within the <a href=""> tag. Your subject should be inserted after the equal sign.
<!DOCTYPE html>
<html>
<h1>wikiHow Support</h1>
<body>
<a href="mailto:wiki@wikihow.com" &subject=Mail To wikiHow>Email wikiHow</a>
</body>
</html>
-
5Autofill your body. This is optional, however, HTML allows you to autofill certain properties in an email. To autofill the body, use the &body= parameter. This should be inserted within the a href="" tag. Your body should be inserted after the equal sign.
<!DOCTYPE html>
<html>
<h1>wikiHow Support</h1>
<body>
<a href="mailto:wiki@wikihow.com?cc=email@example.com &bcc=email@example2.com &subject=Mail To wikiHow &body=Insert Question Here">Email wikiHow</a>
</body>
</html>
-
6Save your file using the .html extension. Press "file" and Save as, name your file and ensure to add the .html towards the end. This step is important, as your file will only be considered a text file if you do not change the extension.
-
7Test your Redirect. If done correctly, when the text is clicked on, the user's default email service app will open along with all your autoformatting. The location of the hyperlink depends on where you've placed it, in this case, it is placed in the body.


Advertisement


About This Article
Advertisement